Ir para o conteúdo principal

O que você precisa

Este teardown (desmontagem analítica) não é um guia de reparo. Para reparar seu/sua Car and Drivers Auto HandHeld Vacuum Bagless, use o nosso manual de serviço.

  1. Car and Drivers Auto HandHeld Vacuum Bagless Teardown, Car and Drivers Auto HandHeld Vacuum Bagless Teardown: passo 1, imagem 1 %32 Car and Drivers Auto HandHeld Vacuum Bagless Teardown, Car and Drivers Auto HandHeld Vacuum Bagless Teardown: passo 1, imagem 2 %32 Car and Drivers Auto HandHeld Vacuum Bagless Teardown, Car and Drivers Auto HandHeld Vacuum Bagless Teardown: passo 1, imagem 3 %32
    • Locate the four screws locate outer gray shelll

    • ''I REMOVED THE SCREWS WITH PH #OO SCREWDRIVER FROM (IFIXIT)

    • New PLace four screws to the side

  2. Car and Drivers Auto HandHeld Vacuum Bagless Teardown: passo 2, imagem 1 %32
    • Here are the four screws from vacuum

  3. Car and Drivers Auto HandHeld Vacuum Bagless Teardown: passo 3, imagem 1 %32 Car and Drivers Auto HandHeld Vacuum Bagless Teardown: passo 3, imagem 2 %32 Car and Drivers Auto HandHeld Vacuum Bagless Teardown: passo 3, imagem 3 %32
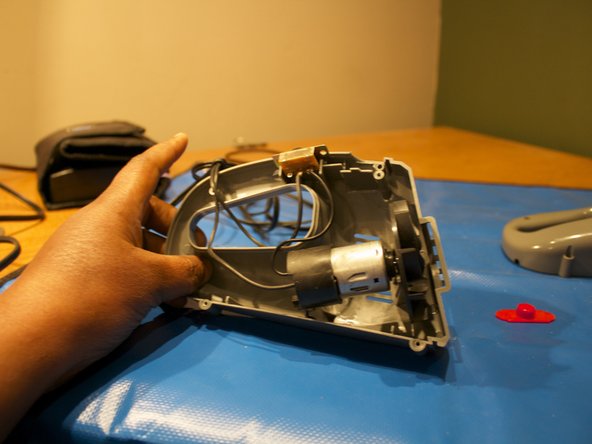
    • Remove the top grey shell of the vacuum

    • Place a red tab to the side

    • Let start looking at the 9volt motor with wire and on/off switch.

    • I remove the outer shell . I remove the motor and wires and on/off switch.

  4. Car and Drivers Auto HandHeld Vacuum Bagless Teardown: passo 4, imagem 1 %32
    • This it complete teardown on Car and Driver HandHeld Vacuum bagless!

kempc8

Membro desde: 11/22/13

899 Reputação

Autoria de 7 guias

Equipe

K and K Fixit Membro de K and K Fixit

Business

1 Membro

Autoria de 11 guias

0 comentários

Adicione um comentário

Exibir estatísticas:

Últimas 24 horas: 1

Últimos 7 dias: 2

Últimos 30 dias: 8

Duração total: 1,012