O que você precisa
-
Ferramenta utilizada neste passo:iFixit Opening Picks (Set of 6)$4.99
-
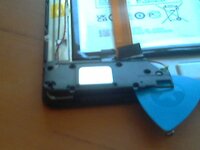
Pop off the case with Opening Picks and pull off the cover.
-
-
-
Ferramenta utilizada neste passo:Phillips #00 Screwdriver$5.49
-
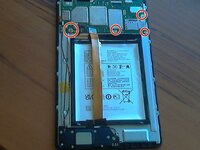
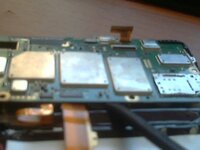
Remove the circled screws with a Philips 00 driver bit.
-
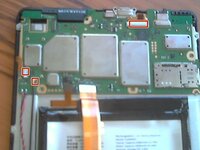
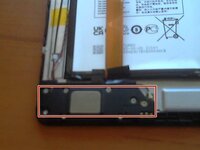
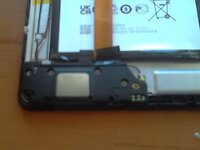
Remove these three cables.
-