Ir para o conteúdo principal

why! W670SZQ1 HDD Hard Disk Replacement

Guia arquivado
Este guia é mantido exclusivamente para fins históricos. Use a versão atualizada do guia para executar o reparo.

O que você precisa

  1. why! W670SZQ1 HDD Hard Disk Replacement, accumulator: passo 1, imagem 1 %32 why! W670SZQ1 HDD Hard Disk Replacement, accumulator: passo 1, imagem 2 %32 why! W670SZQ1 HDD Hard Disk Replacement, accumulator: passo 1, imagem 3 %32
    • Open the latch of the accumulator on the left side.

    • Open the battery latch on the right side.

    • Remove the accumulator by simultaneously holding the right-hand latch open.

  2. why! W670SZQ1 HDD Hard Disk Replacement, Access to the most important components: passo 2, imagem 1 %32 why! W670SZQ1 HDD Hard Disk Replacement, Access to the most important components: passo 2, imagem 2 %32 why! W670SZQ1 HDD Hard Disk Replacement, Access to the most important components: passo 2, imagem 3 %32
    • Use the Philips screwdriver to remove the two screws at the bottom of the cover.

    • Lift the cover at the bottom right with the iFixit Opening Tool

    • Lift the cover at the bottom left with the iFixit Opening Tool

    • Finally, remove the cover to gain access to the most important components.

  3. why! W670SZQ1 HDD Hard Disk Replacement, HDD hard disk: passo 3, imagem 1 %32 why! W670SZQ1 HDD Hard Disk Replacement, HDD hard disk: passo 3, imagem 2 %32
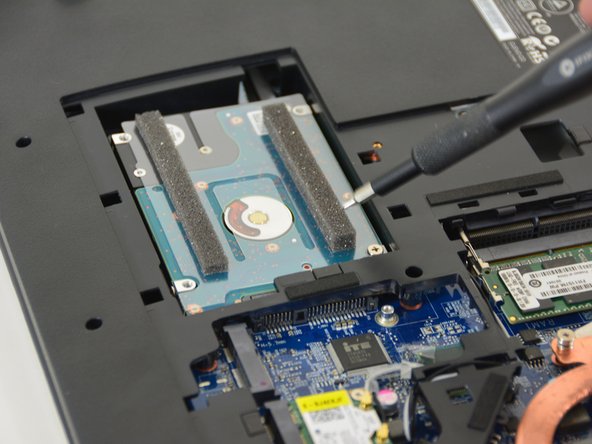
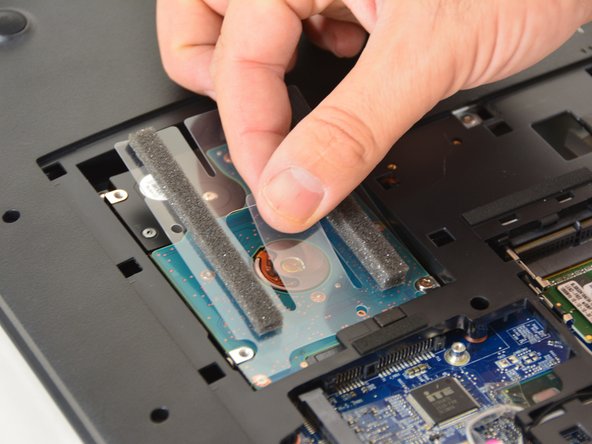
    • Locate the HDD disk.

    • Lift the plastic tab and pull the HDD hard drive out of its SATA connector.

Conclusão

Repeat the steps in reverse order to reassemble your device.

Um agradecimento especial a esses tradutores:

de en

100%

Estes tradutores estão nos ajudando a consertar o mundo! Quer contribuir?
Comece a traduzir ›

Felice Suglia

Membro desde: 06/15/13

30.884 Reputação

Autoria de 264 guias

0 comentários

Adicione um comentário

Exibir estatísticas:

Últimas 24 horas: 0

Últimos 7 dias: 0

Últimos 30 dias: 0

Duração total: 95