Ir para o conteúdo principal

why! W650SZ LCD Screen Replacement

O que você precisa

  1. why! W650SZ LCD Screen Replacement, Battery: passo 1, imagem 1 %32 why! W650SZ LCD Screen Replacement, Battery: passo 1, imagem 2 %32 why! W650SZ LCD Screen Replacement, Battery: passo 1, imagem 3 %32
    • Slide the latch on the right to the unlocked position.

    • Slide the latch on the left to the unlocked position.

    • Remove the battery pack from the slot.

  2. why! W650SZ LCD Screen Replacement, Remove the Bezel: passo 2, imagem 1 %32 why! W650SZ LCD Screen Replacement, Remove the Bezel: passo 2, imagem 2 %32 why! W650SZ LCD Screen Replacement, Remove the Bezel: passo 2, imagem 3 %32
    • Although the photos are shown without a keyboard, it is not necessary to remove the keyboard to replace the screen.

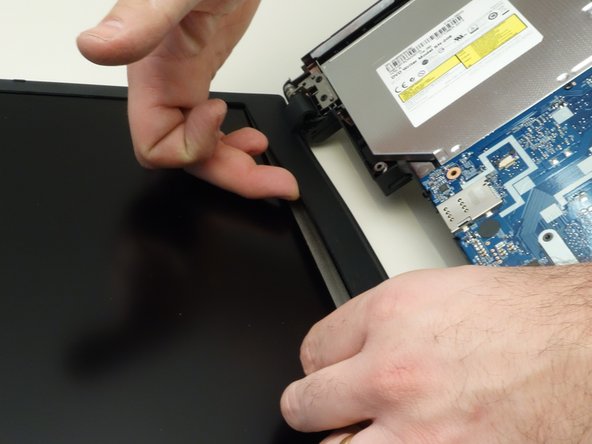
    • Gently insert your fingernail between the display bezel and the LCD.

  3. why! W650SZ LCD Screen Replacement, Remove the Bezel (continued): passo 3, imagem 1 %32 why! W650SZ LCD Screen Replacement, Remove the Bezel (continued): passo 3, imagem 2 %32 why! W650SZ LCD Screen Replacement, Remove the Bezel (continued): passo 3, imagem 3 %32
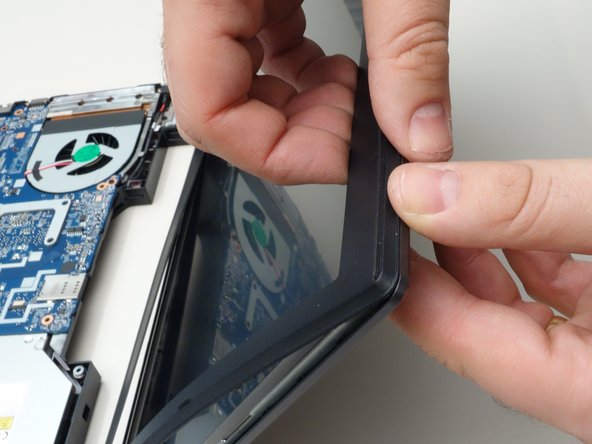
    • Working your way around the frame, unclip the mounting points of the frame surrounding the LCD screen.

  4. why! W650SZ LCD Screen Replacement, Remove the Bezel (continued): passo 4, imagem 1 %32 why! W650SZ LCD Screen Replacement, Remove the Bezel (continued): passo 4, imagem 2 %32 why! W650SZ LCD Screen Replacement, Remove the Bezel (continued): passo 4, imagem 3 %32
    • Remove the bezel surrounding the LCD.

  5. why! W650SZ LCD Screen Replacement, Remove the Screws Securing the LCD: passo 5, imagem 1 %32 why! W650SZ LCD Screen Replacement, Remove the Screws Securing the LCD: passo 5, imagem 2 %32 why! W650SZ LCD Screen Replacement, Remove the Screws Securing the LCD: passo 5, imagem 3 %32
    • Remove the two upper mounting screws securing the LCD to the lid.

    • Remove the two lower mounting screws.

  6. why! W650SZ LCD Screen Replacement, Separate the LCD from the Display: passo 6, imagem 1 %32 why! W650SZ LCD Screen Replacement, Separate the LCD from the Display: passo 6, imagem 2 %32 why! W650SZ LCD Screen Replacement, Separate the LCD from the Display: passo 6, imagem 3 %32
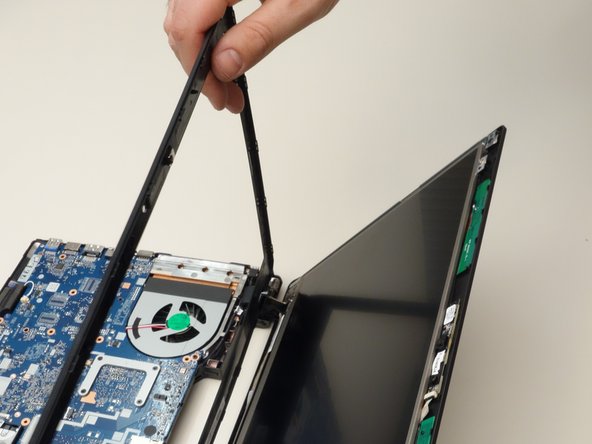
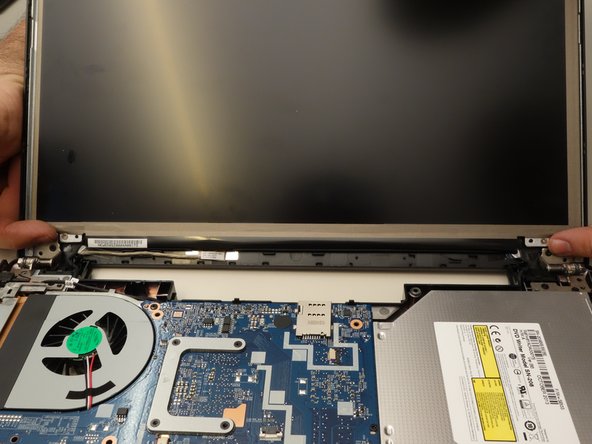
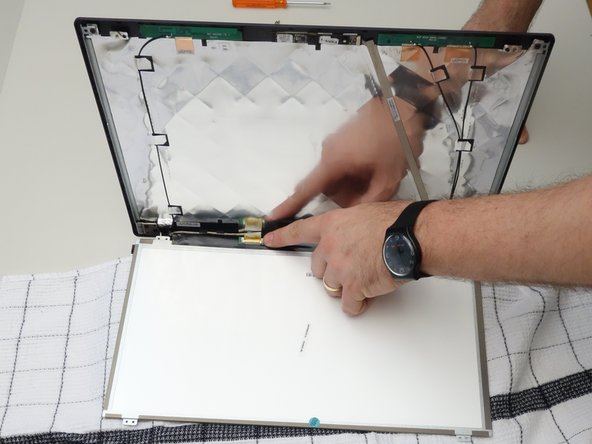
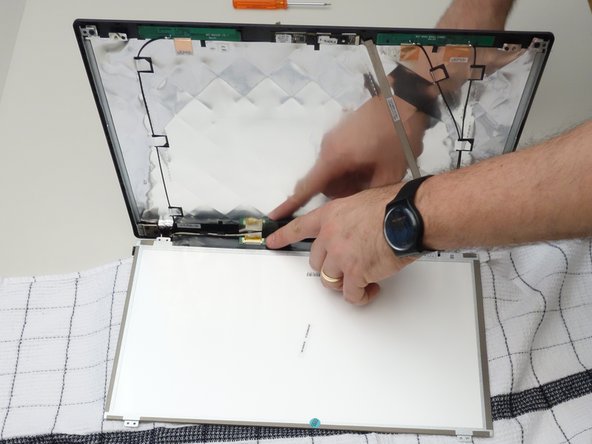
    • Cover the keyboard with a cloth, then carefully lower the LCD screen onto the keyboard.

  7. why! W650SZ LCD Screen Replacement, Disconnect the LCD Cable: passo 7, imagem 1 %32 why! W650SZ LCD Screen Replacement, Disconnect the LCD Cable: passo 7, imagem 2 %32 why! W650SZ LCD Screen Replacement, Disconnect the LCD Cable: passo 7, imagem 3 %32
    • Note the location of the LCD screen connector.

  8. why! W650SZ LCD Screen Replacement, Remove the Connector Tape: passo 8, imagem 1 %32 why! W650SZ LCD Screen Replacement, Remove the Connector Tape: passo 8, imagem 2 %32 why! W650SZ LCD Screen Replacement, Remove the Connector Tape: passo 8, imagem 3 %32
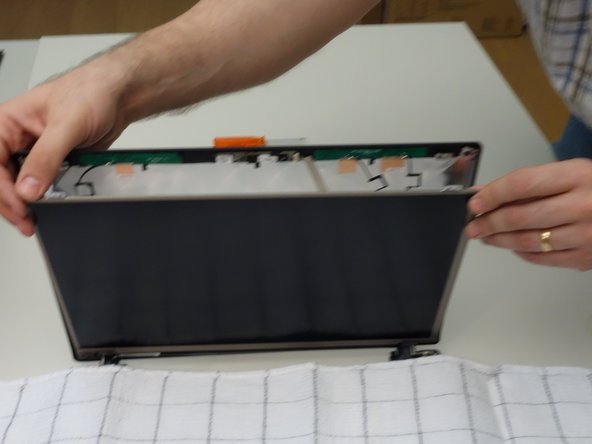
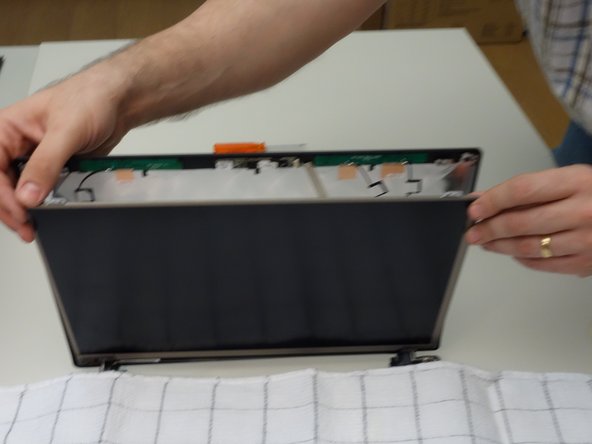
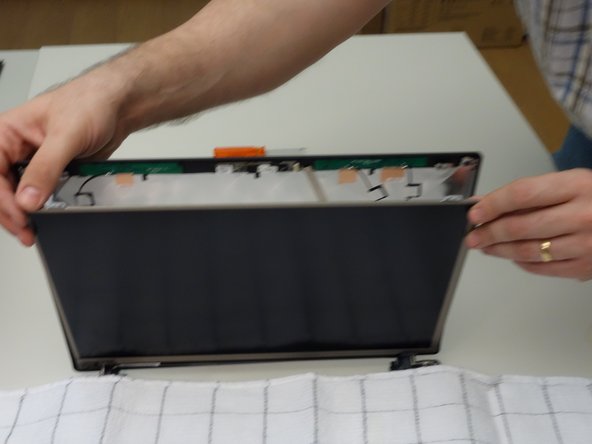
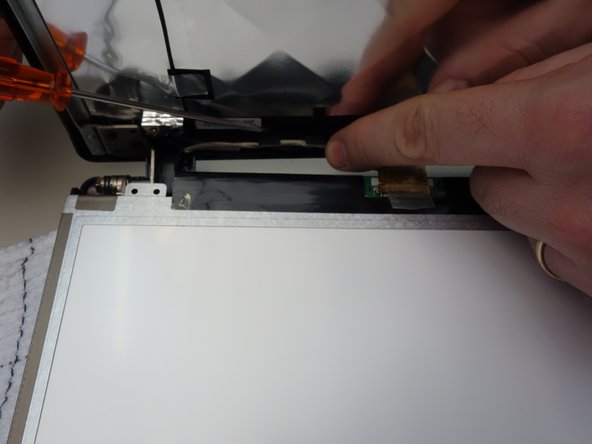
    • Using the plastic tab, peel back the tape securing the LCD cable the panel connector.

  9. why! W650SZ LCD Screen Replacement, Unplug the LCD and Remove the Screen: passo 9, imagem 1 %32 why! W650SZ LCD Screen Replacement, Unplug the LCD and Remove the Screen: passo 9, imagem 2 %32 why! W650SZ LCD Screen Replacement, Unplug the LCD and Remove the Screen: passo 9, imagem 3 %32
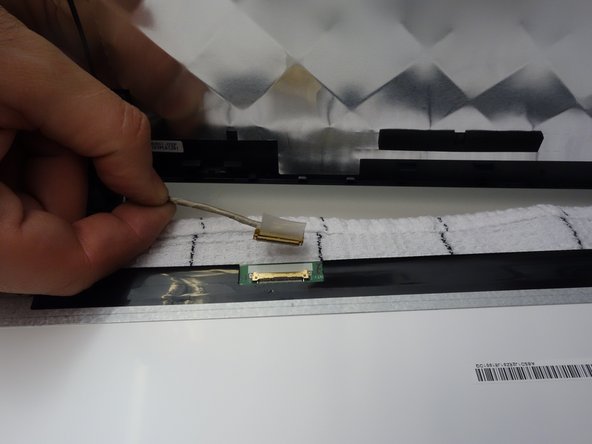
    • Unplug the connector.

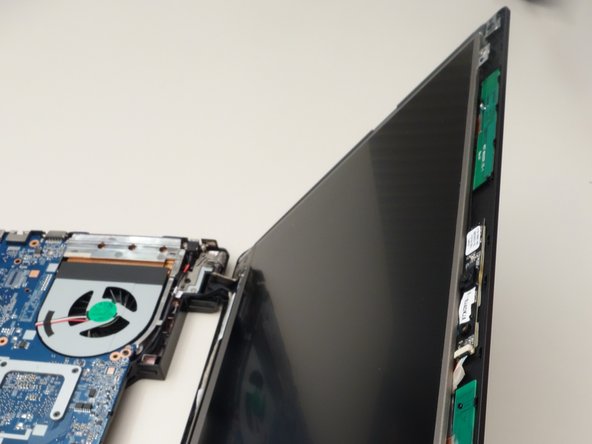
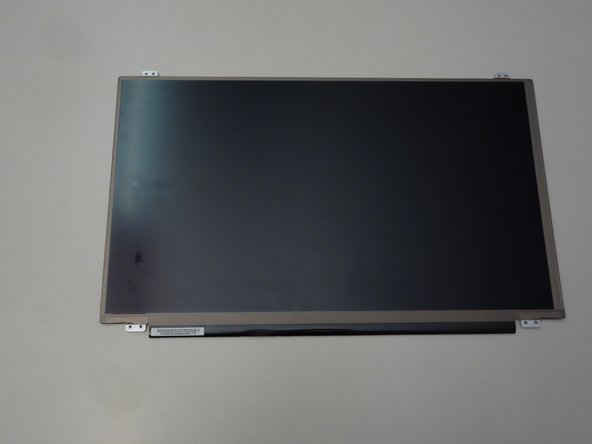
    • The LCD screen can now be removed.

Conclusão

To reassemble your device, follow these instructions in reverse order.

Um agradecimento especial a esses tradutores:

fr en

100%

Jerry Wheeler está nos ajudando a consertar o mundo! Quer contribuir?
Comece a traduzir ›

Felice Suglia

Membro desde: 06/15/13

31.100 Reputação

Autoria de 264 guias

0 comentários

Adicione um comentário

Exibir estatísticas:

Últimas 24 horas: 2

Últimos 7 dias: 7

Últimos 30 dias: 12

Duração total: 167