Esta versão pode conter edições incorretas. Mude para o último instantâneo verificado.
O que você precisa
-
Este passo não foi traduzido. Ajude a traduzi-lo
-
If your display glass is cracked, keep further breakage contained and prevent bodily harm during your repair by taping the glass.
-
Lay overlapping strips of clear packing tape over the iPod's display until the whole face is covered.
-
-
Este passo não foi traduzido. Ajude a traduzi-lo
-
Use a hair dryer or prepare an iOpener and apply it to the lower edge of the iPod for about a minute in order to soften up the adhesive underneath.
-
The bottom of the screen (near the home button) is held in place with strong adhesive.
-
As you start prying the screen off in the next stages, you may need to apply more heat to keep the glue warm and flexible.
-
-
Este passo não foi traduzido. Ajude a traduzi-lo
-
Center the suction cup on the lower section of the glass, with its edge centered over the home button.
-
Press in firmly and make sure the cup has a strong seal.
-
-
Este passo não foi traduzido. Ajude a traduzi-lo
-
Hold the iPod firmly against a table or bench.
-
Lift the suction cup up and back toward the top of the iPod. Be patient, and pull with firm, constant force until the adhesive breaks and the display comes up from the rear case.
-
It may be necessary to use a heat gun to soften the adhesive (especially in cooler climates). If you can pry the screen apart, and the adhesive is still sticking and pulling apart like cheese topping on a pizza, you can slide a thin razor blade in and gently cut the adhesive.
-
-
-
Este passo não foi traduzido. Ajude a traduzi-lo
-
Starting at the top right of the device, insert a plastic opening tool into the gap between the plastic frame and the aluminum rear case.
-
Slide the tool down this crack, loosening the frame from the case.
-
-
Este passo não foi traduzido. Ajude a traduzi-lo
-
Insert the plastic opening tool between the frame and the rear case behind the first clip.
-
Rock the tool sideways, to spread the gap behind the clip and separate it from the rear case.
-
This may not free the clip initially, but repeating the procedure for each clip will begin to loosen the piece.
-
-
Este passo não foi traduzido. Ajude a traduzi-lo
-
Repeat the procedure with the next two clips on this side.
-
-
Este passo não foi traduzido. Ajude a traduzi-lo
-
Moving on to the left side of the device, insert a plastic opening tool into the gap between the plastic frame and the aluminum rear case near the top.
-
Slide the tool down this crack, loosening the frame from the case.
-
-
Este passo não foi traduzido. Ajude a traduzi-lo
-
Insert the plastic opening tool between the frame and the rear case behind the first clip on the left side.
-
Rock the tool sideways, to spread the gap behind the clip and separate it from the rear case.
-
-
Este passo não foi traduzido. Ajude a traduzi-lo
-
Repeat the procedure with the next two clips on this side.
-
Insert the plastic opening tool between the plastic frame and aluminum rear case behind the second clip.
-
Rock the tool sideways, loosening the clip from the case.
-
-
Este passo não foi traduzido. Ajude a traduzi-lo
-
Using the same procedure, loosen the last clip securing the plastic frame to the rear case.
-
-
Este passo não foi traduzido. Ajude a traduzi-lo
-
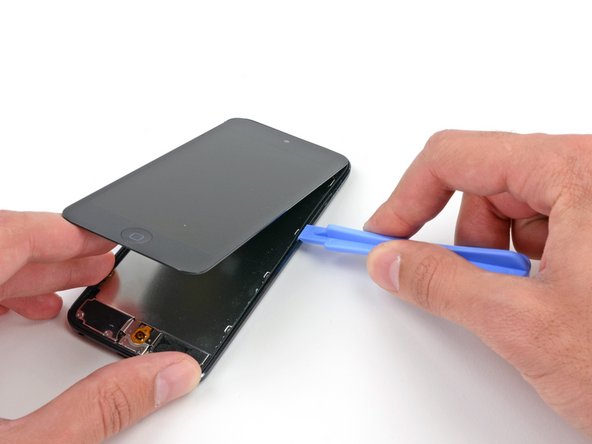
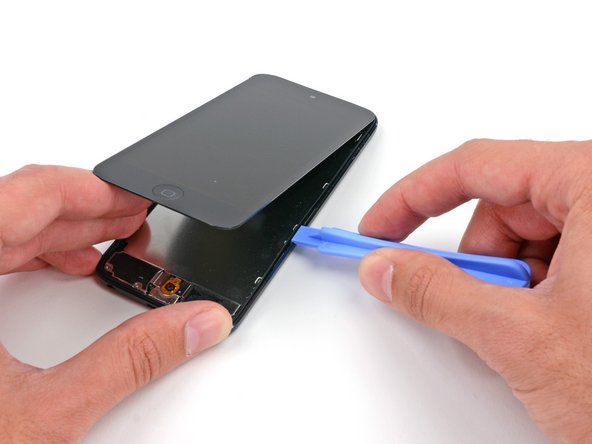
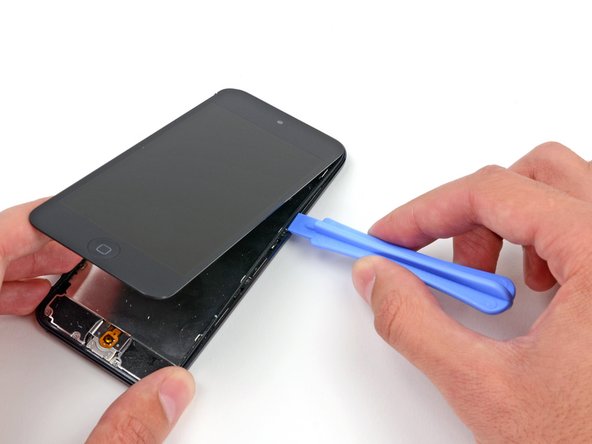
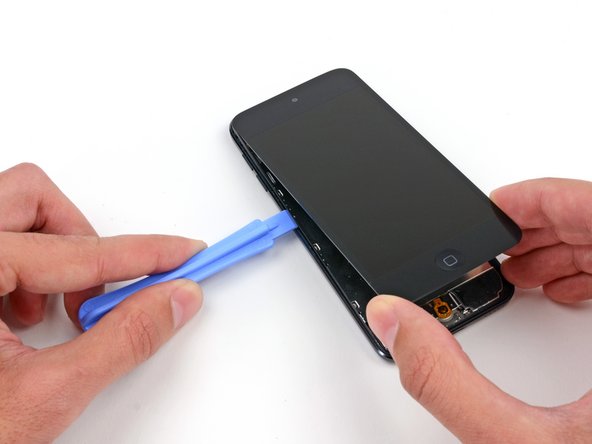
Insert the plastic opening tool between the display assembly and the rear case near the top of the iPod.
-
Slightly twist the opening tool to pry the front panel up from the rear case.
-
Separate the display assembly from the iPod.
-
Cancelar: não concluí este guia.
Uma outra pessoa concluiu este guia.


