Ir para o conteúdo principal

iPod Nano 7th Generation Front Glass/Digitizer Replacement

O que você precisa

  1. iPod Nano 7th Generation Front Glass/Digitizer Replacement, iOpener Heating: passo 1, imagem 1 %32 iPod Nano 7th Generation Front Glass/Digitizer Replacement, iOpener Heating: passo 1, imagem 2 %32
    • We recommend that you clean your microwave before proceeding, as any nasty gunk on the bottom may end up stuck to the iOpener.

    • Place the iOpener in the center of the microwave.

    • For carousel microwaves: Make sure the plate spins freely. If your iOpener gets stuck, it may overheat and burn.

  2. iPod Nano 7th Generation Front Glass/Digitizer Replacement: passo 2, imagem 1 %32
    • Heat the iOpener for thirty seconds.

    • Throughout the repair procedure, as the iOpener cools, reheat it in the microwave for an additional thirty seconds at a time.

    • Be careful not to overheat the iOpener during the repair. Overheating may cause the iOpener to burst. Do not attempt to heat over 100˚C (212˚F).

    • Never touch the iOpener if it appears swollen.

    • If the iOpener is still too hot in the middle to touch, continue using it while waiting for it to cool down some more before reheating. A properly heated iOpener should stay warm for up to 10 minutes.

  3. iPod Nano 7th Generation Front Glass/Digitizer Replacement: passo 3, imagem 1 %32
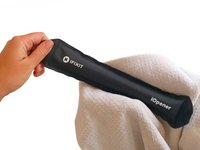
    • Remove the iOpener from the microwave, holding it by one of the two flat ends to avoid the hot center.

    • The iOpener will be very hot, so be careful when handling it. Use an oven mitt if necessary.

  4. iPod Nano 7th Generation Front Glass/Digitizer Replacement, Alternate iOpener heating method: passo 4, imagem 1 %32 iPod Nano 7th Generation Front Glass/Digitizer Replacement, Alternate iOpener heating method: passo 4, imagem 2 %32
    • If you don't have a microwave, follow this step to heat your iOpener in boiling water.

    • Fill a pot or pan with enough water to fully submerge an iOpener.

    • Heat the water to a boil. Turn off the heat.

    • Place an iOpener into the hot water for 2-3 minutes. Make sure the iOpener is fully submerged in the water.

    • Use tongs to extract the heated iOpener from the hot water.

    • Thoroughly dry the iOpener with a towel.

    • The iOpener will be very hot, so be careful to hold it only by the end tabs.

    • Your iOpener is ready for use! If you need to reheat the iOpener, heat the water to a boil, turn off the heat, and place the iOpener in the water for 2-3 minutes.

  5. iPod Nano 7th Generation Front Glass/Digitizer Replacement, Front Panel Assembly: passo 5, imagem 1 %32 iPod Nano 7th Generation Front Glass/Digitizer Replacement, Front Panel Assembly: passo 5, imagem 2 %32
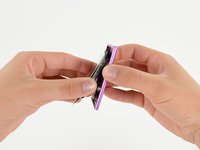
    • Lay the iOpener over the plastic tab to loosen the adhesive. Let the bag sit on the device for approximately 90 seconds before attempting to open the panel.

  6. iPod Nano 7th Generation Front Glass/Digitizer Replacement: passo 6, imagem 1 %32 iPod Nano 7th Generation Front Glass/Digitizer Replacement: passo 6, imagem 2 %32 iPod Nano 7th Generation Front Glass/Digitizer Replacement: passo 6, imagem 3 %32
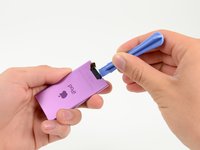
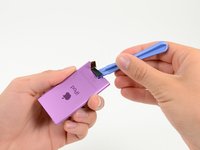
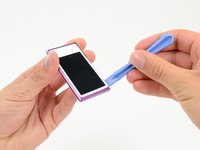
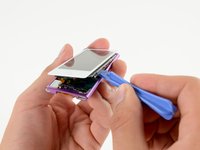
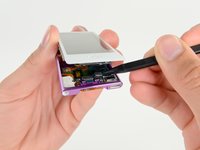
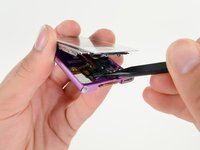
    • Use a plastic opening tool to pull the rear plastic cover away from the device until there is enough room to insert a spudger.

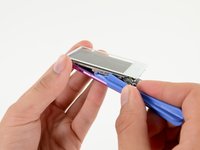
    • Insert a spudger under the cover, then pry it up and away from the device.

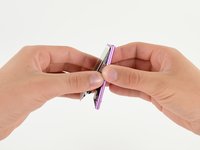
    • Remove the rear plastic cover from the iPod.

    • Be very careful in removing the plastic cover as the bluetooth antenna is adhered to it.

  7. iPod Nano 7th Generation Front Glass/Digitizer Replacement: passo 7, imagem 1 %32
    • Gently bend the Bluetooth antenna to the right, out of the way of the screws in the bottom of the device.

    • Remove the single 1.4 mm Phillips #000 screw from the black plastic spacer.

  8. iPod Nano 7th Generation Front Glass/Digitizer Replacement: passo 8, imagem 1 %32 iPod Nano 7th Generation Front Glass/Digitizer Replacement: passo 8, imagem 2 %32
    • Use a plastic opening tool to remove the black plastic spacer from the Nano.

  9. iPod Nano 7th Generation Front Glass/Digitizer Replacement: passo 9, imagem 1 %32
    • Remove the two 2 mm Phillips #000 screws from the bottom of the case.

  10. iPod Nano 7th Generation Front Glass/Digitizer Replacement: passo 10, imagem 1 %32 iPod Nano 7th Generation Front Glass/Digitizer Replacement: passo 10, imagem 2 %32
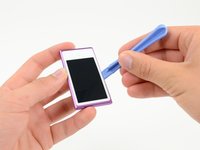
    • Insert a plastic opening tool into the seam between the white plastic front panel and the rear case.

    • Slide the opening tool along the edge of the front panel to free it from clips and adhesive.

  11. iPod Nano 7th Generation Front Glass/Digitizer Replacement: passo 11, imagem 1 %32
    • Use a spudger to press the midframe screw tab up and out of the rear case.

  12. iPod Nano 7th Generation Front Glass/Digitizer Replacement: passo 12, imagem 1 %32
    • Use a metal spudger to carefully pry near the Lightning connector and under all parts of the front panel assembly: the front glass/digitizer, the LCD display and the metal midframe.

    • The adhesive under the metal midframe/display assembly is quite strong and the components are fragile, so go slowly and gently. Make sure you do not bend the LCD screen.

  13. iPod Nano 7th Generation Front Glass/Digitizer Replacement: passo 13, imagem 1 %32 iPod Nano 7th Generation Front Glass/Digitizer Replacement: passo 13, imagem 2 %32
    • Continue prying along the edges under the front panel assembly, releasing the clips and adhesive along the sides of the device.

  14. iPod Nano 7th Generation Front Glass/Digitizer Replacement: passo 14, imagem 1 %32 iPod Nano 7th Generation Front Glass/Digitizer Replacement: passo 14, imagem 2 %32
    • Pull the front panel assembly slightly down and partially out of the device.

    • You only need to open the device enough to gain access to the display cable connectors near the sleep/power button.

    • Do not separate the two halves entirely, they are still connected by several cables.

  15. iPod Nano 7th Generation Front Glass/Digitizer Replacement: passo 15, imagem 1 %32 iPod Nano 7th Generation Front Glass/Digitizer Replacement: passo 15, imagem 2 %32
    • Use a spudger to release the digitizer cable and display data cable connectors.

  16. iPod Nano 7th Generation Front Glass/Digitizer Replacement: passo 16, imagem 1 %32
    • Gently unfold the two halves of the device to access the internal components.

    • Do not try to completely separate the two sections, yet, as they are still attached via a soldered cable.

  17. iPod Nano 7th Generation Front Glass/Digitizer Replacement: passo 17, imagem 1 %32 iPod Nano 7th Generation Front Glass/Digitizer Replacement: passo 17, imagem 2 %32
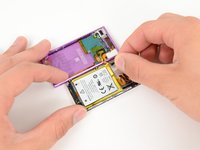
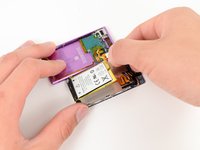
    • Pull up on the battery pull tab to free the battery from its adhesive.

    • Flip the battery over into the rear case for safekeeping.

  18. iPod Nano 7th Generation Front Glass/Digitizer Replacement: passo 18, imagem 1 %32
    • Completely separate the front panel assembly from the rest of the device.

  19. iPod Nano 7th Generation Front Glass/Digitizer Replacement, Display Assembly: passo 19, imagem 1 %32 iPod Nano 7th Generation Front Glass/Digitizer Replacement, Display Assembly: passo 19, imagem 2 %32
    • Insert a spudger under the metal midframe and display on the left side of the home button.

    • Make sure that the spudger is under the entire display assembly to prevent bending the metal midframe.

    • Rotate the spudger around the home button and across the front panel, releasing the adhesive holding the display in place.

  20. iPod Nano 7th Generation Front Glass/Digitizer Replacement: passo 20, imagem 1 %32
    • Once all of the adhesive has been released, gently separate the display assembly from the front glass/digitizer.

  21. iPod Nano 7th Generation Front Glass/Digitizer Replacement, Front Glass/Digitizer: passo 21, imagem 1 %32 iPod Nano 7th Generation Front Glass/Digitizer Replacement, Front Glass/Digitizer: passo 21, imagem 2 %32
    • Use the flat end of a spudger to push the home button gasket toward the center of the button to release the light adhesive.

    • Work your way around the home button in this manner until you can easily remove the button from the front glass.

    • To prevent tearing the gasket around the home button, do not pry the home button out until the adhesive has been sufficiently loosened.

  22. iPod Nano 7th Generation Front Glass/Digitizer Replacement: passo 22, imagem 1 %32
    • Remove the home button from the front glass/digitizer.

Conclusão

To reassemble your device, follow these instructions in reverse order.

29 outras pessoas executaram este guia.

Sam Goldheart

Membro desde: 10/18/12

465.122 Reputação

Autoria de 538 guias

Equipe

iFixit Membro de iFixit

Staff

Membros da 135

Autoria de 16.476 guias

10 comentários

Tried everything to loosen the adhesive around the metal midframe... Nothing worked, and finally (after a lot of prying) I managed to get it out... only to have damaged the lcd digitizer underneath the screen!

If you're going to attempt this, have a spare digitizer nearby, and be willing to fail. After spending $60+ on parts and tools, i'm worse off then where I started.

kelseycbrandin - Responder

I have no idea how this is considered moderate, meanwhile the Classic is considered very difficult.

Francisco Meneses - Responder

Hi! Where can I find in US a front glass replacement for my iPod Nano 7th? Do you know a website to get it? Please write me to tavoacevedom@yahoo.es. Thks.

tavoacevedom - Responder

did you find a glass? I am also looking for one.... hbsamat@yahoo.com

shsamat88 -

So far, so bad. I left the iopener on there for 90 seconds. Not loose at all. Heated it again a little longer and left on for a little longer. Still not loose at all. Pried and pried and BROKE THE BLUETOOTH ANTENNA!!!! Still soldiering on, but the front part is not coming loose either. Beginning to regret the attempt big time.

barrychristian - Responder

Adicione um comentário

Exibir estatísticas:

Últimas 24 horas: 2

Últimos 7 dias: 23

Últimos 30 dias: 130

Duração total: 53,969