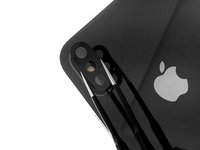
Ir para o conteúdo principal

iPhone XS Rear Camera Lens Cover Replacment

O que você precisa

  1. iPhone XS Rear Camera Lens Cover Replacment, Rear Camera Lens Cover: passo 1, imagem 1 %32
    • To begin with, it will be necessary to remove the pieces of glass from the old broken camera lens.

  2. iPhone XS Rear Camera Lens Cover Replacment: passo 2, imagem 1 %32 iPhone XS Rear Camera Lens Cover Replacment: passo 2, imagem 2 %32
    • Once the glass shards from the camera lens are removed, thoroughly clean the camera bezel (the raised metal part around the camera).

  3. iPhone XS Rear Camera Lens Cover Replacment: passo 3, imagem 1 %32 iPhone XS Rear Camera Lens Cover Replacment: passo 3, imagem 2 %32
    • Adhere some double sided tape or two dots of glue on the new iPhone X rear camera cover.

    • Use tweezers to position the glass lens in its housing.

  4. iPhone XS Rear Camera Lens Cover Replacment: passo 4, imagem 1 %32
    • Lightly press down on the lens for a few seconds to create a good seal.

    • You can test your rear camera to verify the quality of your photos and videos.

Conclusão

Congratulations ! You have repaired your iPhone XS, the lens is replaced, clean it with a microfiber cloth. You can now take photos and film normally.

5 outras pessoas executaram este guia.

Um agradecimento especial a esses tradutores:

fr en

100%

Estes tradutores estão nos ajudando a consertar o mundo! Quer contribuir?
Comece a traduzir ›

cPix

Membro desde: 06/14/16

3.971 Reputação

Autoria de 8 guias

0 comentários

Adicione um comentário

Exibir estatísticas:

Últimas 24 horas: 2

Últimos 7 dias: 4

Últimos 30 dias: 24

Duração total: 3,635