Ir para o conteúdo principal

iPhone 7 Rear Case Battery Removal

Pré-requisito somente
Este guia destina-se apenas a ser usado como pré-requisito para outros guias. É incompleto por si só.

O que você precisa

  1. iPhone 7 Rear Case Battery Removal, Rear Case Battery: passo 1, imagem 1 %32 iPhone 7 Rear Case Battery Removal, Rear Case Battery: passo 1, imagem 2 %32
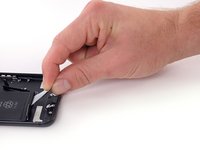
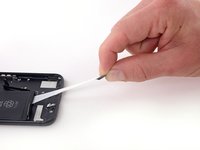
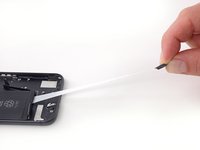
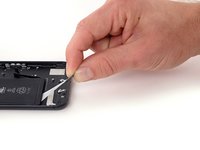
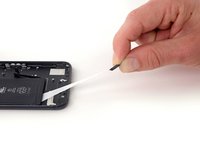
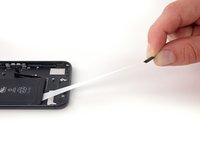
    • Use a pair of tweezers with blunt tips to peel back one of the adhesive strips on the lower edge of the battery.

  2. iPhone 7 Rear Case Battery Removal: passo 2, imagem 1 %32 iPhone 7 Rear Case Battery Removal: passo 2, imagem 2 %32
    • Use a pair of tweezers with blunt tips to peel back the other adhesive strip on the lower edge of the battery.

  3. iPhone 7 Rear Case Battery Removal: passo 3, imagem 1 %32 iPhone 7 Rear Case Battery Removal: passo 3, imagem 2 %32 iPhone 7 Rear Case Battery Removal: passo 3, imagem 3 %32
    • Try to keep the strips flat and unwrinkled during this procedure; wrinkled strips will stick together and break instead of pulling out cleanly.

    • Slowly pull one battery adhesive tab away from the battery, toward the bottom of the iPhone.

    • Pull steadily, maintaining constant tension on the strip until it slips out from between the battery and the rear case. For best results, pull the strip at a 60º angle or less.

    • The strip will stretch to many times its original length. Continue pulling and re-grab the strip near the battery if necessary.

  4. iPhone 7 Rear Case Battery Removal: passo 4, imagem 1 %32 iPhone 7 Rear Case Battery Removal: passo 4, imagem 2 %32 iPhone 7 Rear Case Battery Removal: passo 4, imagem 3 %32
    • Repeat the previous step for the second strip.

    • Hold down the battery as you remove the second strip, or the strip may fling the battery when it separates from the case.

    • If you removed both adhesive strips successfully, skip the next step.

    • Otherwise, if either of the adhesive strips broke off underneath the battery and could not be retrieved, continue with the next step below.

  5. iPhone 7 Rear Case Battery Removal: passo 5, imagem 1 %32 iPhone 7 Rear Case Battery Removal: passo 5, imagem 2 %32
    Ferramenta utilizada nesse passo:
    Plastic Cards
    $2.99
    Comprar
    • If you successfully removed both adhesive strips, move on to the next step. Otherwise, you will need to pry the battery from the rear case.

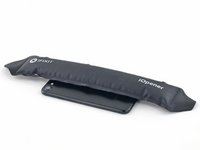
    • Prepare an iOpener and apply it to the back of the rear case, directly over the battery. Alternatively, you can apply heat using a heat gun or hair dryer.

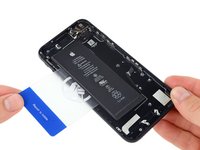
    • After about a minute, remove the iOpener, flip the phone over and use a plastic card to break up any remaining adhesive behind the battery.

    • Avoid bending the battery. Damage to the battery may release dangerous chemicals, and could start a fire.

    • Do not pry under the top third of the battery, you may damage the volume button ribbon cable.

  6. iPhone 7 Rear Case Battery Removal: passo 6, imagem 1 %32
    • Remove the battery from the rear case.

    • When installing the battery, refer to this guide to replace your battery's adhesive strips.

Conclusão

To reassemble your device, follow these instructions in reverse order.

Scott Havard

Membro desde: 06/27/16

49.558 Reputação

Autoria de 31 guias

0 comentários

Adicione um comentário

Exibir estatísticas:

Últimas 24 horas: 0

Últimos 7 dias: 0

Últimos 30 dias: 0

Duração total: 487