Esta versão pode conter edições incorretas. Mude para o último instantâneo verificado.
O que você precisa
-
Este passo não foi traduzido. Ajude a traduzi-lo
-
Power off your iPhone before beginning disassembly.
-
Remove the two 3.4 mm pentalobe screws at the bottom edge of the iPhone.
-
-
Este passo não foi traduzido. Ajude a traduzi-lo
-
Use a hairdryer or prepare an iOpener and apply it to the lower edge of the iPhone for about a minute in order to soften up the adhesive underneath.
-
-
Este passo não foi traduzido. Ajude a traduzi-lo
-
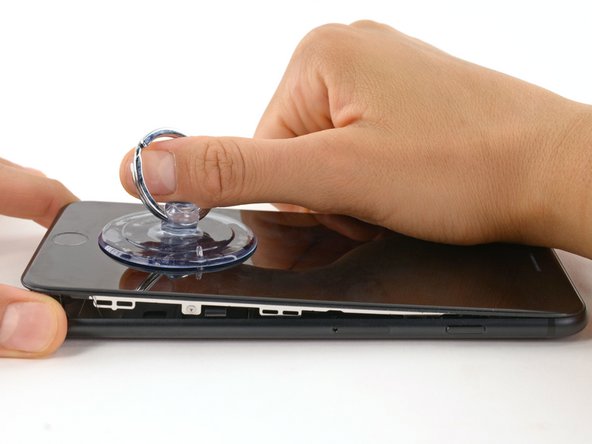
Apply a suction cup to the lower half of the front panel, just above the home button.
-
-
Este passo não foi traduzido. Ajude a traduzi-lo
-
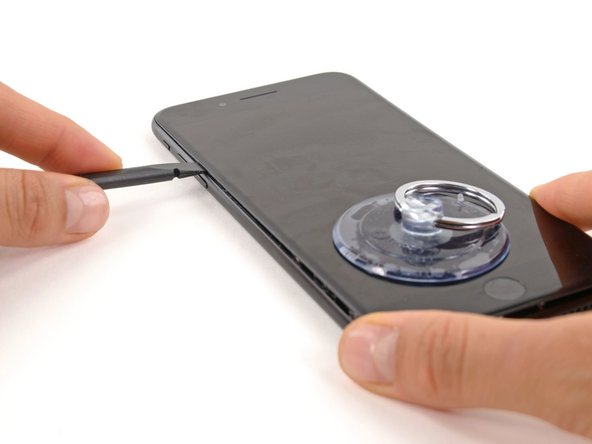
Pull up on the suction cup with firm, constant pressure to create a slight gap between the front panel and rear case.
-
Insert the flat end of a spudger into the gap.
-
While pulling up on the suction cup, twist the spudger to widen the opening between the screen and rear case.
-
-
Este passo não foi traduzido. Ajude a traduzi-lo
-
Insert the flat end of the spudger between the front panel and the rear case at the lower left edge of the iPhone.
-
Slide the spudger up the left edge of the phone starting at the lower edge and moving towards the volume control buttons and silent switch, breaking up the adhesive holding the display in place.
-
-
Este passo não foi traduzido. Ajude a traduzi-lo
-
Remove the spudger from the left side of the phone and insert the flat end into the bottom right corner.
-
Slide the spudger up the right edge of the phone to the top corner, breaking up the adhesive holding the display in place.
-
-
Este passo não foi traduzido. Ajude a traduzi-lo
-
Pull up on the suction cup to lift up the display and open the iPhone.
-
-
Este passo não foi traduzido. Ajude a traduzi-lo
-
Pull up on the small nub on the suction cup to remove it from the front panel.
-
-
Este passo não foi traduzido. Ajude a traduzi-lo
-
Slide an opening pick underneath the display along the top edge of the phone to loosen the last of the adhesive.
-
-
-
Este passo não foi traduzido. Ajude a traduzi-lo
-
Pull the display assembly slightly away from the top edge of the phone to disengage the clips holding it to the rear case.
-
Open the iPhone by swinging the display up from the left side, like the back cover of a book.
-
-
Este passo não foi traduzido. Ajude a traduzi-lo
-
Remove the following four tri-point Y000 screws securing the lower display cable bracket to the logic board:
-
Three 1.2 mm screws
-
One 2.6 mm screw
-
-
Este passo não foi traduzido. Ajude a traduzi-lo
-
Use the point of a spudger to lift the battery connector out of its socket on the logic board.
-
-
Este passo não foi traduzido. Ajude a traduzi-lo
-
Use the flat end of a spudger or a fingernail to disconnect the two lower display connectors by prying them straight up from their sockets on the logic board.
-
-
Este passo não foi traduzido. Ajude a traduzi-lo
-
Remove the three tri-point Y000 screws securing the bracket over the front panel sensor assembly connector:
-
One 1.3 mm screw
-
Two 1.0 mm screws
-
Remove the bracket.
-
-
Este passo não foi traduzido. Ajude a traduzi-lo
-
Disconnect the front panel sensor assembly connector from its socket on the logic board.
-
-
Este passo não foi traduzido. Ajude a traduzi-lo
-
Remove the two screws securing the rear-facing camera bracket:
-
One 1.6 mm Phillips screw
-
One 2.2 mm standoff screw
-
-
Este passo não foi traduzido. Ajude a traduzi-lo
-
Remove the bracket covering the rear-facing camera assembly.
-
-
Este passo não foi traduzido. Ajude a traduzi-lo
-
Use an iFixit opening tool or a fingernail to disconnect the two camera cable connectors by prying them straight up from their sockets.
-
-
Este passo não foi traduzido. Ajude a traduzi-lo
-
Use the flat end of a spudger to pry up the rear-facing camera assembly from the top edge of the iPhone.
-
-
Este passo não foi traduzido. Ajude a traduzi-lo
-
It's difficult to remove this bottom bracket. The inside round edge of this bracket seems to be soldered with camera lens ring; so you need much more effort and it's not surprising to break the bracket altogether.
-
I like to take a flat screw driver and push it in where it wont damage any components and just pull until I hear small tears.
-
Thats where the soldering have happened, you can also see it in picture three.
-
-
Este passo não foi traduzido. Ajude a traduzi-lo
-
The last step is to push the cracked camera lens out from inside.
-
First, find a tool you prefer and easy to use with effort. Then, put your hands where your power will land to protect the rear case from bending. Next, push the camera lens with effort. Please be careful with the phone and your hand very much.
-
When you place the new camera lens, you will need glue or adhesive to fasten the camera lens as well as the new bottom bracket.
-
You don't have to have a new bracket, its not necessary.
-
If you worry about the iPhone 7 Plus being damaged, please send it to an Apple center.
-
What I do here is that I put the phone firmly at the table with the camera sticking out, I place my flat screwdriver where the red marker is and I slightly tap the screwdriver with a hammer.
-


Cancelar: não concluí este guia.
41 outras pessoas executaram este guia.
12 comentários
When will you pretend finish this guide with picture? I have the same problem but I don’t want to loss the waterproof. Do you know another form to fix or soleve this problem?
You will lose waterproof unfortunally. Seals may be replaced but will not be 100%
Adding pictures today.
I read that the bottom bracket you mention at the end is fallen alignment bracket and it aligns the camera lens. Do you know how to add it back? Or we’ll install a new one
You will have to get this part: iPhone 7 Plus Rear Camera Alignment Bracket
as the other one is soldered and will break and bend. You will have to align the bracket yourself to replace it.