Ir para o conteúdo principal

iPhone 5 Volume Controls Replacement

Pré-requisito somente
Este guia destina-se apenas a ser usado como pré-requisito para outros guias. É incompleto por si só.

O que você precisa

  1. iPhone 5 Volume Controls Replacement, Volume Controls: passo 1, imagem 1 %32 iPhone 5 Volume Controls Replacement, Volume Controls: passo 1, imagem 2 %32
    • Remove three screws securing the vibrator and vibrator bracket to the rear case:

    • One 2.3 mm Phillips screw

    • One 1.7 mm Phillips screw

    • One 1.6 mm Phillips screw securing the vibrator to the top inside of the rear case.

    How do I remove the 1.6mm screw?

    Alexei - Responder

  2. iPhone 5 Volume Controls Replacement: passo 2, imagem 1 %32
    • Remove the vibrator and vibrator bracket from the rear case.

    Make sure you have removed all 3 screws connected to the vibrator since the bracket is welded on the motor house.

    Johnny - Responder

  3. iPhone 5 Volume Controls Replacement: passo 3, imagem 1 %32
    • Remove the following screws securing the volume button and ringer switch brackets to the side of the rear case:

    • One 1.5 mm Phillips screw

    • Two 1.8 mm Phillips screws

    The middle one 1,8 = 1,2 mm

    Daniel Mone - Responder

    yes, it is like you say

    [Ados Production] -

    I can't remove the top screw for some reason, should it be any different from the rest?

    arnaudjb - Responder

    When reassembled I noticed that when I firmly tightened these two screws tagged with orange circle , my ringer switch was stuck and didn't move. So I left these two screws little loose and ringer switch worked fine. Now I have used my phone couple weeks and there has been no problem with these loose screws.

    Asko Pesola - Responder

    on my device the red circled screw is completely different. Under my magnifying glass the head is round. Don’t know how to unscrew. There is no fitting bit in my ifixit Pro Tech Toolkit. :(

    Michael Kühnen - Responder

    When re-assembling these parts, make sure that the volume bracket is inserted UNDERNEATH the ringer switch bracket, or the + volume button will not make positive contact with the switch on the cable.

    tinkertoy - Responder

  4. iPhone 5 Volume Controls Replacement: passo 4, imagem 1 %32 iPhone 5 Volume Controls Replacement: passo 4, imagem 2 %32
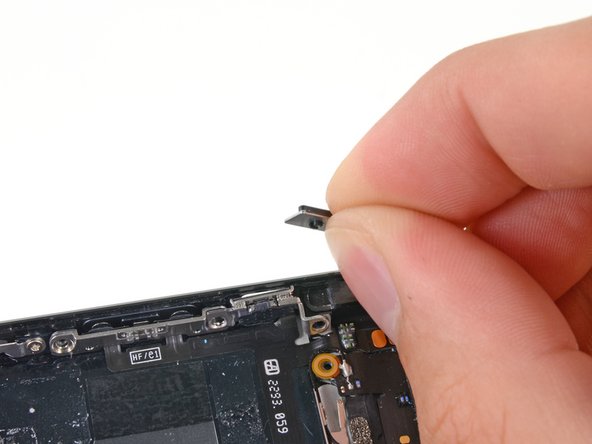
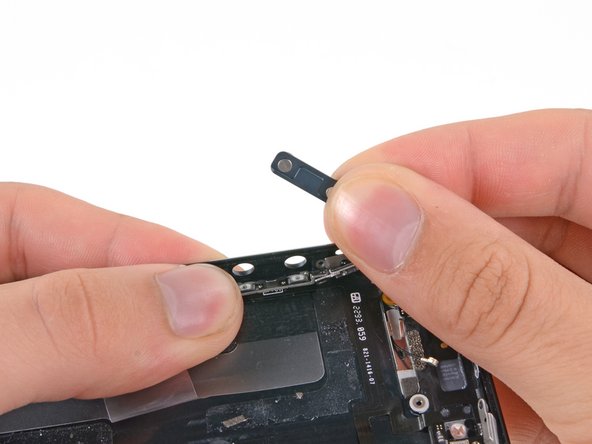
    • Use the tip of a spudger to pry the ringer switch bracket from the side of the rear case.

    • Remove the ringer switch.

    I didn't see mention of it, but I found the ringer switch button would slide down to OFF during reassembly, so I made sure the new ringer switch was also set to OFF before screwing all back together.

    Dean M - Responder

    I found removing the hinge that secures the power button to require more force than I thought necessary. Seemed to be the most difficult part of the repair. When installing the new AC/PB cable, i started with this assembly and worked backwards. Would have been helpful to include a good set of tweezers in the repair kits for those with fat fingers like mine or who don't have a pair at home.

    aroclobama - Responder

  5. iPhone 5 Volume Controls Replacement: passo 5, imagem 1 %32 iPhone 5 Volume Controls Replacement: passo 5, imagem 2 %32
    • Use a spudger to pry the volume button bracket from the side of the rear case.

    • Remove the volume buttons.

Conclusão

To reassemble your device, follow these instructions in reverse order.

Uma outra pessoa concluiu este guia.

Andrew Optimus Goldheart

Membro desde: 10/17/09

502.749 Reputação

Autoria de 407 guias

Equipe

iFixit Membro de iFixit

Staff

Membros da 135

Autoria de 16.732 guias

0 comentários

Adicione um comentário

Exibir estatísticas:

Últimas 24 horas: 0

Últimos 7 dias: 0

Últimos 30 dias: 0

Duração total: 492