Introdução
Use this guide to replace unresponsive volume control buttons in an iPad mini 4 LTE.
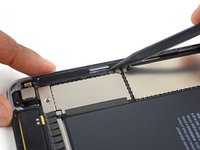
This guide will teach you how to remove the volume control assembly which includes: the ribbon cable with the volume up and volume down switches on it, microphone, and volume control bracket. The guide does not detail the replacement of the exterior button covers.
Parts of this guide were shot with a Wi-Fi model and as such the internals may look slightly different from the LTE model. The procedure is the same for both models except where noted.
O que você precisa
-
Ferramenta utilizada neste passo:Safety Glasses$3.19
-
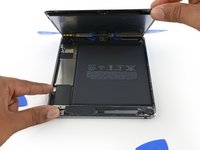
If your display glass is cracked, keep further breakage contained and prevent bodily harm during your repair by taping the glass.
-
Lay overlapping strips of clear packing tape over the iPad's display until the whole face is covered. For particularly bad breaks, you may need to lay down two layers.
-
Do your best to follow the rest of the guide as described. However, once the glass is broken, it will likely continue to crack as you work, and you may need to use a metal prying tool to scoop the glass out.
-
-
-
-
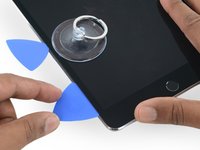
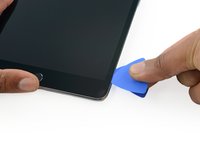
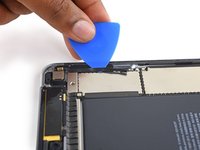
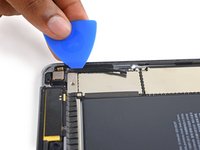
Leave the opening pick in the iPad slightly past the front-facing camera.
-
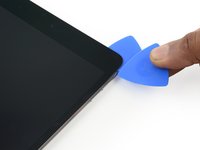
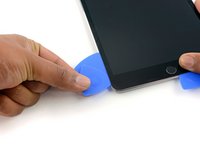
Take a second pick and insert it to the left of the camera, where the first pick just was. Slide it back to the corner to completely cut any remaining adhesive.
-
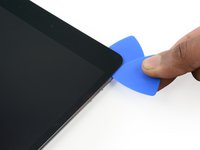
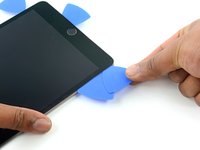
Leave the second pick in place to prevent the corner adhesive from re-sealing as it cools.
-
-
-
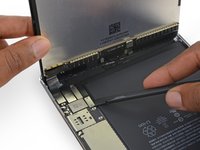
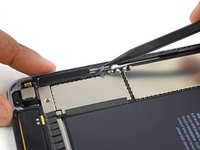
Remove the four 1.2 mm Phillips screws over the battery/display connector bracket.
-
-
-
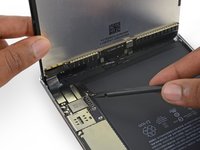
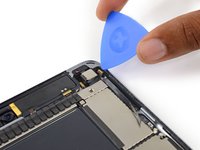
Remove the single 1.2 mm Phillips screw securing the volume control cable bracket.
-


To reassemble your device, follow these instructions in reverse order.
To reassemble your device, follow these instructions in reverse order.
Cancelar: não concluí este guia.
Uma outra pessoa concluiu este guia.
