Introdução
Use this guide to replace the adhesive on your iPad 3 4G to seal the deal on a repair job well done.
Before you begin peeling and sticking tape, it's important to have clean adhesion surfaces on both the front panel and the rear case. Use a spudger to scrape off any large excess bits of original adhesive, then clean all of the gluing surfaces with a paper towel and rubbing alcohol or Goof Off.
It is recommended that you peel each adhesive strip as needed, rather than lay them out all at once.
O que você precisa
-
Ferramenta utilizada neste passo:Tweezers$4.99
-
Carefully grasp the home button with a pair of tweezers.
-
Gently lower and place the home button into the round opening located at the bottom of the front panel.
-
-
-
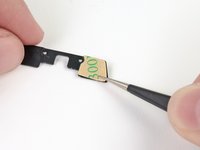
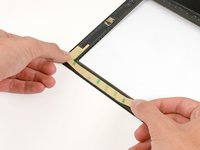
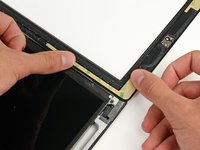
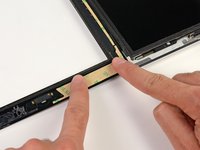
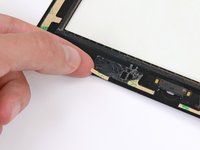
Carefully peel off the first trapezoidal adhesive strip.
I ordered the IPAD 2 BATTERY KIT (IF110-014-3 ). does this come with this adhesive strips?
Yes the iPad 2 battery kit includes everything you need, including the adhesive. The strips may look slightly different than the ones shown in this guide, but they will work the same. If you are only replacing the battery, you won’t need to remove or replace the home button, so ignore the home button bracket steps of this guide.
-
-
-
-
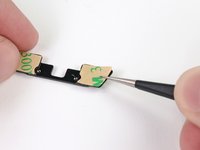
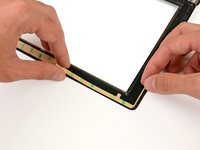
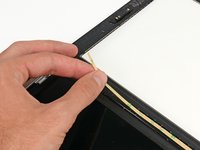
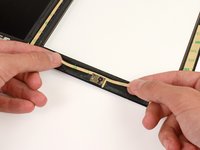
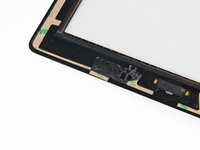
Place the straight adhesive strip on the right side of the front panel.
-
If you've already attached the digitizer cable, you'll have to work around/under it to attach this strip.
I had already reattached the digitizer cable so I used an Exacto knife to trim the adhesive around the cable…worked like a charm.
-
-
-
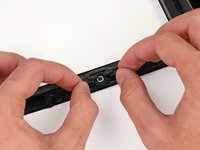
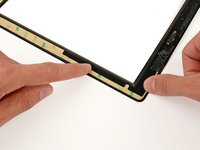
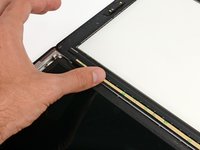
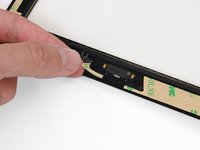
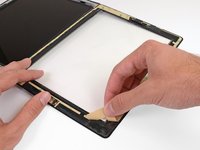
Place the last L-shaped adhesive strip on the bottom right corner of the front panel.
hi, i had my front panel connecting strip torn during repair… what can i do??
i had my ipad 2 front panel connecting strip torn down during repair…
plz tell me the solution
-
-
-
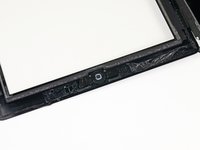
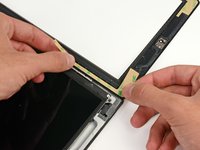
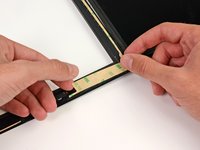
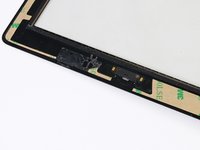
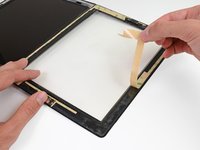
Lay the thin T-shaped adhesive strip between the bottom edge of the inner frame of the front panel and the camera mounting bracket. The longest edge should be flush with the inner frame.
I believe this should go above the bracket. There is no metal to adhere to between the LCD and the camera.
No. Everything is showed correctly. This strip doesn't have to glue to metal, there are plastic spacers for it at the top of the LCD.
If you afraid the glass will be loose of the bezel then you can cut two thin stripes of another two sided tape and attach them to the bezel's plastic as an extra option.
-


To reassemble your device, follow these instructions in reverse order.
To reassemble your device, follow these instructions in reverse order.
Cancelar: não concluí este guia.
4 outras pessoas executaram este guia.

Um comentário
Need to update this instruction because the new adhesive strips I used for my iPad3 4G repair was different than what is shown in this guide. Granted, it’s pretty easy to figure out.