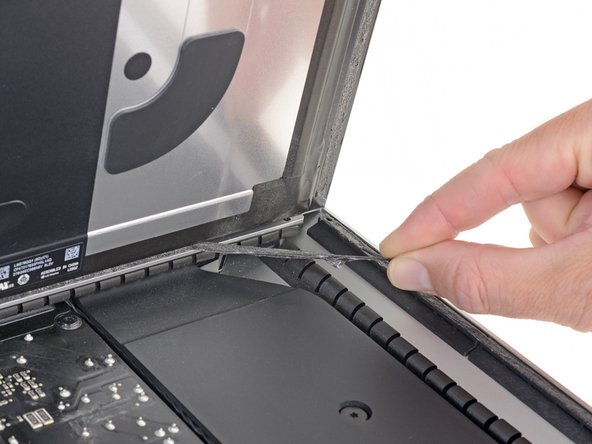
Ir para o conteúdo principal

iMac Intel 21.5" Retina 4K Display (2017) Display Assembly Replacement

Pré-requisito somente
Este guia destina-se apenas a ser usado como pré-requisito para outros guias. É incompleto por si só.

O que você precisa

  1. iMac Intel 21.5" Retina 4K Display (2017) Display Assembly Replacement, Display Assembly Separation: passo 1, imagem 1 %32 iMac Intel 21.5" Retina 4K Display (2017) Display Assembly Replacement, Display Assembly Separation: passo 1, imagem 2 %32
    • Lift the display up to a near-vertical position.

    • At this point there is still a strip of adhesive along the bottom of the display that will hold the display to the frame like a hinge. You can loosen this adhesive by working the display up and down a few times.

  2. iMac Intel 21.5" Retina 4K Display (2017) Display Assembly Replacement: passo 2, imagem 1 %32 iMac Intel 21.5" Retina 4K Display (2017) Display Assembly Replacement: passo 2, imagem 2 %32 iMac Intel 21.5" Retina 4K Display (2017) Display Assembly Replacement: passo 2, imagem 3 %32
    Ferramenta utilizada nesse passo:
    Plastic Cards
    $2.99
    Comprar
    • Be very careful not to touch the capacitor leads or any exposed solder joints on the back of the power supply (boxed in red).

    • Grasp the small tab at the end of one of the bottom edge display adhesive strips and pull the adhesive toward the top of the iMac to remove it.

    • Repeat this step with the other adhesive strip and remove it.

    • If either adhesive strip breaks before it's removed, use a plastic card to slice through the remaining adhesive.

  3. iMac Intel 21.5" Retina 4K Display (2017) Display Assembly Replacement: passo 3, imagem 1 %32 iMac Intel 21.5" Retina 4K Display (2017) Display Assembly Replacement: passo 3, imagem 2 %32 iMac Intel 21.5" Retina 4K Display (2017) Display Assembly Replacement: passo 3, imagem 3 %32
    • Lift the display up from the frame and remove it from the iMac.

    • It may be necessary to slowly lift from one side to peel against the remaining adhesive.

    • Be very careful handling the display—it's big, heavy, and made of glass.

    • After the adhesive is cut, it cannot be used to re-seal the display in place. Follow this guide to replace the adhesive strips that secure the display to the rear enclosure.

Conclusão

To reassemble your device, follow these instructions in reverse order.

Adam O'Camb

Membro desde: 04/11/15

196.299 Reputação

Autoria de 416 guias

0 comentários

Adicione um comentário

Exibir estatísticas:

Últimas 24 horas: 0

Últimos 7 dias: 0

Últimos 30 dias: 0

Duração total: 161