Introdução
Follow the steps in this guide to upgrade or replace the SATA hard drive in a iMac Intel 21.5" EMC 3068. Note that if you are upgrading your drive, you will need to clone your existing hard drive onto the replacement prior to performing this upgrade to keep your files and operating system.
Some images in this guide use a 2015 iMac, which has minor visual differences. These differences do not affect the repair procedure.
O que você precisa
-
-
Before beginning any work on your iMac: Unplug the computer and press and hold the power button for ten seconds to discharge the power supply's capacitors.
-
-
-
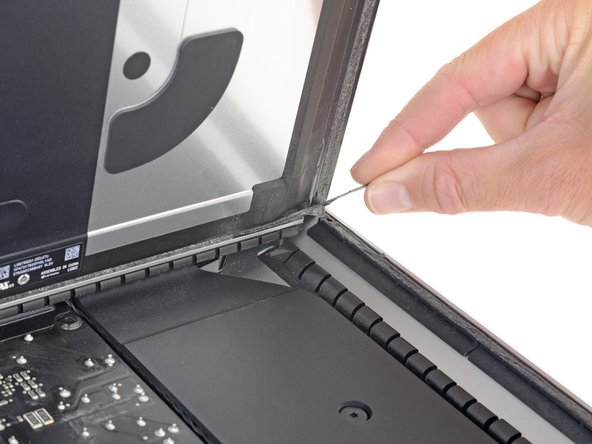
Starting from the top right corner of the iMac, wedge a plastic card between the display and frame.
-
-
-
-
Hold the display with one hand while using your other hand to unplug the display power cable.
-
-
-
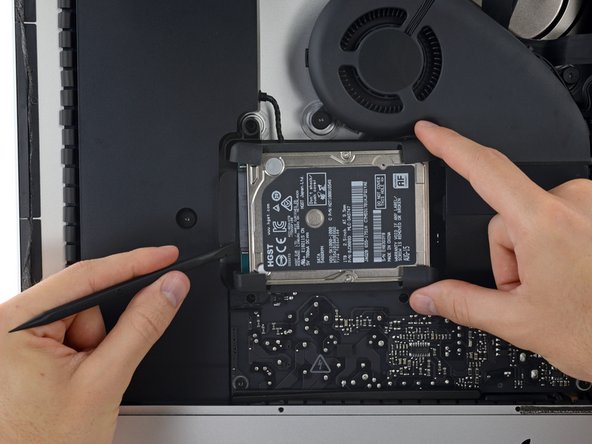
Remove the following T10 Torx screws securing the hard drive brackets to the iMac:
-
Two 21 mm screws
-
One 9 mm screw
-
One 27 mm screw
-
-
-
Lift the hard drive from the edge nearest the logic board and pull it slightly out of its recess.
-
-
-
Peel the rubber bumper off one side of the hard drive.
-
Repeat for the other side.
-


To reassemble your device, follow these instructions in reverse order.
To reassemble your device, follow these instructions in reverse order.
Cancelar: não concluí este guia.
25 outras pessoas executaram este guia.

3 comentários
This tutorial is excellent but has the final step missing: how to replug the SATA connector given that it is stuck under the storage bay.
I had to unscrew the storage bay to be able to replug the SATA connector and follow the tutorial in reverse to finish it.
Don't try to remove the left speaker as it requires to remove the CPU fan first which adds extra steps to the process.
The most difficult part of the whole process was connecting the new HD to the connector (even if not stuck under the bay). There's not enough slack in the connector's cabling to allow use of one's fingers. It took me 20 minutes and the use of a couple of wooden popsicle sticks and a spudger to eventually nudge it in place. Otherwise, great tutorial Adam O'Camb!
2020 kaufte ich mir einen iMac 21,5 Zoll einfachste Ausführung (8GB RAM, 2,3 GhZ). Der Computer brauchte mindestens 65 Sekunden, um Applikationen hochzuladen, was die Arbeit mit dem Computer nahezu unmöglich machte. Letzte Woche habe ich die HDD-Festplatte dank des Reperatur-Kits von ifixit ausgetauscht. Seitdem funktioniert der Computer mühelos. Applikationen, Dokumente, Bilddateien lassen sich unter einer Sekunde öffnen. Man bekommt schon das Gefühl einen neuen iMac gekauft zu haben! Ich kann das Reperatur-Kit samt Anleitung nur wärmstens empfehlen. Hierbei ist allerdings zu beachten, dass die Reparatur genaustens nach Anleitung durchgeführt werden sollte. Kleiner Tipp: Wenn die Schrauben von dem Lautsprecher gelöst werden, lässt er sich leicht nach links verschieben. Damit ist das SATAkabel leichter zugänglich! Viel Erfolg!