Ir para o conteúdo principal

Esta versão pode conter edições incorretas. Mude para o último instantâneo verificado.

Pré-requisito somente
Este guia destina-se apenas a ser usado como pré-requisito para outros guias. É incompleto por si só.

O que você precisa

  1. Este passo não foi traduzido. Ajude a traduzi-lo

    : passo 1, imagem 1 %32
    • Disconnect the hard drive thermal sensor from the top edge of the logic board.

    • Pull the connector parallel to the face of the logic board.

  2. Este passo não foi traduzido. Ajude a traduzi-lo

    : passo 2, imagem 1 %32
    • Remove the two 9.2 mm T10 Torx screws securing the hard drive bracket to the rear case.

  3. Este passo não foi traduzido. Ajude a traduzi-lo

    : passo 3, imagem 1 %32
    • Lift the hard drive from its left edge enough to clear the inverter and pull it toward the left edge of your iMac to unseat the mounting pins from the chassis.

    • During installation, do not push the rubber grommets through the chassis with the hard drive mounting pins as retrieving them will require removing the logic board.

  4. Este passo não foi traduzido. Ajude a traduzi-lo

    : passo 4, imagem 1 %32 : passo 4, imagem 2 %32
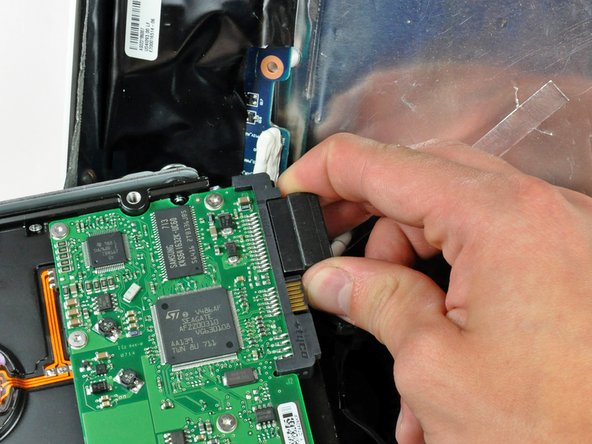
    • Pull both the SATA power and data cable connectors away from the hard drive.

    • Be careful when de-routing the hard drive thermal sensor cable from under the heat sink framework.

Linha de Chegada

0 comentários

Adicione um comentário

Exibir estatísticas:

Últimas 24 horas: 2

Últimos 7 dias: 8

Últimos 30 dias: 10

Duração total: 1,314