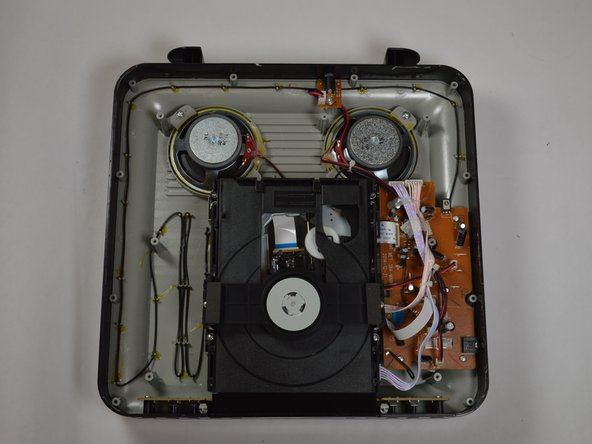
Ir para o conteúdo principal

iLive IKBC384S Disk Drive Replacement

O que você precisa

  1. iLive IKBC384S Disk Drive Replacement, Top Cover: passo 1, imagem 1 %32 iLive IKBC384S Disk Drive Replacement, Top Cover: passo 1, imagem 2 %32
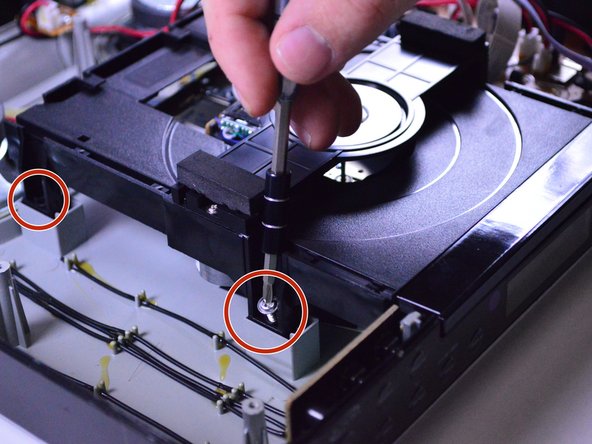
    • Make sure you remove all seven 3 mm screws before proceeding to the next step.

  2. iLive IKBC384S Disk Drive Replacement: passo 2, imagem 1 %32 iLive IKBC384S Disk Drive Replacement: passo 2, imagem 2 %32
    • Use iOpener or heat gun on all sides except the front.

  3. iLive IKBC384S Disk Drive Replacement: passo 3, imagem 1 %32 iLive IKBC384S Disk Drive Replacement: passo 3, imagem 2 %32
    • Be cautious when taking the top of the device off there may still be some adhesive stuck to device.

    • The top of the device will be very difficult to remove because of the adhesive holding it together.

  4. iLive IKBC384S Disk Drive Replacement, Disk Drive: passo 4, imagem 1 %32 iLive IKBC384S Disk Drive Replacement, Disk Drive: passo 4, imagem 2 %32
    • Remove all four screws(13.5 mm in length) that are securing the device

  5. iLive IKBC384S Disk Drive Replacement: passo 5, imagem 1 %32 iLive IKBC384S Disk Drive Replacement: passo 5, imagem 2 %32
    • Remove both of the connected cords on the motherboard.

    • Also remove the flat ribbon cable that is connected to the motherboard.

    • Once you have removed all screws and cables connected to motherboard the disk drive can be easily removed

Conclusão

To reassemble your device, follow these instructions in reverse order.

Allen Dover

Membro desde: 03/21/17

401 Reputação

Autoria de 4 guias

Equipe

Texas Tech, Team S46-G6, Bennett Spring 2017 Membro de Texas Tech, Team S46-G6, Bennett Spring 2017

TTU-BENNETT-S17S46G6

Membros da 3

Autoria de 6 guias

0 comentários

Adicione um comentário

Exibir estatísticas:

Últimas 24 horas: 0

Últimos 7 dias: 1

Últimos 30 dias: 3

Duração total: 407