Ir para o conteúdo principal

iHome iP1 30-pin Connector Replacement

O que você precisa

  1. iHome iP1 30-pin Connector Replacement, Dock Cover: passo 1, imagem 1 %32
    • Orient the iHome upside down with the speakers facing you.

  2. iHome iP1 30-pin Connector Replacement: passo 2, imagem 1 %32
    • Remove the two 9.5 mm Phillips #1 screws from the dock cover.

  3. iHome iP1 30-pin Connector Replacement: passo 3, imagem 1 %32 iHome iP1 30-pin Connector Replacement: passo 3, imagem 2 %32 iHome iP1 30-pin Connector Replacement: passo 3, imagem 3 %32
    • Remove the dock cover by grabbing its sides and pulling it up and away from the faceplate.

  4. iHome iP1 30-pin Connector Replacement, Back Cover: passo 4, imagem 1 %32
    • Orient the iHome upside down with the speakers facing away from you.

  5. iHome iP1 30-pin Connector Replacement: passo 5, imagem 1 %32 iHome iP1 30-pin Connector Replacement: passo 5, imagem 2 %32
    • Remove the four 9.5 mm Phillips #2 screws located on each of the four corners of the iHome's back cover.

  6. iHome iP1 30-pin Connector Replacement: passo 6, imagem 1 %32
    • Remove the back cover by grabbing its sides and lifting it off the iHome.

  7. iHome iP1 30-pin Connector Replacement, 30-pin Connector: passo 7, imagem 1 %32
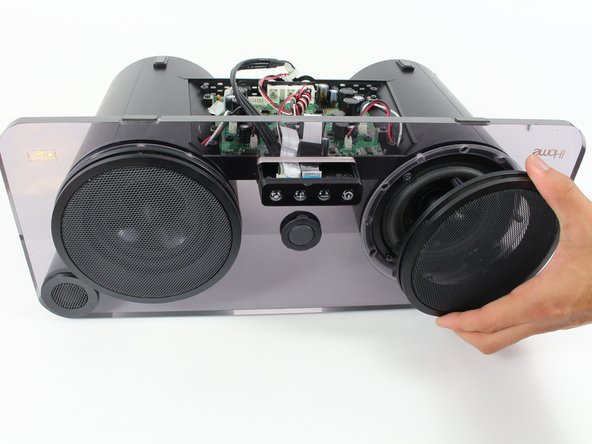
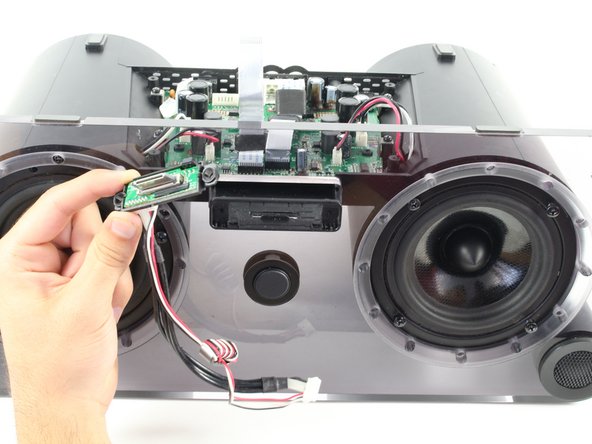
    • Rotate the iHome so that the speakers are facing you.

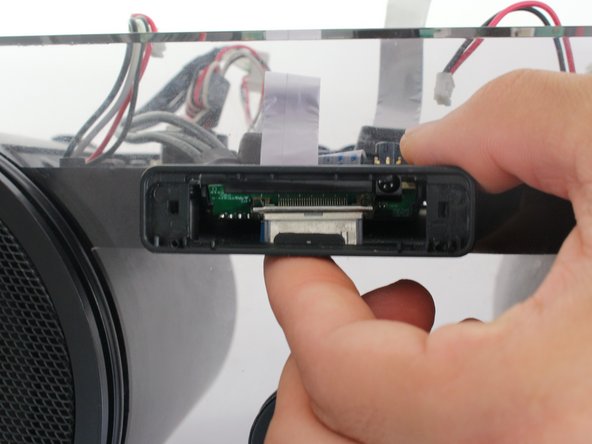
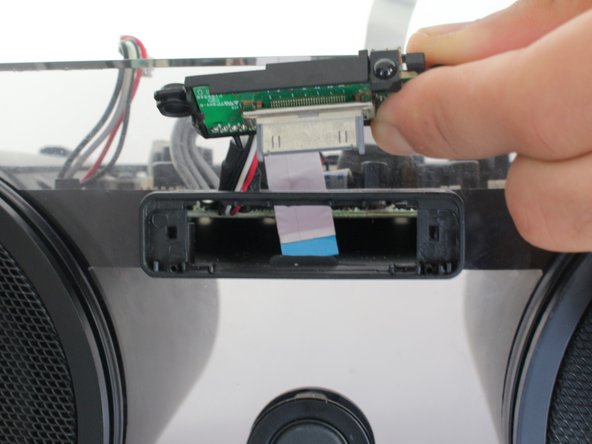
    • Disconnect the silver ribbon cable connected to the 30-pin connector (the middle one) by pulling it directly up.

  8. iHome iP1 30-pin Connector Replacement: passo 8, imagem 1 %32 iHome iP1 30-pin Connector Replacement: passo 8, imagem 2 %32 iHome iP1 30-pin Connector Replacement: passo 8, imagem 3 %32
    • Rotate the iHome so that the speakers are once again facing away from you and the motherboard is still exposed.

    • Unplug the wide red/white/black wire bundle from the lower right-hand corner of the motherboard by pulling it out of their connection.

  9. iHome iP1 30-pin Connector Replacement: passo 9, imagem 1 %32 iHome iP1 30-pin Connector Replacement: passo 9, imagem 2 %32 iHome iP1 30-pin Connector Replacement: passo 9, imagem 3 %32
    • Rotate the iHome iP1 so that the speakers are now facing you.

    • Remove both of the speaker covers by pulling them off of the faceplate.

  10. iHome iP1 30-pin Connector Replacement: passo 10, imagem 1 %32
    • Unscrew the twelve 14.5 mm Phillips #2 screws holding the faceplate to the speaker housing. (There are six screws connecting the faceplate to each speaker.)

    • Completing this step will loosen the faceplate enough to pull the bundle of cables attached to the 30-pin connector through a hole in the faceplate, allowing the 30-pin connector to be removed from the iHome.

  11. iHome iP1 30-pin Connector Replacement: passo 11, imagem 1 %32 iHome iP1 30-pin Connector Replacement: passo 11, imagem 2 %32 iHome iP1 30-pin Connector Replacement: passo 11, imagem 3 %32
    • Detach the 30-pin connector from the dock housing by pushing it through the slot which it sticks out of.

    • Sometimes the 30-pin connector can get stuck in the dock housing, making it difficult to push through. To prevent this, push each side of the 30-pin connector evenly. This step can be accomplished without the use of any additional tools.

    • The command buttons have been shown as removed to show how to detach the 30-pin connector. However, it is not necessary to remove the command buttons in order to remove the 30-pin connector.

  12. iHome iP1 30-pin Connector Replacement: passo 12, imagem 1 %32 iHome iP1 30-pin Connector Replacement: passo 12, imagem 2 %32 iHome iP1 30-pin Connector Replacement: passo 12, imagem 3 %32
    • Remove the 30-pin connector from the iHome by pulling the bundle of cables attached to it through the center hole in the faceplate.

    • You may have to wiggle the faceplate to be able to pull the bundle of cables through its center hole.

Conclusão

To reassemble your device, follow these instructions in reverse order.

Uma outra pessoa concluiu este guia.

Wen Sullivan

Membro desde: 10/06/16

518 Reputação

Autoria de 4 guias

Equipe

Cal Poly, Team 20-1, Livingston Fall 2016 Membro de Cal Poly, Team 20-1, Livingston Fall 2016

CPSU-LIVINGSTON-F16S20G1

Membros da 4

Autoria de 7 guias

4 comentários

Where can you buy a new pin connector?

shoreman19 - Responder

Where can I buy a new pin connector?

shoreman19 - Responder

Where can you buy a new pin connector?

Edward Voermans - Responder

where can i buy new Board

Riyu PC - Responder

Adicione um comentário

Exibir estatísticas:

Últimas 24 horas: 0

Últimos 7 dias: 3

Últimos 30 dias: 13

Duração total: 2,462