Introdução
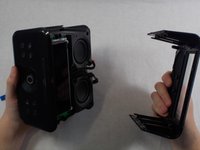
If your iHome iAVS16 isn’t producing the correct display on the screen or is not working at all, this guide will show you step by step how to disassemble the iHome iAVS16 to access and replace the LCD display. If LCD display still does not work after replacement then start looking else where for issues.
O que você precisa
-
-
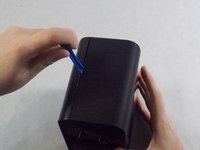
Remove the four 1.7 mm Phillips #0 screws located on the bottom of the device.
-
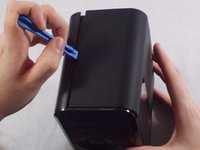
Lift up the bottom of the device.
 Pergunte ao FixBot
-
-
-
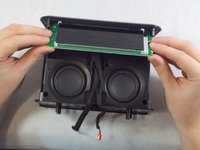
Remove the two 1.7 mm Phillips #0 screws holding the white face place onto the inside of the device's bottom.
-
Using an iFixit opening tool on the side without the black adhesive, carefully lift up the white face plate.
-
-
Ferramenta utilizada neste passo:Tweezers$4.99
-
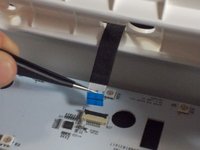
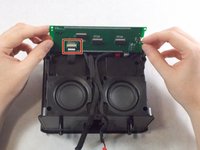
Using the tweezers, lift up on the black tab holding the ribbon cable down.
-
Carefully pull the ribbon cable back and out of the slot.
-
-
-
-
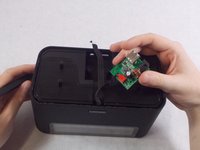
Remove the two 1.7 mm Phillips #0 screws holding the power board in.
-
Carefully flip the board over.
-
Remove the red connector from its socket with a pair of tweezers.
-
-
-
Insert an iFixit opening tool into the lining on the front casing and pry it apart. Do this for both sides.
-
Further remove the front casing off from the device manually with your hands.
-
-
-
Remove the four 1.7 mm Phillips #0 screws holding the LCD onto the front of the device.
-
-
-
Carefully flip the LCD display over to expose the ribbon cable connecting it.
-
Lift the black tab holding the cable down, and carefully put it out of the socket.
-


To reassemble your device, follow these instructions in reverse order.

Equipe

UMass Dartmouth, Team S1-G7, O'Connell Fall 2019 Membro de UMass Dartmouth, Team S1-G7, O'Connell Fall 2019
UMASSD-O'CONNELL-F19S1G7
4 Membros
Autoria de 5 guias