Ir para o conteúdo principal
Participe da comunidade de reparos - Criar conta
iFixit Precision Bit Driver Reassembly

iFixit Precision Bit Driver Reassembly

Ricky H

Ricky H e um outro colaborador

Última atualização em 30 de mai de 2025

2 minutos
Fácil
Guia colaborativo

Introdução

Ir para o passo 1

I've recently noticed a number of folks asking how to reassemble the aluminum iFixit Precision Bit Driver when the top bearing assembly comes off. Threw together a quick guide

O que você precisa

Ferramentas

Exibir mais…

  1. iFixit Precision Bit Driver Reassembly, How to reinstall the bearing cap: passo 1, imagem 1 %32 iFixit Precision Bit Driver Reassembly, How to reinstall the bearing cap: passo 1, imagem 2 %32 iFixit Precision Bit Driver Reassembly, How to reinstall the bearing cap: passo 1, imagem 3 %32
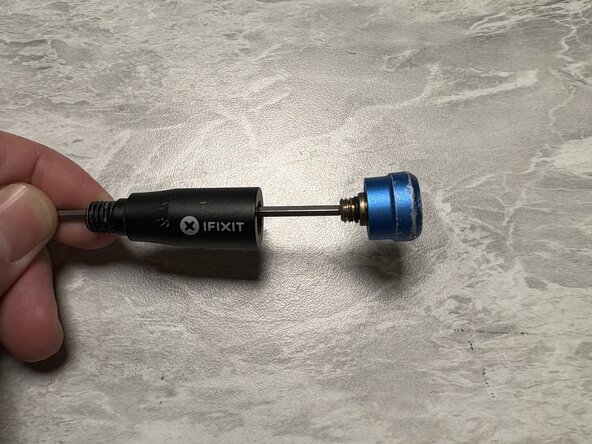
    • Unscrew the center of the barrel

    • Note: Assembly utilizes threat locker. You may need tools to unscrew. Use a small piece of duct tape on the smooth part to protect the aluminum.

    • Use pliers on the duct tape, and an adjustable wrench on the flat of the knurled part near the bottom of the screw driver to create leverage to unscrew the barrel.

  2. iFixit Precision Bit Driver Reassembly: passo 2, imagem 1 %32 iFixit Precision Bit Driver Reassembly: passo 2, imagem 2 %32 iFixit Precision Bit Driver Reassembly: passo 2, imagem 3 %32
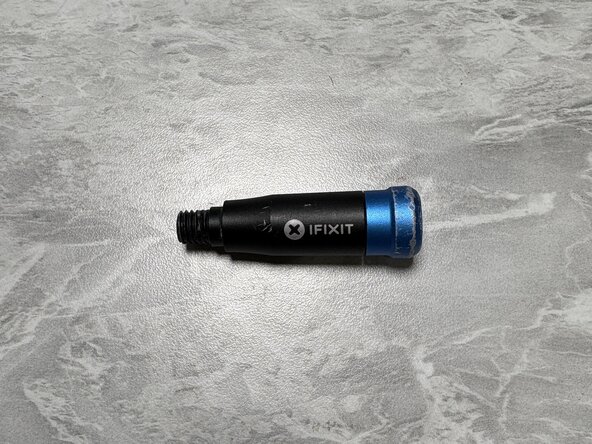
    • Next use a 2.5mm hex key with a long shaft such that it fits all the way through the top half of the screw driver.

    • Insert the bearing/top assembly onto the hex key, and begin tightening the bearing assembly into the screwdriver.

    • Note: threadlocker should not be necessary here as there is an O ring that is responsible for maintaining the thread loading

  3. iFixit Precision Bit Driver Reassembly: passo 3, imagem 1 %32
    • Screw the two halves of the barrel back together.

    • While not necessary, some thread locker can be applied to the threads on the upper half of the barrel to prevent the two halves from separating. Be sure to use non-permanent thread locker in case you need to do this again in the future!

  4. iFixit Precision Bit Driver Reassembly: passo 4, imagem 1 %32
    • Voila, enjoy your screw driver.

Conclusão

There are other ways to do this, such as the floss trick. But if you have the tools lying around here's the proper way to reassemble your iFixit Precision screwdriver!

Uma outra pessoa concluiu este guia.

Gear Up For Future Repairs

Shop all

Ricky H

Membro desde: 04/13/12

139 Reputação

Autoria de 1 guia

0Comentários do guia

Comentar

Visualizações:

Últimas 24 horas: 1

Últimos 7 dias: 113

Últimos 30 dias: 336

Ao todo: 490