Ir para o conteúdo principal
Participe da comunidade de reparos - Criar conta

iBook G3 12" Front Display Bezel Replacement

O que você precisa

  1. iBook G3 12" Front Display Bezel Replacement, Battery: passo 1, imagem 1 %32
    • Use a coin to rotate the battery locking screw 90 degrees clockwise.

    • Lift the battery out of the computer.

    Pergunte ao FixBot
  2. iBook G3 12" Front Display Bezel Replacement, Keyboard: passo 2, imagem 1 %32
    • Pull the keyboard release tabs toward you and lift up on the keyboard until it pops free.

    • If the keyboard does not come free, use a small flathead screwdriver to turn the keyboard locking screw 180 degrees in either direction and try again.

    • Flip the keyboard over, away from the screen, and rest it face-down on the trackpad area.

    Pergunte ao FixBot
  3. iBook G3 12" Front Display Bezel Replacement: passo 3, imagem 1 %32
    • If the computer does not have an Airport card installed, skip the next two steps.

    • Push the wire clasp toward the Airport card and pull it up to free it from the RAM shield.

    Pergunte ao FixBot
  4. iBook G3 12" Front Display Bezel Replacement: passo 4, imagem 1 %32
    • Grasp the clear plastic tab on the Airport card and pull toward the right.

    Pergunte ao FixBot
  5. iBook G3 12" Front Display Bezel Replacement: passo 5, imagem 1 %32
    • Hold the Airport card in one hand and use your other hand to remove the antenna cable.

    Pergunte ao FixBot
  6. iBook G3 12" Front Display Bezel Replacement: passo 6, imagem 1 %32
    • Remove the two 2.5 mm Phillips screws that secure the RAM shield.

    Pergunte ao FixBot
  7. iBook G3 12" Front Display Bezel Replacement: passo 7, imagem 1 %32
    • Grasp the metal bracket on top of the RAM shield and pull upward to remove the shield.

    Pergunte ao FixBot
  8. iBook G3 12" Front Display Bezel Replacement: passo 8, imagem 1 %32
    • Pull the keyboard cable up from the logic board, holding the cable as close to the connector as possible.

    Pergunte ao FixBot
  9. iBook G3 12" Front Display Bezel Replacement, Lower Case: passo 9, imagem 1 %32
    • Your laptop should look approximately like this.

    Pergunte ao FixBot
  10. iBook G3 12" Front Display Bezel Replacement: passo 10, imagem 1 %32
    • Use a pin (or anything you like) to remove the three rubber feet from the lower case.

    Pergunte ao FixBot
  11. iBook G3 12" Front Display Bezel Replacement: passo 11, imagem 1 %32
    • Remove the three 5.2 mm newly-revealed Phillips screws.

    Pergunte ao FixBot
  12. iBook G3 12" Front Display Bezel Replacement: passo 12, imagem 1 %32
    • Use a spudger or small flathead screwdriver to pry up the three metal rings that housed the rubber bumpers.

    Pergunte ao FixBot
  13. iBook G3 12" Front Display Bezel Replacement: passo 13, imagem 1 %32
    • Remove the one 10 mm and two 20 mm hex screws using a 2mm hex. Alternatively, a T8 Torx screwdriver key will do.

    Pergunte ao FixBot
  14. iBook G3 12" Front Display Bezel Replacement: passo 14, imagem 1 %32
    • Remove the two 4.2 mm Phillips screws on either side of the battery contacts.

    Pergunte ao FixBot
  15. iBook G3 12" Front Display Bezel Replacement: passo 15, imagem 1 %32
    • Breathe deeply. Trying times are ahead, but we promise the lower case does come off.

    • Push the thin rims of the lower case surrounding the battery compartment in, bending them past the tabs, and then lift up to free that corner of the lower case.

    Pergunte ao FixBot
  16. iBook G3 12" Front Display Bezel Replacement: passo 16, imagem 1 %32
    • There is a slot on the wall of the battery compartment that locks the lower case in place. Use a small flathead screwdriver to pry out the slot's lower rim and pull up on the lower case to free the slot from the tabs holding it.

    Pergunte ao FixBot
  17. iBook G3 12" Front Display Bezel Replacement: passo 17, imagem 1 %32
    • Run a spudger along the seam between the lower case and upper case on the front of the computer to free the tabs locking the lower case. Pull up on the lower case and continue to use the spudger as necessary until you hear three distinct clicks.

    Pergunte ao FixBot
  18. iBook G3 12" Front Display Bezel Replacement: passo 18, imagem 1 %32
    • Continue to run the spudger around the front, right corner. There are two tabs on the port side of the computer, one near the front corner and one near the sound out port.

    Pergunte ao FixBot
  19. iBook G3 12" Front Display Bezel Replacement: passo 19, imagem 1 %32
    • Once the front and sides of the lower case are free, turn the computer so that the back is facing you and pull the lower case up and toward you until the back tabs pop free (it may be helpful to jiggle the case up and down).

    Pergunte ao FixBot
  20. iBook G3 12" Front Display Bezel Replacement: passo 20, imagem 1 %32
    • Remove the small greasy springs with white plastic caps from either side of the battery contacts.

    Pergunte ao FixBot
  21. iBook G3 12" Front Display Bezel Replacement, Upper Case: passo 21, imagem 1 %32
    • Remove the following 4 screws on the bottom of the computer:

    • Two 3 mm Phillips from the left side of the computer.

    • One 4.5 mm Phillips near the latch mechanism (this screw may be missing in 800 MHz iBooks)

    • One 14.2 mm Phillips near the front, right corner.

    Pergunte ao FixBot
  22. iBook G3 12" Front Display Bezel Replacement: passo 22, imagem 1 %32
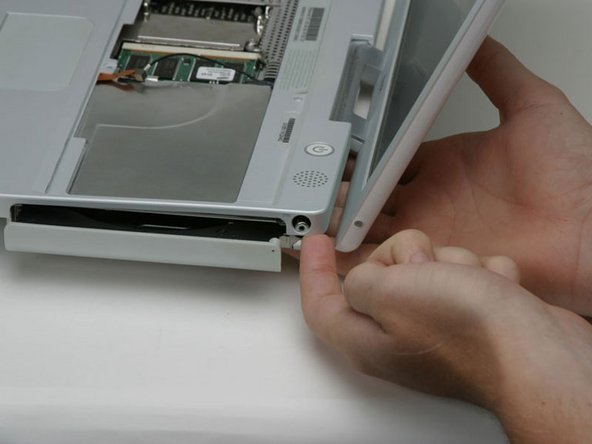
    • Use a straightened paperclip to open the optical drive tray.

    Pergunte ao FixBot
  23. iBook G3 12" Front Display Bezel Replacement: passo 23, imagem 1 %32
    • Pull the optical drive out just enough so that you can access and remove a Phillips screw near the battery compartment.

    Pergunte ao FixBot
  24. iBook G3 12" Front Display Bezel Replacement: passo 24, imagem 1 %32
    • Pull the optical drive a bit more so that you can access and remove a second Phillips screw near the power receptacle.

    Pergunte ao FixBot
  25. iBook G3 12" Front Display Bezel Replacement: passo 25, imagem 1 %32
    Ferramenta utilizada neste passo:
    Tweezers
    $4.99
    • Turn over the computer and open it.

    • Use tweezers (or a refrigerator magnet) to remove the magnet covering a Phillips screw near the middle of the computer.

    Pergunte ao FixBot
  26. iBook G3 12" Front Display Bezel Replacement: passo 26, imagem 1 %32
    • Remove the following 4 screws on the edges of the keyboard area.

    • One 4.5 mm Phillips underneath where the magnet was.

    • Three 6 mm Phillips in plastic depressions.

    Pergunte ao FixBot
  27. iBook G3 12" Front Display Bezel Replacement: passo 27, imagem 1 %32
    • Peel up the foil tape covering the speaker cable near the ports.

    Pergunte ao FixBot
  28. iBook G3 12" Front Display Bezel Replacement: passo 28, imagem 1 %32
    • This is a diagram of the trackpad ribbon clamp connector you will disconnect in the next step.

    • 1) With your fingernails, grasp the locking bar on either side and pull up a small amount (about 1/16" or 2 mm).

    • 2) After disengaging the locking bar, slide the cable out of the connector.

    Pergunte ao FixBot
  29. iBook G3 12" Front Display Bezel Replacement: passo 29, imagem 1 %32
    • Loosen the trackpad connector by pulling the top piece up slightly, freeing the trackpad ribbon.

    • Slide the orange trackpad ribbon out of the connector.

    Pergunte ao FixBot
  30. iBook G3 12" Front Display Bezel Replacement: passo 30, imagem 1 %32
    • Before you can jerk the upper case off with joy, you must disconnect both the blue and white power cable and red and black speaker cable as described in the next steps.

    • Lift the upper case from the left side and use your other hand to pull out the right side in order to clear the power receptacle.

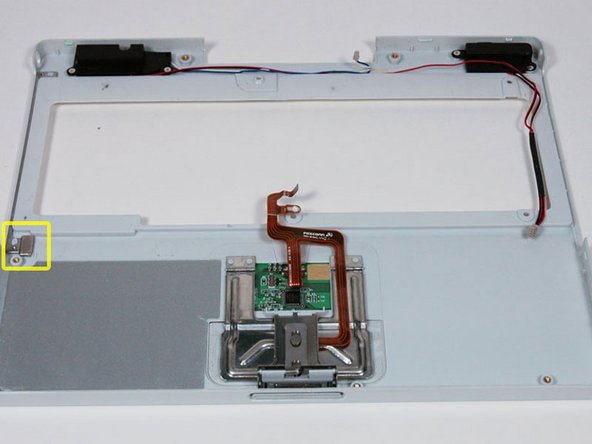
    • There may be a thin metal bar fastened to the upper case by the two screws on either side of the optical drive. This bar provides rigidity around the optical drive; don't forget it when reassembling.

    Pergunte ao FixBot
  31. iBook G3 12" Front Display Bezel Replacement: passo 31, imagem 1 %32
    • The connectors at the ends of the cables are attached very firmly to the sockets on the logic board. Pulling directly on the cable will either separate the cable from its connector or the socket from the logic board.

    • Lift the upper case enough to disconnect the blue and white power cable from the logic board. Using your fingernails or a dental pick, carefully pry the connector from its socket. Make sure you're pulling only on the connector and not on the socket.

    Pergunte ao FixBot
  32. iBook G3 12" Front Display Bezel Replacement: passo 32, imagem 1 %32
    • Lift the upper case off completely and disconnect the red and black speaker cable from the logic board. As before, make sure you're pulling only on the connector and not on the socket.

    Pergunte ao FixBot
  33. iBook G3 12" Front Display Bezel Replacement: passo 33, imagem 1 %32
    • There is a magnet that allows the computer to detect when the laptop is closed. If this magnet is not present your computer will not automatically go to sleep. Be sure the magnet is in the position indicated.

    Pergunte ao FixBot
  34. iBook G3 12" Front Display Bezel Replacement, Top Shield: passo 34, imagem 1 %32
    • Your laptop should look approximately like this.

    Pergunte ao FixBot
  35. iBook G3 12" Front Display Bezel Replacement: passo 35, imagem 1 %32
    • Remove the following 14 screws (some models may be missing a couple of screws):

    • One 2.5 mm Phillips.

    • Six 3.5 mm Phillips.

    • One 4.5 mm Phillips near the sleep light with a small shaft.

    • Two 4.5 mm Phillips with larger shafts.

    • Four 5 mm Phillips

    • If a screw is inserted in the left hole, the 14.2 mm screw in step 24 can not be inserted to hold the top case down.

    Pergunte ao FixBot
  36. iBook G3 12" Front Display Bezel Replacement: passo 36, imagem 1 %32
    • Peel back three strips of yellow tape in the bottom left corner.

    • Peel back one strip of foil tape in the upper left corner and another near where the trackpad connects to the logic board.

    Pergunte ao FixBot
  37. iBook G3 12" Front Display Bezel Replacement: passo 37, imagem 1 %32
    • Lift the top shield up from the right side, minding the upper left corner, which may catch on the metal framework.

    Pergunte ao FixBot
  38. iBook G3 12" Front Display Bezel Replacement, Display: passo 38, imagem 1 %32
    • Your laptop should look approximately like this.

    Pergunte ao FixBot
  39. iBook G3 12" Front Display Bezel Replacement: passo 39, imagem 1 %32
    • If you have already removed the hard drive in a previous step, your iBook may differ slightly from the picture.

    • Disconnect the microphone cable from the front, left corner of the logic board.

    • Peel back the black tape and free the microphone cable from the hard drive.

    Pergunte ao FixBot
  40. iBook G3 12" Front Display Bezel Replacement: passo 40, imagem 1 %32
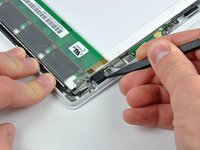
    • Use the black plastic handle to disconnect the display data cable from the logic board.

    Pergunte ao FixBot
  41. iBook G3 12" Front Display Bezel Replacement: passo 41, imagem 1 %32
    • If you have already removed the modem in a previous step, you can skip this step.

    • Remove the single Phillips securing the display data cable to the metal framework.

    Pergunte ao FixBot
  42. iBook G3 12" Front Display Bezel Replacement: passo 42, imagem 1 %32
    • Deroute the display data and microphone cables.

    Pergunte ao FixBot
  43. iBook G3 12" Front Display Bezel Replacement: passo 43, imagem 1 %32
    • Peel back the yellow tape securing the inverter cable to the optical drive.

    Pergunte ao FixBot
  44. iBook G3 12" Front Display Bezel Replacement: passo 44, imagem 1 %32
    • Disconnect the inverter cable from the logic board.

    Pergunte ao FixBot
  45. iBook G3 12" Front Display Bezel Replacement: passo 45, imagem 1 %32
    • Carefully deroute the inverter cable from beneath the optical drive.

    • Deroute the Airport antenna cable from beneath the optical drive.

    Pergunte ao FixBot
  46. iBook G3 12" Front Display Bezel Replacement: passo 46, imagem 1 %32
    • Support the display with your free hand while removing the following screws.

    • Remove the single Phillips screw on the outer edge of either hinge (two screws total).

    • Tilt the display back to get over two small nubbins, and then slide it directly from the case and away.

    Pergunte ao FixBot
  47. iBook G3 12" Front Display Bezel Replacement, Rear Display Bezel: passo 47, imagem 1 %32
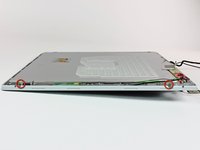
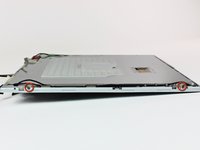
    • Use a 1.5mm hex screwdriver to remove the two hex screws on either side of the display (four screws total).

    • If you don't have a 1.5mm hex driver, you can probably get these screws out with a T6 Torx screwdriver. However, if you use a T6 Torx driver you'll be more likely to strip the screws.

    Pergunte ao FixBot
  48. iBook G3 12" Front Display Bezel Replacement: passo 48, imagem 1 %32
    • Use your thumbs to slightly separate the rear bezel from the front bezel.

    • It is helpful to hold the opposing corner of the display stationary to aid in flexing the rear bezel away from the display.

    Pergunte ao FixBot
  49. iBook G3 12" Front Display Bezel Replacement: passo 49, imagem 1 %32 iBook G3 12" Front Display Bezel Replacement: passo 49, imagem 2 %32 iBook G3 12" Front Display Bezel Replacement: passo 49, imagem 3 %32
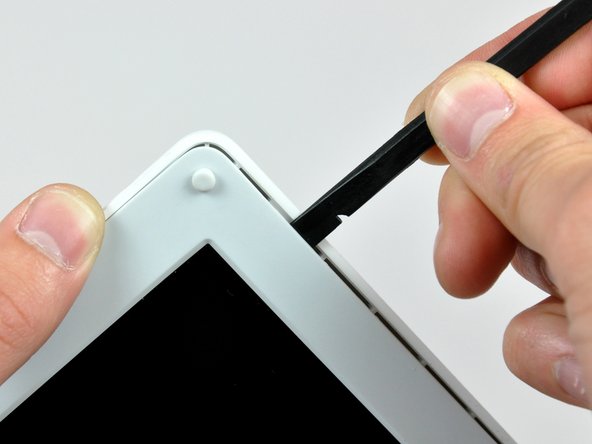
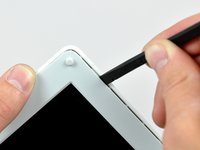
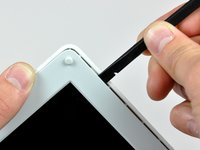
    • Insert the flat end of a spudger into the gap between the front and rear bezels.

    • Rotate your spudger until it is parallel to the front face of the display.

    • Run the spudger around the perimeter of the display to separate the rear bezel from its retaining clips.

    Pergunte ao FixBot
  50. iBook G3 12" Front Display Bezel Replacement: passo 50, imagem 1 %32
    • Lift the rear bezel off the display.

    Pergunte ao FixBot
  51. iBook G3 12" Front Display Bezel Replacement, LCD Cover: passo 51, imagem 1 %32
    • Remove the large piece of tape near the lower right corner of the display.

    Pergunte ao FixBot
  52. iBook G3 12" Front Display Bezel Replacement: passo 52, imagem 1 %32 iBook G3 12" Front Display Bezel Replacement: passo 52, imagem 2 %32
    • Remove the single screw inserted through the piece of EMI tape near the bottom edge of the display (it's the first of the two clutch cover screws).

    • Use the tip of a spudger to remove the small washer under the screw you just removed.

    Pergunte ao FixBot
  53. iBook G3 12" Front Display Bezel Replacement: passo 53, imagem 1 %32
    • Peel the aluminum/EMI tape as one piece off the cast aluminum frame of the clutch hinges.

    • It is not necessary to peel the tape off the thin steel LCD cover.

    Pergunte ao FixBot
  54. iBook G3 12" Front Display Bezel Replacement: passo 54, imagem 1 %32
    • Remove the pieces of readily removable tape from around the perimeter of the display.

    Pergunte ao FixBot
  55. iBook G3 12" Front Display Bezel Replacement: passo 55, imagem 1 %32 iBook G3 12" Front Display Bezel Replacement: passo 55, imagem 2 %32
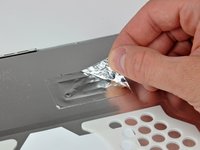
    • Remove the piece of aluminum tape near the center of the LCD cover.

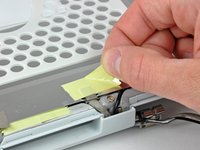
    • Peel back the piece of tape securing the display data cable ground loop to the thin steel LCD cover.

    Pergunte ao FixBot
  56. iBook G3 12" Front Display Bezel Replacement: passo 56, imagem 1 %32 iBook G3 12" Front Display Bezel Replacement: passo 56, imagem 2 %32
    • Remove the two Phillips screws securing each side of the LCD to the clutch hinge frame (four screws total).

    Pergunte ao FixBot
  57. iBook G3 12" Front Display Bezel Replacement: passo 57, imagem 1 %32
    • Lift the thin steel LCD cover off the LCD.

    Pergunte ao FixBot
  58. iBook G3 12" Front Display Bezel Replacement, Clutch Cover: passo 58, imagem 1 %32
    • Remove the second of the two Phillips screws securing the clutch cover to the cast aluminum frame of the clutch hinges.

    Pergunte ao FixBot
  59. iBook G3 12" Front Display Bezel Replacement: passo 59, imagem 1 %32 iBook G3 12" Front Display Bezel Replacement: passo 59, imagem 2 %32 iBook G3 12" Front Display Bezel Replacement: passo 59, imagem 3 %32
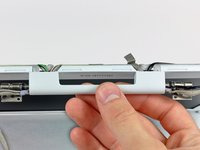
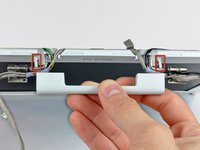
    • Pull the clutch cover away from the front of the display.

    • Keep track of the two covers that close the ends of the clutch cover. The third picture shows their correct orientation on the clutch cover.

    Pergunte ao FixBot
  60. iBook G3 12" Front Display Bezel Replacement, Display Data Cable: passo 60, imagem 1 %32
    • Remove the two pieces of tape over the display data/microphone cables near the lower edge of the display.

    Pergunte ao FixBot
  61. iBook G3 12" Front Display Bezel Replacement: passo 61, imagem 1 %32 iBook G3 12" Front Display Bezel Replacement: passo 61, imagem 2 %32
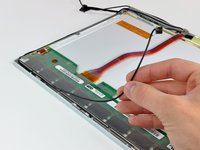
    • Use the tip of a spudger to lift the microphone out of the front bezel.

    • De-route the microphone cable from around the top and side of the display.

    Pergunte ao FixBot
  62. iBook G3 12" Front Display Bezel Replacement: passo 62, imagem 1 %32 iBook G3 12" Front Display Bezel Replacement: passo 62, imagem 2 %32
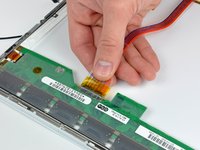
    • Disconnect the display data cable by pulling its connector away from the socket on the LCD.

    • Pull the connector parallel to the face of the LCD.

    • Remove the display data cable from the display.

    Pergunte ao FixBot
  63. iBook G3 12" Front Display Bezel Replacement, Inverter/AirPort Cables: passo 63, imagem 1 %32
    • Remove the two pieces of tape covering the inverter/AirPort cables along the lower edge of the display.

    Pergunte ao FixBot
  64. iBook G3 12" Front Display Bezel Replacement: passo 64, imagem 1 %32 iBook G3 12" Front Display Bezel Replacement: passo 64, imagem 2 %32
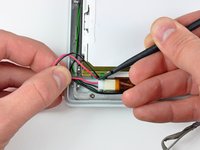
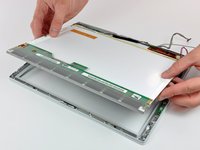
    • Use the flat end of a spudger to push the backlight connector while gently pulling its cables away from the socket on the inverter.

    • Lift the LCD out of the front bezel and set it aside.

    Pergunte ao FixBot
  65. iBook G3 12" Front Display Bezel Replacement: passo 65, imagem 1 %32 iBook G3 12" Front Display Bezel Replacement: passo 65, imagem 2 %32
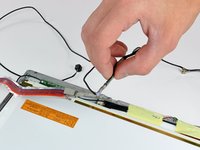
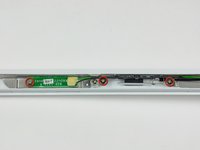
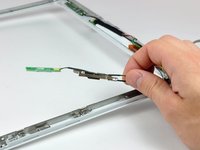
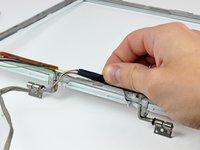
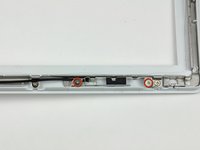
    • Remove the three Phillips screws securing the reed switch board and the AirPort antenna to the front bezel.

    • If you have a 1.33 GHz 12" G4 iBook, the reed switch board is located near the optical drive. Please skip to the next step.

    • De-route the reed switch/AirPort antenna cables around the side of the display.

    Pergunte ao FixBot
  66. iBook G3 12" Front Display Bezel Replacement: passo 66, imagem 1 %32 iBook G3 12" Front Display Bezel Replacement: passo 66, imagem 2 %32 iBook G3 12" Front Display Bezel Replacement: passo 66, imagem 3 %32
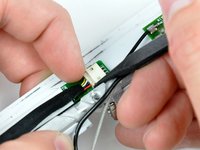
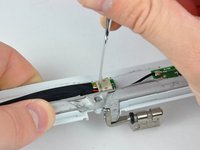
    • Gently peel the inverter cable ground strap off the cast aluminum frame of the clutch hinges.

    • While pulling the inverter cable away from its socket on the inverter board, use the tip of a spudger to push the connector out of its socket.

    • If the connector won't budge from its socket, insert a metal spudger or similar tool into the gap between the connector and its socket and twist to separate the two pieces.

    Pergunte ao FixBot
  67. iBook G3 12" Front Display Bezel Replacement: passo 67, imagem 1 %32 iBook G3 12" Front Display Bezel Replacement: passo 67, imagem 2 %32
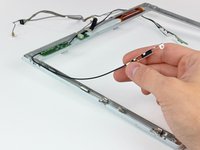
    • Remove the two Phillips screws securing the AirPort antenna to the front bezel.

    • De-route the AirPort antenna cable along the edge of the display.

    Pergunte ao FixBot
  68. iBook G3 12" Front Display Bezel Replacement: passo 68, imagem 1 %32 iBook G3 12" Front Display Bezel Replacement: passo 68, imagem 2 %32
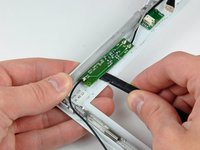
    • If you have a 1.33 GHz 12" G4 iBook, simply remove the Inverter/AirPort cables.

    • For all other models, use the flat end of a spudger to remove the antenna board from the front bezel.

    • The antenna board is very thin and delicate.

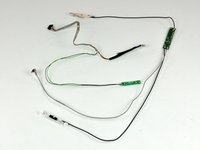
    • Remove the inverter/AirPort cables.

    Pergunte ao FixBot
  69. iBook G3 12" Front Display Bezel Replacement, Clutch Hinges: passo 69, imagem 1 %32 iBook G3 12" Front Display Bezel Replacement, Clutch Hinges: passo 69, imagem 2 %32
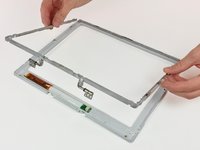
    • Remove the six Phillips screws securing the clutch hinges to the front display bezel.

    • Lift the clutch hinges off the front display bezel.

    Pergunte ao FixBot
  70. iBook G3 12" Front Display Bezel Replacement, Front Display Bezel: passo 70, imagem 1 %32 iBook G3 12" Front Display Bezel Replacement, Front Display Bezel: passo 70, imagem 2 %32
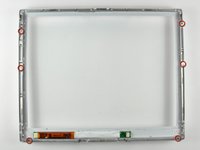
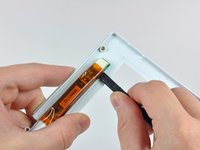
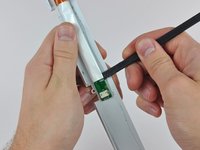
    • Insert the flat end of a spudger between the display inverter and the front display bezel near the center of the inverter.

    • Run the spudger along the length of the display inverter, separating it from the adhesive securing it to the front display bezel.

    • Lift the inverter out of the front display bezel.

    Pergunte ao FixBot
  71. iBook G3 12" Front Display Bezel Replacement: passo 71, imagem 1 %32
    • Front bezel remains.

    Pergunte ao FixBot
Conclusão

To reassemble your device, follow these instructions in reverse order.

Documentos anexados

0Comentários do guia

Comentar

Visualizações:

Últimas 24 horas: 2

Últimos 7 dias: 13

Últimos 30 dias: 89

Ao todo: 5,148