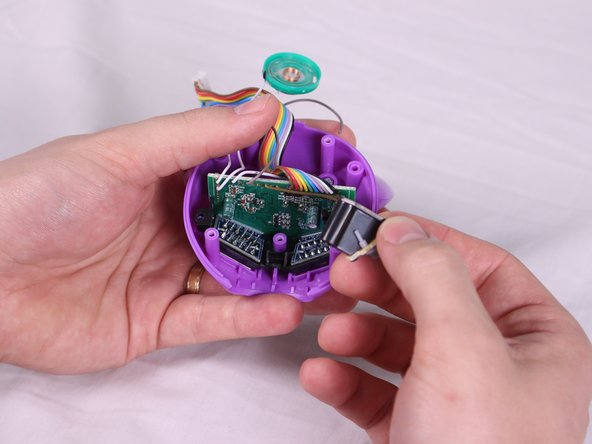
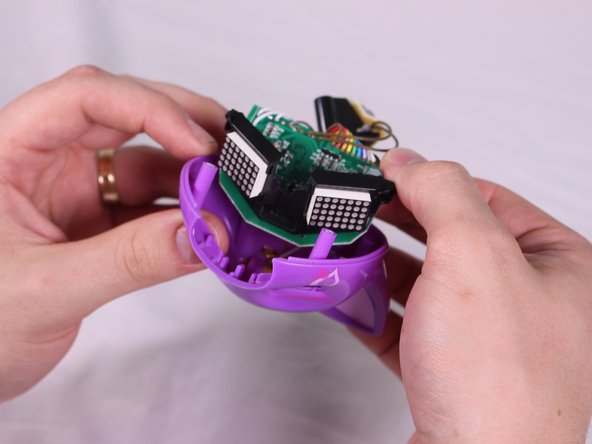
Ir para o conteúdo principal

Zoomer Meowzies Eyes/Motherboard Replacement

O que você precisa

  1. Zoomer Meowzies Eyes/Motherboard Replacement, Legs: passo 1, imagem 1 %32 Zoomer Meowzies Eyes/Motherboard Replacement, Legs: passo 1, imagem 2 %32 Zoomer Meowzies Eyes/Motherboard Replacement, Legs: passo 1, imagem 3 %32
    • Using the Triangle driver remove the four 7.5 mm screws.

    • The two front screws are deeper than the two on the back legs which may cause difficulties. These can be reached by putting the bit in first then carefully putting the driver on slightly (not all the way)

  2. Zoomer Meowzies Eyes/Motherboard Replacement: passo 2, imagem 1 %32 Zoomer Meowzies Eyes/Motherboard Replacement: passo 2, imagem 2 %32
    • Turn the device so that the the device is on its side.

    • Hold the back and belly on the device and gently pull apart.

    • Pulling with too much force might damage a few cables inside, so caution is needed.

  3. Zoomer Meowzies Eyes/Motherboard Replacement: passo 3, imagem 1 %32 Zoomer Meowzies Eyes/Motherboard Replacement: passo 3, imagem 2 %32 Zoomer Meowzies Eyes/Motherboard Replacement: passo 3, imagem 3 %32
    • With insides exposed, grab leg and gently pull up and away from the body to detach them. Repeat for all legs needed.

  4. Zoomer Meowzies Eyes/Motherboard Replacement, Head (Bottom): passo 4, imagem 1 %32 Zoomer Meowzies Eyes/Motherboard Replacement, Head (Bottom): passo 4, imagem 2 %32
    • Gently pry the ribbon cable from the connector.

  5. Zoomer Meowzies Eyes/Motherboard Replacement: passo 5, imagem 1 %32 Zoomer Meowzies Eyes/Motherboard Replacement: passo 5, imagem 2 %32 Zoomer Meowzies Eyes/Motherboard Replacement: passo 5, imagem 3 %32
    • Using a soldering Iron, carefully heat the solder point around the silver wire and pull gently until the wire lifts free.

    • The soldering iron and solder get very hot, so caution is advised to avoid touching either directly.

    • This step may be skipped but if so care must be taken to not accidentally pull the wire from the contact. Skipping this step will limit the amount or room that is available to work with.

  6. Zoomer Meowzies Eyes/Motherboard Replacement: passo 6, imagem 1 %32 Zoomer Meowzies Eyes/Motherboard Replacement: passo 6, imagem 2 %32 Zoomer Meowzies Eyes/Motherboard Replacement: passo 6, imagem 3 %32
    • Take the upper half of the device in hand.

    • Using the Philips #1 driver remove the two 9.5mm screws.

    • Remove the purple square collar around the neck of the device.

    • The wires can prove difficult to get through the opening in the collar. Move wires through the opening carefully.

  7. Zoomer Meowzies Eyes/Motherboard Replacement: passo 7, imagem 1 %32 Zoomer Meowzies Eyes/Motherboard Replacement: passo 7, imagem 2 %32
    • Turn the device so that it is on its side.

    • Holding the device's head and back in each hand, pull apart to separate the head from the body.

    • Pull the wires through and manipulate carefully as needed to get them through and completely detach head.

  8. Zoomer Meowzies Eyes/Motherboard Replacement: passo 8, imagem 1 %32 Zoomer Meowzies Eyes/Motherboard Replacement: passo 8, imagem 2 %32
    • Turn the head upside-down so that ears are facing down, and locate the four screws around the underside of the device's head.

    • Use the Triangle screwdriver to remove the four 7.5mm screws.

  9. Zoomer Meowzies Eyes/Motherboard Replacement: passo 9, imagem 1 %32 Zoomer Meowzies Eyes/Motherboard Replacement: passo 9, imagem 2 %32 Zoomer Meowzies Eyes/Motherboard Replacement: passo 9, imagem 3 %32
    • Hold the top and bottom halves of the head in each hand separately and gently pull away from each other to separate both halves.

  10. Zoomer Meowzies Eyes/Motherboard Replacement, Eyes/Motherboard: passo 10, imagem 1 %32 Zoomer Meowzies Eyes/Motherboard Replacement, Eyes/Motherboard: passo 10, imagem 2 %32 Zoomer Meowzies Eyes/Motherboard Replacement, Eyes/Motherboard: passo 10, imagem 3 %32
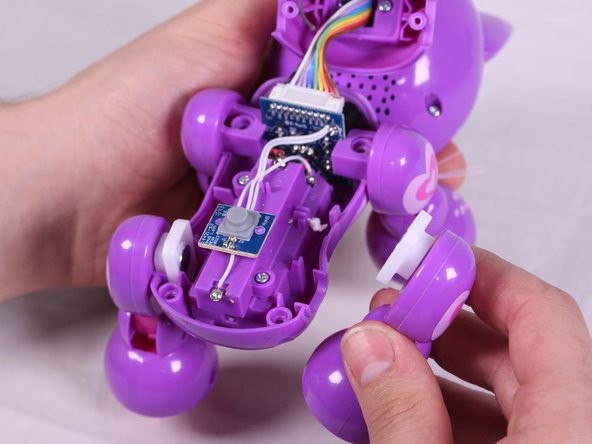
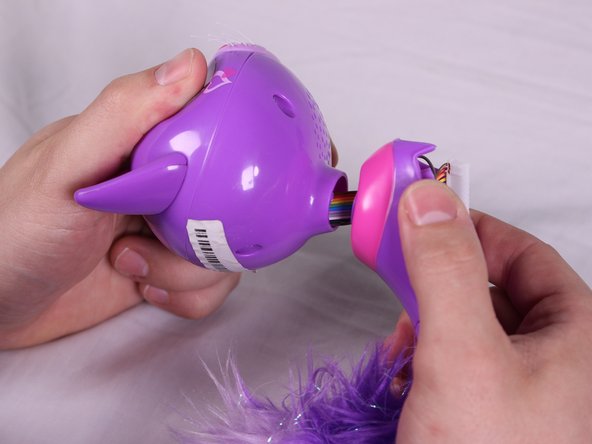
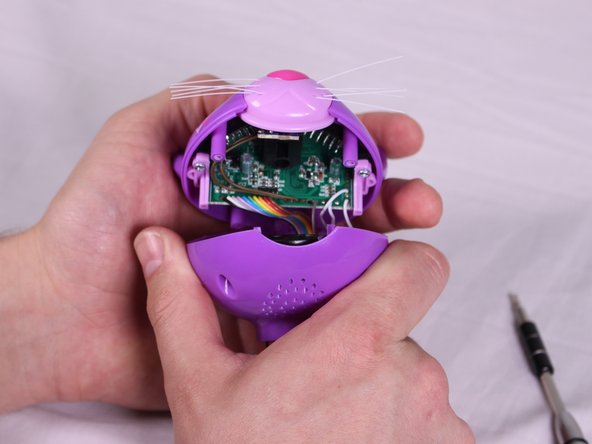
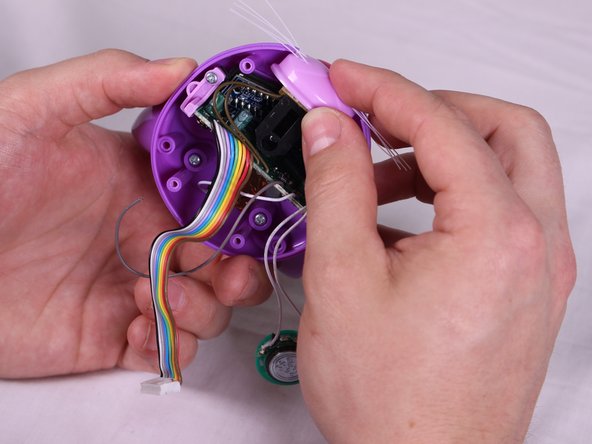
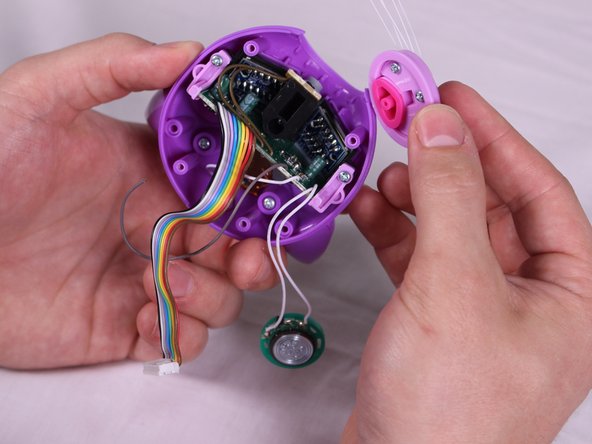
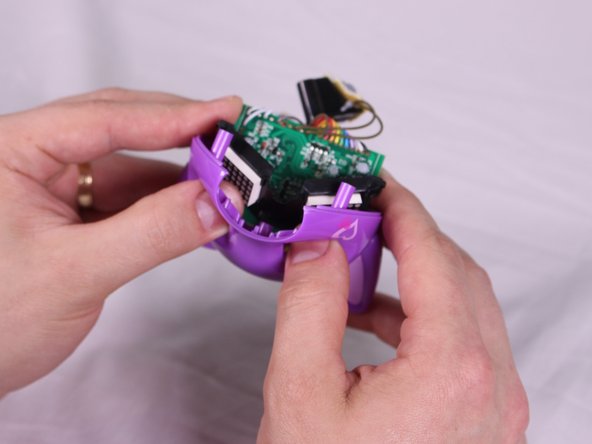
    • With the top half of the head in hand, push the nose in and away from the rest of the head to remove the nose.

  11. Zoomer Meowzies Eyes/Motherboard Replacement: passo 11, imagem 1 %32 Zoomer Meowzies Eyes/Motherboard Replacement: passo 11, imagem 2 %32
    • Using a soldering iron, de-solder the wire from the gold contact sheet.

    • The soldering iron is very hot, so caution is advised in order to avoid burns to the body.

  12. Zoomer Meowzies Eyes/Motherboard Replacement: passo 12, imagem 1 %32 Zoomer Meowzies Eyes/Motherboard Replacement: passo 12, imagem 2 %32
    • Using the Phillips #1 driver, remove the two 9.5mm screws located on either sides of the head near the ears.

    • The pink brackets are not attached to the screws but will likely come out with the screws. Take care to ensure that the brackets do not get lost.

  13. Zoomer Meowzies Eyes/Motherboard Replacement: passo 13, imagem 1 %32 Zoomer Meowzies Eyes/Motherboard Replacement: passo 13, imagem 2 %32 Zoomer Meowzies Eyes/Motherboard Replacement: passo 13, imagem 3 %32
    • Using the Phillips #1 driver, remove the 7.0mm screw holding the contact in place.

    • Pulling lightly on the contact, remove it and its brace from the motherboard.

  14. Zoomer Meowzies Eyes/Motherboard Replacement: passo 14, imagem 1 %32 Zoomer Meowzies Eyes/Motherboard Replacement: passo 14, imagem 2 %32 Zoomer Meowzies Eyes/Motherboard Replacement: passo 14, imagem 3 %32
    • With the head in hand, place thumbs on the screens and press gently inside and upwards to lift the screen and motherboard out from the head.

Conclusão

To reassemble your device, follow these instructions in reverse order.

Mitchell Gentry

Membro desde: 02/14/18

675 Reputação

Autoria de 6 guias

Equipe

USF Tampa, Team S6-G2, Eyestone Spring 2018 Membro de USF Tampa, Team S6-G2, Eyestone Spring 2018

USFT-EYESTONE-S18S6G2

Membros da 3

Autoria de 16 guias

0 comentários

Adicione um comentário

Exibir estatísticas:

Últimas 24 horas: 0

Últimos 7 dias: 0

Últimos 30 dias: 3

Duração total: 238