Ir para o conteúdo principal
ZD-N Plus Wireless Controller LB and RB Buttons Replacement

ZD-N Plus Wireless Controller LB and RB Buttons Replacement

Nick Aproff

Nick Aproff e 3 outros colaboradores

Última atualização em January 3, 2020

8 minutos
Moderado
Precisa de mais images

Introdução

Ir para o passo 1

This guide is created to explain how to replace the LB and RB buttons on your ZD-N208 Plus Wireless Controller. Bumpers can be found on eBay for $3.00.

O que você precisa

Ferramentas

Exibir mais…

  1. ZD-N Plus Wireless Controller LB and RB Buttons Replacement, Back Panel: passo 1, imagem 1 %32
    • Remove the seven 12mm JIS #00 screws that hold the back panel in place.

  2. ZD-N Plus Wireless Controller LB and RB Buttons Replacement: passo 2, imagem 1 %32 ZD-N Plus Wireless Controller LB and RB Buttons Replacement: passo 2, imagem 2 %32
    • Lift up on the back panel of the ZD-N Plus to remove it from the rest of the controller.

  3. ZD-N Plus Wireless Controller LB and RB Buttons Replacement, Battery: passo 3, imagem 1 %32
    • Use an opening tool to pry the battery from its original position.

    • The battery is glued on, so this may take some effort.

  4. ZD-N Plus Wireless Controller LB and RB Buttons Replacement: passo 4, imagem 1 %32 ZD-N Plus Wireless Controller LB and RB Buttons Replacement: passo 4, imagem 2 %32
    • Use an opening tool to pry the connector away from the two metallic prongs.

    • The parts are built to stay together, so this may take some effort.

    • Be careful to not warp the prongs in the process.

  5. ZD-N Plus Wireless Controller LB and RB Buttons Replacement: passo 5, imagem 1 %32 ZD-N Plus Wireless Controller LB and RB Buttons Replacement: passo 5, imagem 2 %32
    • Remove the battery from the controller.

  6. ZD-N Plus Wireless Controller LB and RB Buttons Replacement, Rumble Motor: passo 6, imagem 1 %32 ZD-N Plus Wireless Controller LB and RB Buttons Replacement, Rumble Motor: passo 6, imagem 2 %32
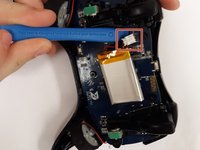
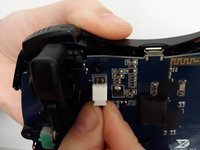
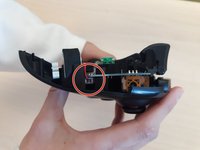
    • Remove the electrical connector attaching each rumble motor to the controller.

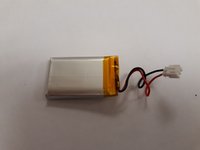
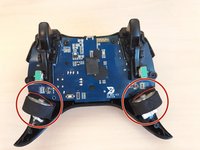
    • Lift up on the circular section of the rumble to remove it from the controller.

  7. ZD-N Plus Wireless Controller LB and RB Buttons Replacement, Motherboard: passo 7, imagem 1 %32 ZD-N Plus Wireless Controller LB and RB Buttons Replacement, Motherboard: passo 7, imagem 2 %32
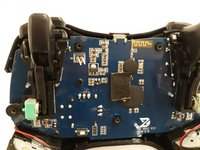
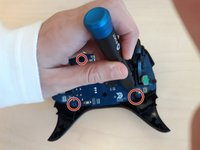
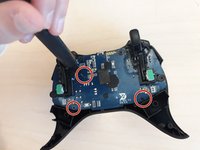
    • Remove the three 1.2mm JIS #00 screws that hold the motherboard in place.

  8. ZD-N Plus Wireless Controller LB and RB Buttons Replacement: passo 8, imagem 1 %32
    • Lift the motherboard out of the controller.

  9. ZD-N Plus Wireless Controller LB and RB Buttons Replacement, LB and RB Buttons: passo 9, imagem 1 %32
    • The LB/RB buttons can be easily pulled from the top of the controller.

Conclusão

To reassemble your device, follow these instructions in reverse order.

Uma outra pessoa concluiu este guia.

0Comentários do guia

Comentar

Visualizações:

Últimas 24 horas: 0

Últimos 7 dias: 7

Últimos 30 dias: 25

Ao todo: 467