Ir para o conteúdo principal

Yamaha APX-6N Guitar Strings Replacement

O que você precisa

  1. Yamaha APX-6N Guitar Strings Replacement, Guitar strings: passo 1, imagem 1 %32
    • Loosen the guitar strings by turning the tuning pegs counter clockwise.

  2. Yamaha APX-6N Guitar Strings Replacement: passo 2, imagem 1 %32
    • To avoid injury, assure strings are loosened before cutting.

    • Once the strings are loose, cut them using the wire cutters.

    • After strings have been cut, remove them by pulling them out of the tuners and the bottom of the bridge.

  3. Yamaha APX-6N Guitar Strings Replacement: passo 3, imagem 1 %32 Yamaha APX-6N Guitar Strings Replacement: passo 3, imagem 2 %32
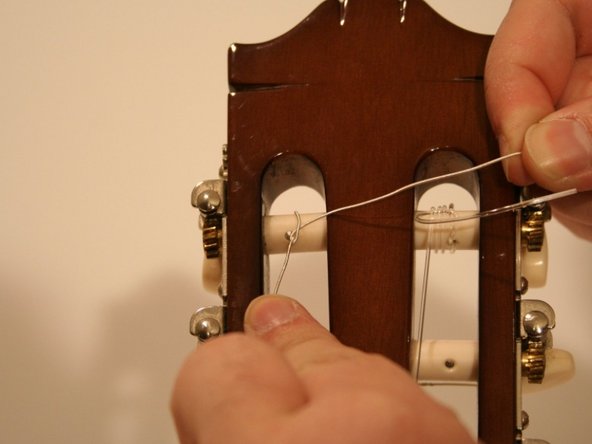
    • Insert the end of the string through the middle of the bridge until four inches comes through.

    • Wrap the short end of the string around the long end, making a loop.

    • Put the short end of the string through the loop around three to four times.

    • Pull both ends of the string until the knot is tight.

  4. Yamaha APX-6N Guitar Strings Replacement: passo 4, imagem 1 %32 Yamaha APX-6N Guitar Strings Replacement: passo 4, imagem 2 %32
    • Insert the end of the string into the hole on the correct tuning peg.

    • Pull the end over the tuning peg and loop under the string. Then push the end of the string under the loop.

    • Put the end of the string through the loop and pull both ends until the knot is tight.

  5. Yamaha APX-6N Guitar Strings Replacement: passo 5, imagem 1 %32 Yamaha APX-6N Guitar Strings Replacement: passo 5, imagem 2 %32
    • Repeat Step 4 for all other strings. Strings should be placed in the tuning pegs in clockwise order. Refer to string packaging for more details.

  6. Yamaha APX-6N Guitar Strings Replacement: passo 6, imagem 1 %32
    • Turn the tuning pegs clockwise to tighten each string until the string makes a sound when plucked.

    • Do not overtighten the strings! Strings may snap and lead to injury.

  7. Yamaha APX-6N Guitar Strings Replacement: passo 7, imagem 1 %32
    • After all strings have been replaced, tune the guitar to your desired tuning.

    • Check the headstock and the bridge for any loose string ends.

    • If necessary, use the wire cutters to snip off excess string.

    • The ends of the strings are very sharp.

Conclusão

You now have new strings for your guitar!

Benjamin

Membro desde: 05/10/21

145 Reputação

Autoria de 1 guia

0 comentários

Adicione um comentário

Exibir estatísticas:

Últimas 24 horas: 0

Últimos 7 dias: 1

Últimos 30 dias: 13

Duração total: 264