Introdução
This is a guide for the disassembly of the Xiaomi Redmi Note 3.
While not necessary, to complete this disassembly, folks are encouraged to have basic knowledge on the workings of phone electronics.
O que você precisa
-
-
Locate the sim card tray at the right side of the phone
-
Insert the metal needle sim tool into the tray hole to eject the tray and pull it out
-
-
-
Insert your thumb in between the back panel and the front of phone and slowly follow along the edges to separate the two pieces
-
-
-
Remove the plastic connector that links the battery with the motherboard by gently prying the ends of the connector from each side of the phone
-
-
-
Pull the black tab at the top left of the battery to disconnect the battery from the system
-
-
-
Wedge the tweezers under the battery to lift it up
-
Remove as much as adhesive as needed to lift the battery from phone using tweezers or fingers
-
-
-
-
Use the screwdriver to unscrew the speaker at the bottom back of the phone. There are five screws around the edges of the speaker
-
-
-
Remove the loud speaker cover using the tweezers to expose the daughterboard
-
-
-
Remove the two gold tabs on the two top corners of the daughterboard
-
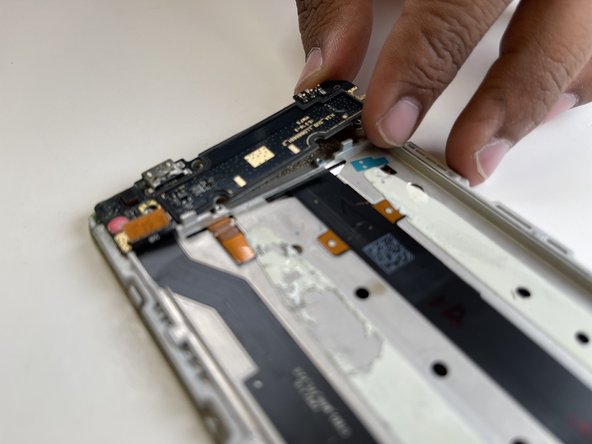
Pry the daughterboard open with the tweezers or pull it out using your fingers
-
-
-
Unscrew the four screws at the top of the motherboard and pop up the top cover
-
-
-
Pull the tab that’s holding the front camera to remove the camera protector
-
-
-
Remove the five connectors of the motherboard using tweezers or your fingers
-
-
-
Remove the remaining four screws as your work down to the bottom to loosen the motherboard
-


To reassemble your device, follow these instructions in reverse order.
To reassemble your device, follow these instructions in reverse order.
Equipe

Group 2 Eng Communications Membro de Group 2 Eng Communications
Community
Membros da 4
1 Guia de autoria