Ir para o conteúdo principal
Participe da comunidade de reparos - Criar conta

Xelio P900A-BK Screen Replacement

O que você precisa

  1. Xelio P900A-BK Screen Replacement, Screen: passo 1, imagem 1 %32
    • Remove the two bottom screws.

    • The two bottom screws have a 2.44mm wide tops and are 5.44mm.

    Pergunte ao FixBot

    Comentar

  2. Xelio P900A-BK Screen Replacement: passo 2, imagem 1 %32 Xelio P900A-BK Screen Replacement: passo 2, imagem 2 %32
    • Slide the spludger between the screen's rolled edge and the back of the tablet and pry apart carefully. Expect the tablet screen to make a cracking sound.

    • Slide the spudger in the slit all the way around the perimeter of the tablet to fully separate the screen.

    Pergunte ao FixBot

    Comentar

  3. Xelio P900A-BK Screen Replacement: passo 3, imagem 1 %32
    • Once the screen has fully separated from the back of the tablet, gently lift up the edges to remove the screen.

    Pergunte ao FixBot

    Comentar

  4. Xelio P900A-BK Screen Replacement: passo 4, imagem 1 %32 Xelio P900A-BK Screen Replacement: passo 4, imagem 2 %32
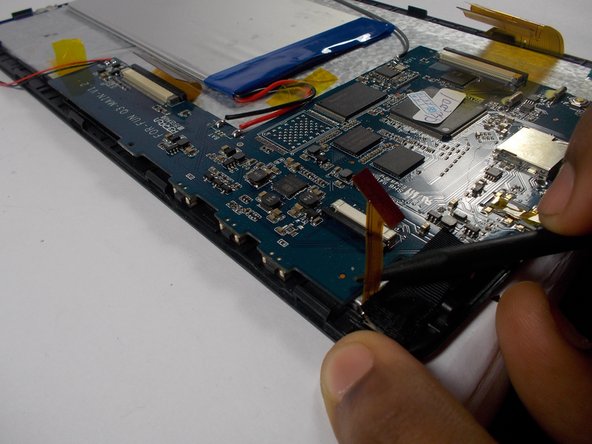
    • Next, disconnect the front facing camera ribbon (shown). The ribbon is held to the motherboard by a small bar.

    • Using the spudger to pry open the bar, pull the ribbon out to disconnect it.

    Pergunte ao FixBot

    Comentar

  5. Xelio P900A-BK Screen Replacement: passo 5, imagem 1 %32 Xelio P900A-BK Screen Replacement: passo 5, imagem 2 %32
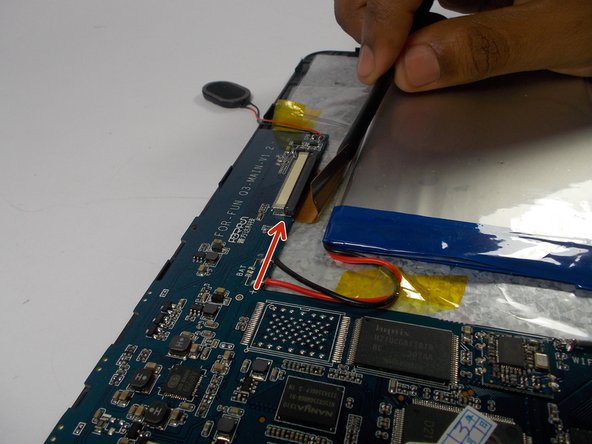
    • Next, work on disconnecting the ribbon for the touch screen.

    • The touch screen ribbon is larger than the camera ribbon and is located on the left side of motherboard.

    • Using the spudger, gently pry the ribbon out from under the bar. Pull the ribbon and disconnect it from the motherboard.

    Pergunte ao FixBot

    Comentar

  6. Xelio P900A-BK Screen Replacement: passo 6, imagem 1 %32 Xelio P900A-BK Screen Replacement: passo 6, imagem 2 %32 Xelio P900A-BK Screen Replacement: passo 6, imagem 3 %32
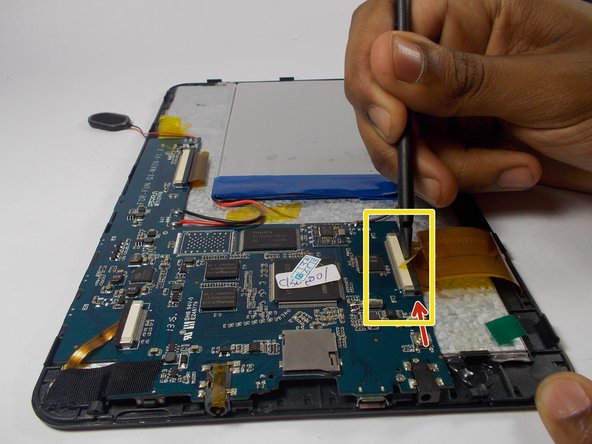
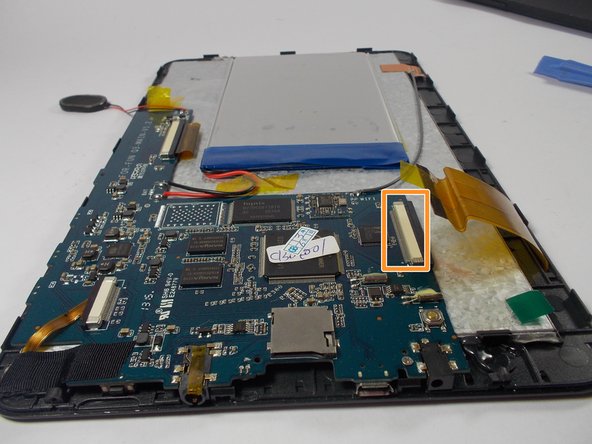
    • Next, work to disconnect the LCD screen ribbon.

    • This ribbon is located on the right side of the motherboard.

    • The ribbon is connected to the motherboard by a small bar. Using the spudger, pry the bar apart and slide the ribbon out.

    Pergunte ao FixBot

    Comentar

  7. Xelio P900A-BK Screen Replacement: passo 7, imagem 1 %32 Xelio P900A-BK Screen Replacement: passo 7, imagem 2 %32 Xelio P900A-BK Screen Replacement: passo 7, imagem 3 %32
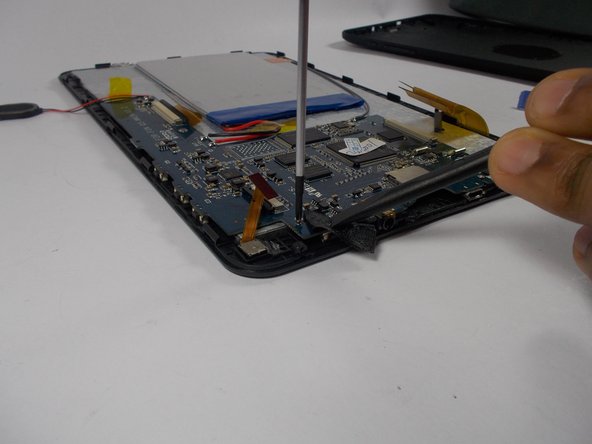
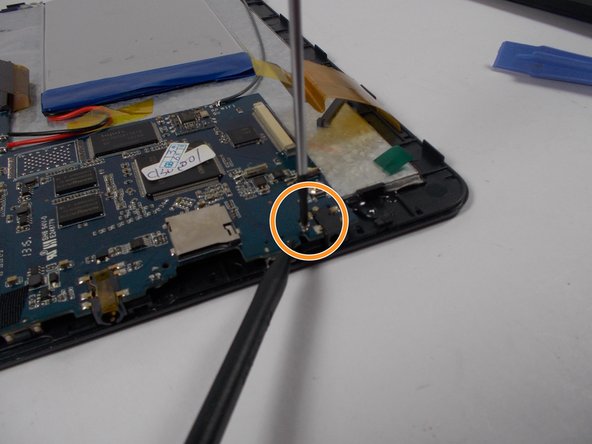
    • Remove the two motherboard screws.

    • To remove the first screw, expose the black strip. Then using a Philips head screwdriver, remove the first screw.

    • Locate the second screw by looking to the bottom right of the motherboard. Remove the second screw with the Philips head screwdriver.

    Pergunte ao FixBot

    Comentar

  8. Xelio P900A-BK Screen Replacement: passo 8, imagem 1 %32 Xelio P900A-BK Screen Replacement: passo 8, imagem 2 %32
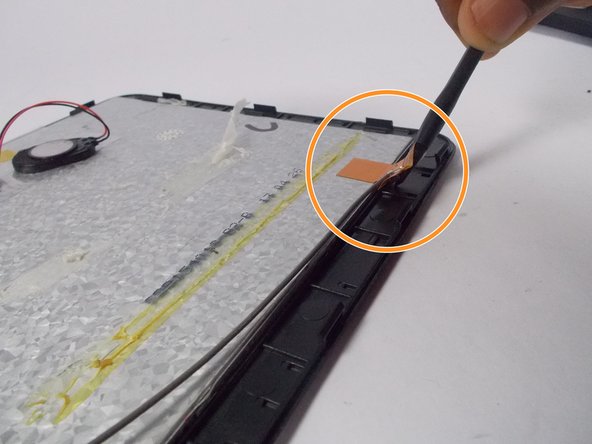
    • Locate the last connection to the LCD in the top right section of the tablet.

    • The last connection is a ribbon connected to green wire, which is held down by tape.

    • Disconnect the ribbon by removing the tape connecting it to the plastic frame of the tablet.

    Pergunte ao FixBot

    Comentar

  9. Xelio P900A-BK Screen Replacement: passo 9, imagem 1 %32
    • With the spudger, pry the LCD screen from the plastic screen holder.

    • Use gentle, but firm force to pry the LCD away from the holder.

    Pergunte ao FixBot

    Comentar

  10. Xelio P900A-BK Screen Replacement: passo 10, imagem 1 %32
    • Work the spudger all the way around until the LCD is free from the screen holder.

    Pergunte ao FixBot

    Comentar

  11. Xelio P900A-BK Screen Replacement: passo 11, imagem 1 %32
    • Finally, lift the LCD off, removing it from the screen holder and the motherboard.

    Pergunte ao FixBot

    Comentar

Conclusão

To reassemble your device, follow these instructions in reverse order.

Cancelar: não concluí este guia.

Uma outra pessoa concluiu este guia.

Marcus Nelson

Membro desde: 03/26/15

307 Reputação

Autoria de 3 guias

Equipe

0Comentários do guia

Comentar

Visualizações:

Últimas 24 horas: 0

Últimos 7 dias: 2

Últimos 30 dias: 13

Ao todo: 658