Esta versão pode conter edições incorretas. Mude para o último instantâneo verificado.
O que você precisa
-
Este passo não foi traduzido. Ajude a traduzi-lo
-
Position the iFixit Opening Tool's riveted edge in between the top and bottom cover of the plastic enclosure.
-
Apply downward pressure on the iFixit Opening Tool until the security clip unlocks.
-
Repeat on different points of the plastic enclosure until the bottom cover is removed.
-
-
Este passo não foi traduzido. Ajude a traduzi-lo
-
Remove the six 50 mm green screws (labeled F1-F6) from the metal chassis using a Torx 10 screwdriver.
-
-
Este passo não foi traduzido. Ajude a traduzi-lo
-
Apply pressure to peel off the sides of the casing.
-
Separate the metal chassis from the top cover, lifting the back of the chassis up and away from the top cover.
-
-
Este passo não foi traduzido. Ajude a traduzi-lo
-
Flip the metal enclosure so that the fan cover is on top.
-
-
-
Este passo não foi traduzido. Ajude a traduzi-lo
-
Remove the two 15mm screws from the front panel using the Torx T8 screwdriver.
-
-
Este passo não foi traduzido. Ajude a traduzi-lo
-
Remove the two 10mm screws, labeled C3 and C4, attaching the plastic hard drive case to the metal chassis with the Torx T10 Security screwdriver.
-
-
Este passo não foi traduzido. Ajude a traduzi-lo
-
Lift the hard drive and the black plastic casing from the chassis.
-
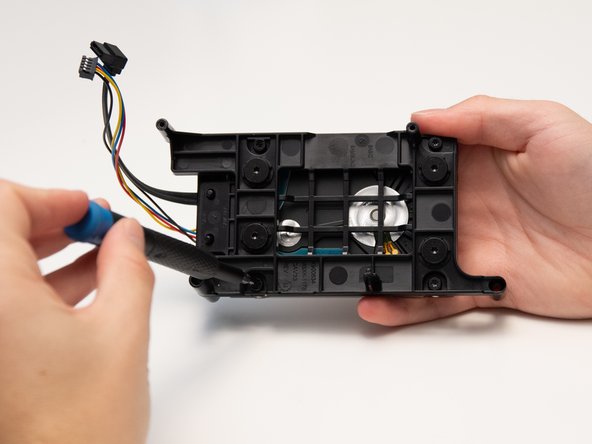
Remove the two sets of wires from the motherboard by gently pulling them directly upward.
-
-
Este passo não foi traduzido. Ajude a traduzi-lo
-
Remove the four 10mm screws attaching the hard drive to the plastic casing with the Torx T8 Security screwdriver.
-
-
Este passo não foi traduzido. Ajude a traduzi-lo
-
Carefully remove the hard drive from its plastic case.
-
-
Este passo não foi traduzido. Ajude a traduzi-lo
-
Carefully remove the black wire connection from the hard drive by gently pulling away from the hard drive.
-


Cancelar: não concluí este guia.
13 outras pessoas executaram este guia.

Equipe

Cal Poly, Team S12-G6, Regan Fall 2019 Membro de Cal Poly, Team S12-G6, Regan Fall 2019
CPSU-REGAN-F19S12G6
Membros da 4
Autoria de 26 guias