Ir para o conteúdo principal
Participe da comunidade de reparos - Criar conta

Xbox 360 Wireless Controller Front Case Replacement

O que você precisa

  1. Xbox 360 Wireless Controller Front Case Replacement, Battery: passo 1, imagem 1 %32 Xbox 360 Wireless Controller Front Case Replacement, Battery: passo 1, imagem 2 %32
    • Depress the battery release button on the top of the controller.

    • Remove the battery holder from the controller.

    • The standard option for Xbox 360 Wireless Controllers Battery Packs is AA batteries. A rechargeable battery is also available, but both battery options are removed from the controller in the same way.

    Pergunte ao FixBot
  2. Xbox 360 Wireless Controller Front Case Replacement, Rear Case: passo 2, imagem 1 %32
    Ferramenta utilizada neste passo:
    Tweezers
    $4.99
    • Use a pair of tweezers to peel the barcode sticker from the battery compartment.

    Pergunte ao FixBot
  3. Xbox 360 Wireless Controller Front Case Replacement: passo 3, imagem 1 %32
    • Remove the seven 9.3 mm T8 Security Torx screws securing the rear case to the front case.

    Pergunte ao FixBot
  4. Xbox 360 Wireless Controller Front Case Replacement: passo 4, imagem 1 %32 Xbox 360 Wireless Controller Front Case Replacement: passo 4, imagem 2 %32
    Ferramenta utilizada neste passo:
    Spudger
    $2.99
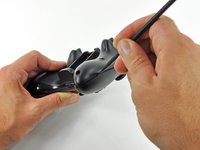
    • Insert a Spudger between the front and rear cases along the left edge of the controller.

    • Rotate the spudger toward the front of the controller, prying the two cases apart.

    Pergunte ao FixBot
  5. Xbox 360 Wireless Controller Front Case Replacement: passo 5, imagem 1 %32 Xbox 360 Wireless Controller Front Case Replacement: passo 5, imagem 2 %32
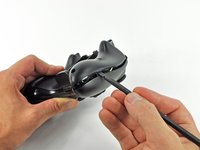
    • Insert a spudger between the front and rear cases, near the headphone jack.

    • Rotate the spudger toward the front of the controller to pry the two cases apart.

    Pergunte ao FixBot
  6. Xbox 360 Wireless Controller Front Case Replacement: passo 6, imagem 1 %32 Xbox 360 Wireless Controller Front Case Replacement: passo 6, imagem 2 %32
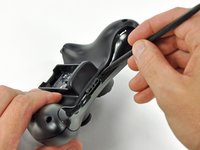
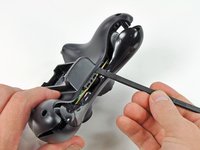
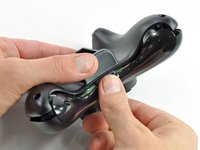
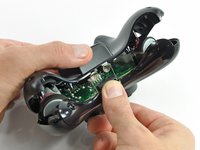
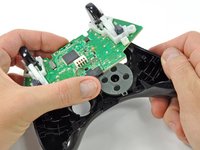
    • Grasp the controller by the battery compartment and the headphone jack.

    • Lift the battery compartment away from the headphone jack, separating the rear case from the front case and logic board.

    • The battery contact springs are held in place by slots in the battery housing in the rear case. Be sure to realign them properly during reassembly.

    Pergunte ao FixBot
  7. Xbox 360 Wireless Controller Front Case Replacement, Vibration Motors: passo 7, imagem 1 %32 Xbox 360 Wireless Controller Front Case Replacement, Vibration Motors: passo 7, imagem 2 %32
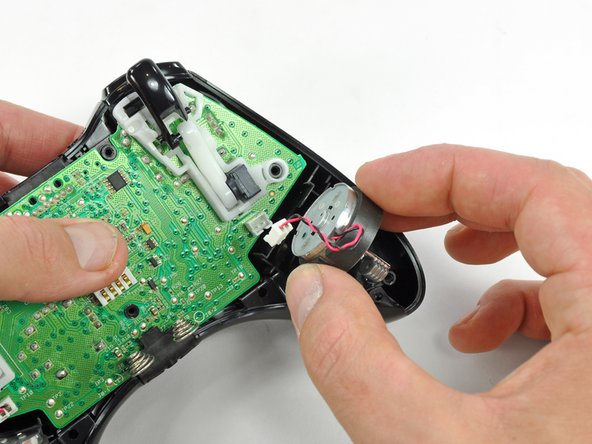
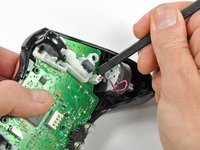
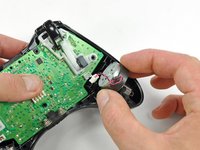
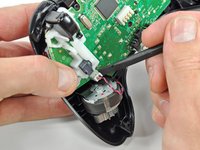
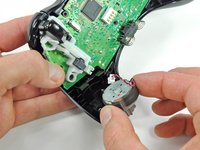
    • Use the flat end of a spudger to remove the vibration motor cable, moving it upward from its socket on the logic board.

    • Lift the vibration motor out of the front case.

    Pergunte ao FixBot
  8. Xbox 360 Wireless Controller Front Case Replacement: passo 8, imagem 1 %32 Xbox 360 Wireless Controller Front Case Replacement: passo 8, imagem 2 %32
    • Remove the vibration motor from the other side of the controller using the same method previously described.

    • The left motor has significantly more counterweight than the right motor.

    Pergunte ao FixBot
  9. Xbox 360 Wireless Controller Front Case Replacement, Logic Board: passo 9, imagem 1 %32 Xbox 360 Wireless Controller Front Case Replacement, Logic Board: passo 9, imagem 2 %32
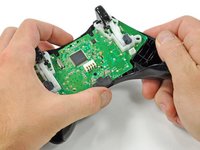
    • Lifting from the headphone jack and power plug, remove the logic board from the front case.

    Pergunte ao FixBot
  10. Xbox 360 Wireless Controller Front Case Replacement, Bottom Panel: passo 10, imagem 1 %32 Xbox 360 Wireless Controller Front Case Replacement, Bottom Panel: passo 10, imagem 2 %32
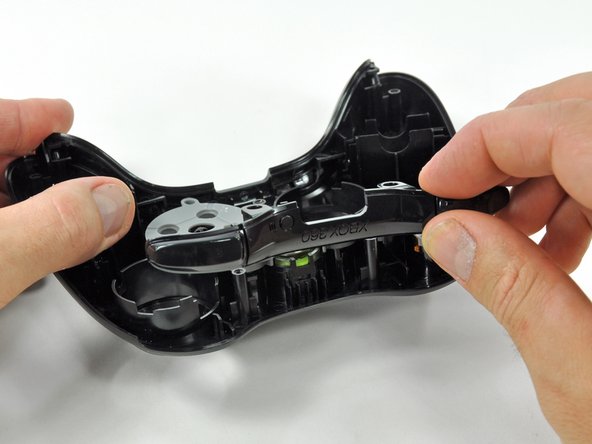
    • Lift the bumper panel off of the front case.

    Pergunte ao FixBot
  11. Xbox 360 Wireless Controller Front Case Replacement: passo 11, imagem 1 %32
    • Remove the rubber pad from the back of the D-pad.

    Pergunte ao FixBot
  12. Xbox 360 Wireless Controller Front Case Replacement: passo 12, imagem 1 %32
    • Remove the two 7.0 mm silver Phillips screws from the back of the D-pad.

    Pergunte ao FixBot
  13. Xbox 360 Wireless Controller Front Case Replacement: passo 13, imagem 1 %32 Xbox 360 Wireless Controller Front Case Replacement: passo 13, imagem 2 %32
    Ferramenta utilizada neste passo:
    Tweezers
    $4.99
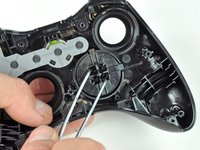
    • The D-pad is secured to its backing by two diagonal clips, shown in red.

    • Use a pair of tweezers and squeeze the clips together to release the D-pad from its backing.

    Pergunte ao FixBot
  14. Xbox 360 Wireless Controller Front Case Replacement: passo 14, imagem 1 %32 Xbox 360 Wireless Controller Front Case Replacement: passo 14, imagem 2 %32
    • Lift the D-pad backing out of its compartment on the front case.

    • The D-pad remains below the front case.

    • The D-pad will fall once its backing is removed. Be sure to support it as you remove the backing.

    • The backing is slotted to its compartment to ensure that it will always be aligned properly.

    Pergunte ao FixBot
  15. Xbox 360 Wireless Controller Front Case Replacement: passo 15, imagem 1 %32
    • Remove the rubber pad from the back of the input buttons.

    Pergunte ao FixBot
  16. Xbox 360 Wireless Controller Front Case Replacement: passo 16, imagem 1 %32 Xbox 360 Wireless Controller Front Case Replacement: passo 16, imagem 2 %32
    • Using a pair or tweezers, remove the following buttons from the front panel:

    • A Button

    • B Button

    • X Button

    • Y Button

    • Start Button

    • Select Button

    • Guide Button

    Pergunte ao FixBot
  17. Xbox 360 Wireless Controller Front Case Replacement: passo 17, imagem 1 %32
    • Using a pair of tweezers, remove the LED ring from the front panel.

    Pergunte ao FixBot
  18. Xbox 360 Wireless Controller Front Case Replacement: passo 18, imagem 1 %32 Xbox 360 Wireless Controller Front Case Replacement: passo 18, imagem 2 %32 Xbox 360 Wireless Controller Front Case Replacement: passo 18, imagem 3 %32
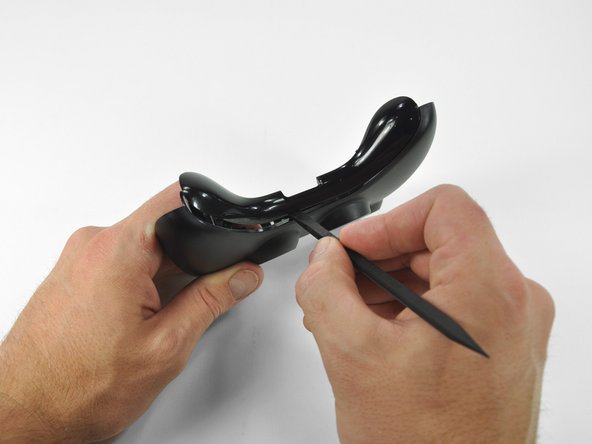
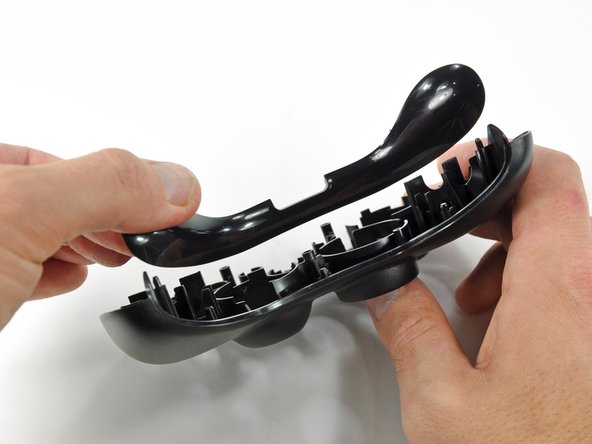
    • Insert a spudger between the lower panel and front case.

    • Slide the spudger along the gap between the two case components.

    • Lift the lower panel off of the front case.

    Pergunte ao FixBot
Conclusão

To reassemble your device, follow these instructions in reverse order.

19 outras pessoas executaram este guia.

Brett Hartt

Membro desde: 04/12/10

132.073 Reputação

Autoria de 144 guias

Equipe

iFixit Membro de iFixit

Staff

123 Membros

Autoria de 25.704 guias

0Comentários do guia

Comentar

Visualizações:

Últimas 24 horas: 5

Últimos 7 dias: 18

Últimos 30 dias: 114

Ao todo: 13,988