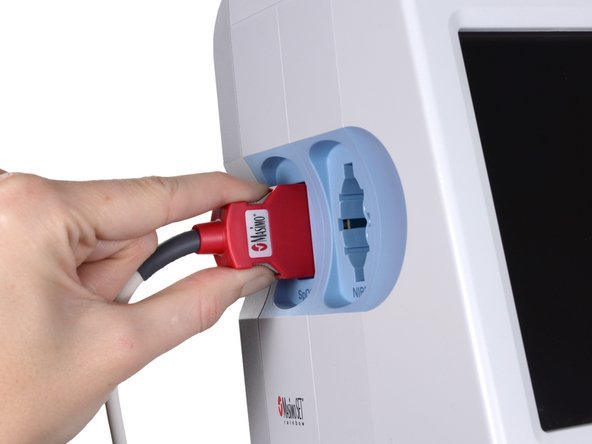
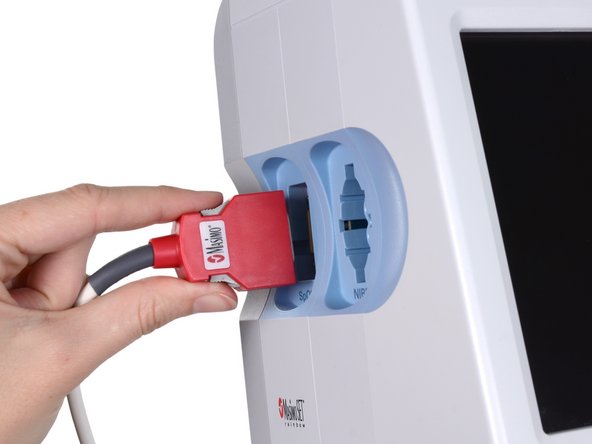
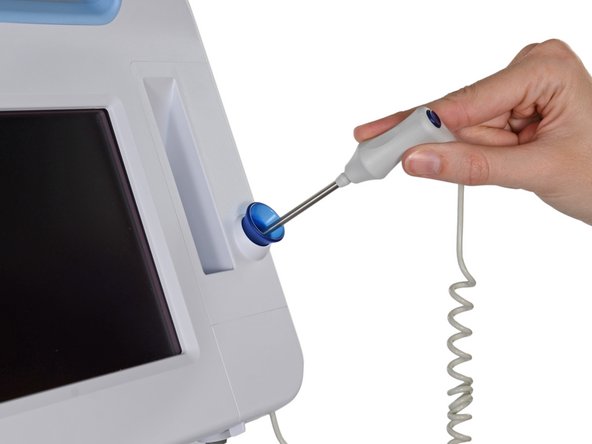
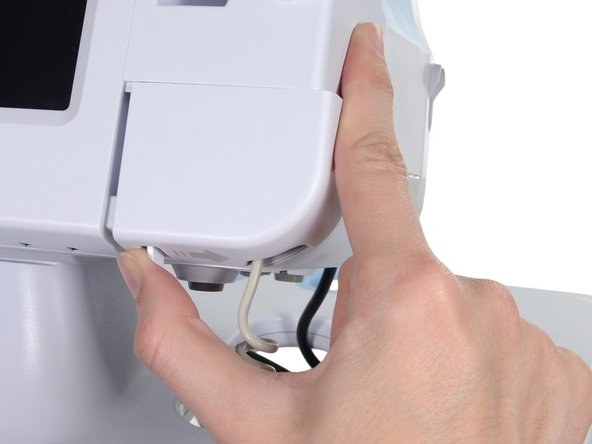
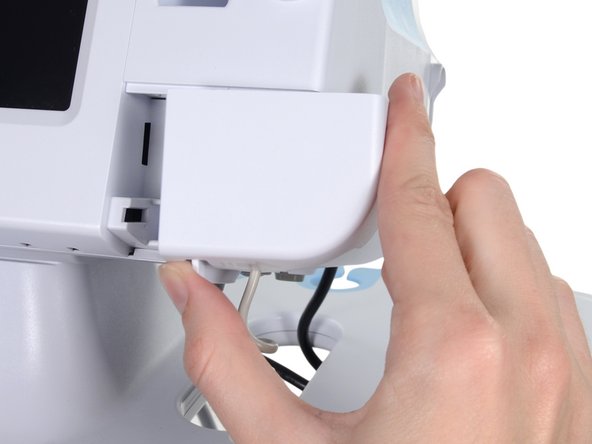
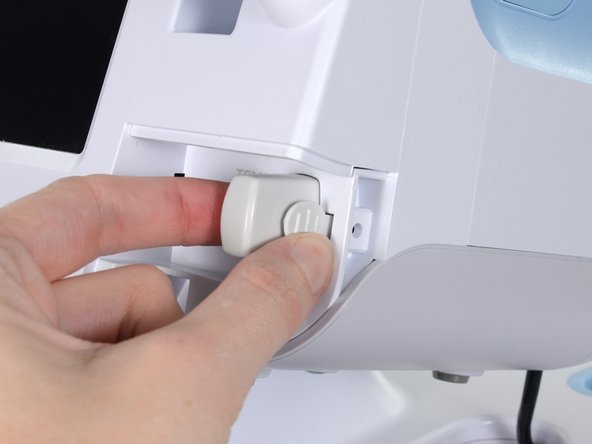
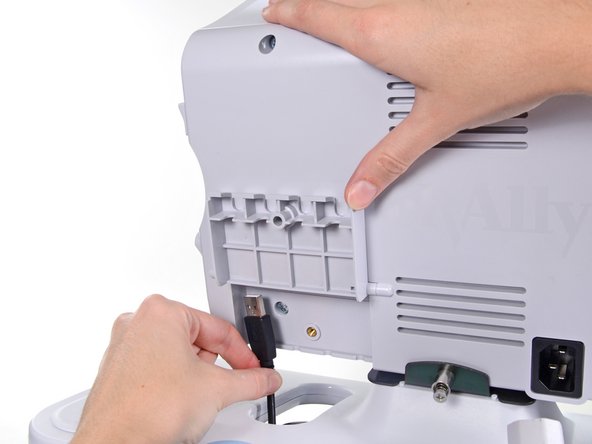
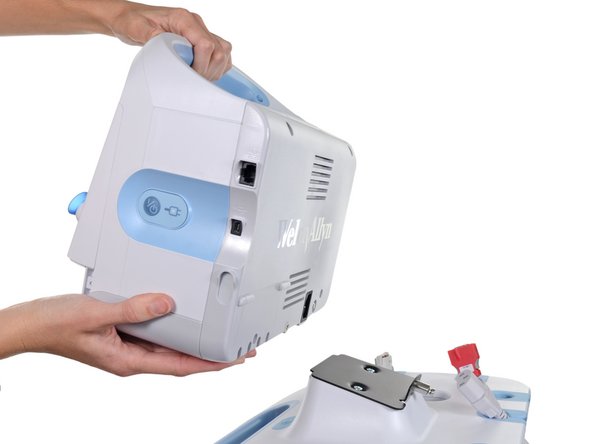
Ir para o conteúdo principal

Welch Allyn Connex Vital Signs Monitor 6000 Stand Replacement

O que você precisa

  1. Welch Allyn Connex Vital Signs Monitor 6000 Stand Replacement, Stand: passo 1, imagem 1 %32 Welch Allyn Connex Vital Signs Monitor 6000 Stand Replacement, Stand: passo 1, imagem 2 %32
    • Unplug the AC power connection cable.

  2. Welch Allyn Connex Vital Signs Monitor 6000 Stand Replacement: passo 2, imagem 1 %32 Welch Allyn Connex Vital Signs Monitor 6000 Stand Replacement: passo 2, imagem 2 %32 Welch Allyn Connex Vital Signs Monitor 6000 Stand Replacement: passo 2, imagem 3 %32
    • Place your thumb and forefinger on the blood pressure (NIBP) hose connector. Squeeze the side tabs until the connector releases.

    • Always grasp the hose by the connector. Do not pull on the hose itself.

    • Pull the connector away from the connector port.

  3. Welch Allyn Connex Vital Signs Monitor 6000 Stand Replacement: passo 3, imagem 1 %32 Welch Allyn Connex Vital Signs Monitor 6000 Stand Replacement: passo 3, imagem 2 %32 Welch Allyn Connex Vital Signs Monitor 6000 Stand Replacement: passo 3, imagem 3 %32
    • Place your thumb and forefinger on the Pulse oximetry (SpO2 or combined SpO2/SpHb) cable connector. Squeeze the side tabs until the connector releases.

    • Always grasp the cable by the connector. Do not pull on the cable itself.

    • Pull the connector away from the connector port.

  4. Welch Allyn Connex Vital Signs Monitor 6000 Stand Replacement: passo 4, imagem 1 %32 Welch Allyn Connex Vital Signs Monitor 6000 Stand Replacement: passo 4, imagem 2 %32
    • Grasp the temperature probe and pull it up to remove it from the monitor.

  5. Welch Allyn Connex Vital Signs Monitor 6000 Stand Replacement: passo 5, imagem 1 %32 Welch Allyn Connex Vital Signs Monitor 6000 Stand Replacement: passo 5, imagem 2 %32 Welch Allyn Connex Vital Signs Monitor 6000 Stand Replacement: passo 5, imagem 3 %32
    • Remove the cover of the temperature module by pressing the tab and sliding the cover to the right.

  6. Welch Allyn Connex Vital Signs Monitor 6000 Stand Replacement: passo 6, imagem 1 %32 Welch Allyn Connex Vital Signs Monitor 6000 Stand Replacement: passo 6, imagem 2 %32 Welch Allyn Connex Vital Signs Monitor 6000 Stand Replacement: passo 6, imagem 3 %32
    • Depress the spring tab on the temperature probe cable connector and withdraw it from the probe port.

  7. Welch Allyn Connex Vital Signs Monitor 6000 Stand Replacement: passo 7, imagem 1 %32
    • Remove the flathead screw on the USB networking door.

    • Loosen the captive Phillips #2 screw securing the monitor to the stand.

  8. Welch Allyn Connex Vital Signs Monitor 6000 Stand Replacement: passo 8, imagem 1 %32
    • Holding the monitor securely, open the USB networking door.

    • You may have to lift the monitor slightly to allow the door to swing out from the stand mount.

  9. Welch Allyn Connex Vital Signs Monitor 6000 Stand Replacement: passo 9, imagem 1 %32 Welch Allyn Connex Vital Signs Monitor 6000 Stand Replacement: passo 9, imagem 2 %32
    • Detach any accessory USB cables from USB ports on the monitor.

  10. Welch Allyn Connex Vital Signs Monitor 6000 Stand Replacement: passo 10, imagem 1 %32 Welch Allyn Connex Vital Signs Monitor 6000 Stand Replacement: passo 10, imagem 2 %32 Welch Allyn Connex Vital Signs Monitor 6000 Stand Replacement: passo 10, imagem 3 %32
    • Slide the monitor off of the stand tray.

Conclusão

To reassemble your device, follow these instructions in reverse order.

Sam Goldheart

Membro desde: 10/18/12

465.656 Reputação

Autoria de 538 guias

Equipe

iFixit Membro de iFixit

Staff

Membros da 135

Autoria de 16.734 guias

0 comentários

Adicione um comentário

Exibir estatísticas:

Últimas 24 horas: 0

Últimos 7 dias: 1

Últimos 30 dias: 2

Duração total: 861