Introdução
The sealing is situated between tank and machine. You can easily see if it´s not watertight.
O que você precisa
-
-
The instructions are suitable for nearly every model of Jura and similar ones e.g. AEG and Krups.
-
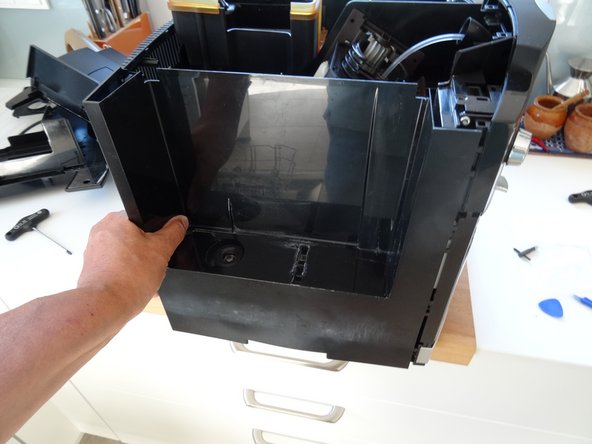
Remove the water reservoir.
-
-
-
Using an oval head bit you can screw them out. If you haven´t got one you can carefully use pliers. It is a good idea to later change the screws for normal ones.
-
Beneath both top side covers are two Torx T15 screws. Remove those. Now lift off the whole top cover. Sometimes it jams and you have to use a bit of force.
-
The side covers must be pushed backwards by about 1 cm. Sometimes this is a little bit difficult to move. If necessary, wedge a plastic opening tool into the gap between the side covers and the front panel. The rear cover can be easily removed.
-
-
-
-
The support of the sealing is secured by a screw, mostly Tx 15.
-
On the left and right side are notches, open them and raise the support.
-
Turn it upside down.
-
-
-
Press both plastic rivets with tiers, then push them out. The cover of the sealing is free.
-
Change sealings. The old one was black, the new one red.
-
Attach cover
-


Now follow the steps in reverse direction.
Now follow the steps in reverse direction.
Cancelar: não concluí este guia.
4 outras pessoas executaram este guia.
Um agradecimento especial a esses tradutores:
100%
VauWeh está nos ajudando a consertar o mundo! Quer contribuir?
Comece a traduzir ›
Equipe

Repair is War on Entropy Membro de Repair is War on Entropy
Community
Membros da 26
Autoria de 1.186 guias