Ir para o conteúdo principal

WRS315SDHW Start Relay Assembly Replacement

O que você precisa

  1. WRS315SDHW Start Relay Assembly Replacement, Safety precautions: passo 1, imagem 1 %32
    • Before you begin your repair, perform the following:

    • Turn off your main water supply

    • Unplug your device

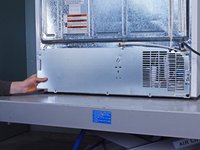
  2. WRS315SDHW Start Relay Assembly Replacement, Unfasten the rear panel: passo 2, imagem 1 %32 WRS315SDHW Start Relay Assembly Replacement, Unfasten the rear panel: passo 2, imagem 2 %32 WRS315SDHW Start Relay Assembly Replacement, Unfasten the rear panel: passo 2, imagem 3 %32
    • Use a 1/4 inch socket wrench, or a flathead screwdriver, to remove the seven 16.2 mm-long screws securing the rear panel.

    • Use a 1/4 inch socket wrench to loosen the screw securing the water hose enough for the rear panel to freely move.

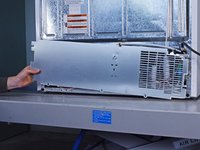
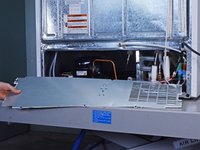
  3. WRS315SDHW Start Relay Assembly Replacement, Remove the rear panel: passo 3, imagem 1 %32 WRS315SDHW Start Relay Assembly Replacement, Remove the rear panel: passo 3, imagem 2 %32 WRS315SDHW Start Relay Assembly Replacement, Remove the rear panel: passo 3, imagem 3 %32
    • Pull the rear panel off the chassis to remove it.

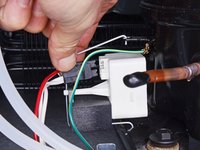
  4. WRS315SDHW Start Relay Assembly Replacement, Disconnect the start relay assembly: passo 4, imagem 1 %32 WRS315SDHW Start Relay Assembly Replacement, Disconnect the start relay assembly: passo 4, imagem 2 %32 WRS315SDHW Start Relay Assembly Replacement, Disconnect the start relay assembly: passo 4, imagem 3 %32
    • Use a flathead screwdriver, or a similar tool, to disconnect the connector attached to the start relay assembly.

  5. WRS315SDHW Start Relay Assembly Replacement, Unclip the start relay assembly: passo 5, imagem 1 %32 WRS315SDHW Start Relay Assembly Replacement, Unclip the start relay assembly: passo 5, imagem 2 %32 WRS315SDHW Start Relay Assembly Replacement, Unclip the start relay assembly: passo 5, imagem 3 %32
    • Pull the metal clip out its hole in the top of the start relay assembly.

    • Rest the clip next to the assembly.

  6. WRS315SDHW Start Relay Assembly Replacement, Remove the start relay assembly: passo 6, imagem 1 %32 WRS315SDHW Start Relay Assembly Replacement, Remove the start relay assembly: passo 6, imagem 2 %32 WRS315SDHW Start Relay Assembly Replacement, Remove the start relay assembly: passo 6, imagem 3 %32
    • Pull the start relay assembly straight off its prongs in the chassis.

    • Remove the start relay assembly.

    • The assembly consists of the start capacitor, start relay, and overload relay.

Conclusão

To reassemble your device, follow these instructions in reverse order.

Take your e-waste to an R2 or e-Stewards certified recycler.

Repair didn’t go as planned? Ask our Answers community for help.

nicO

Membro desde: 04/14/15

15.927 Reputação

Autoria de 88 guias

Equipe

Global Fixers Membro de Global Fixers

Community

Membros da 35

Autoria de 603 guias

0 comentários

Adicione um comentário

Exibir estatísticas:

Últimas 24 horas: 0

Últimos 7 dias: 0

Últimos 30 dias: 6

Duração total: 93