Introdução
Use this guide to replace the dispenser assembly in your Whirlpool WRS315SDHW Refrigerator.
The dispenser assembly controls how your ice and water is dispensed out of your refrigerator. If your refrigerator is not dispensing properly, then the dispenser assembly might be broken.
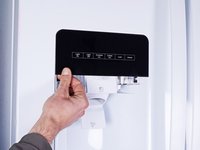
Note: Some photos show the doors removed for clarity purposes. Removing them is not required and will not change the procedure.
O que você precisa
-
-
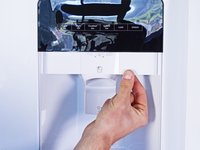
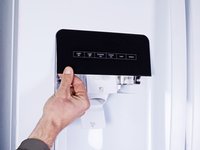
Use a 1/4 inch socket wrench to remove the two 15.6 mm-long screws securing the two dispenser panels.
-
-
-
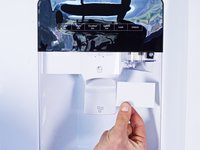
Pull the dispenser panels straight down to separate them from the chassis.
-
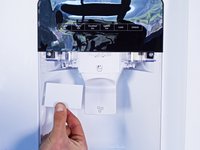
Remove the dispenser panels.
-
-
-
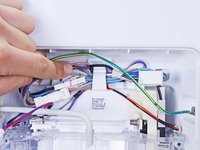
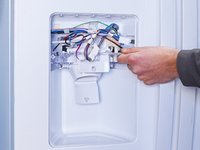
Use a 1/4 inch socket wrench to remove the two 15.6 mm-long screws securing the control board.
-
-
-
-
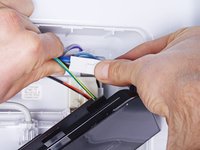
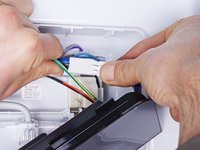
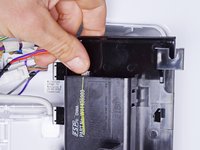
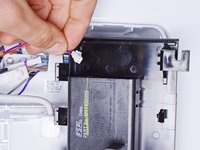
Disconnect the large connector attached to the right edge of the control board.
-
-
-
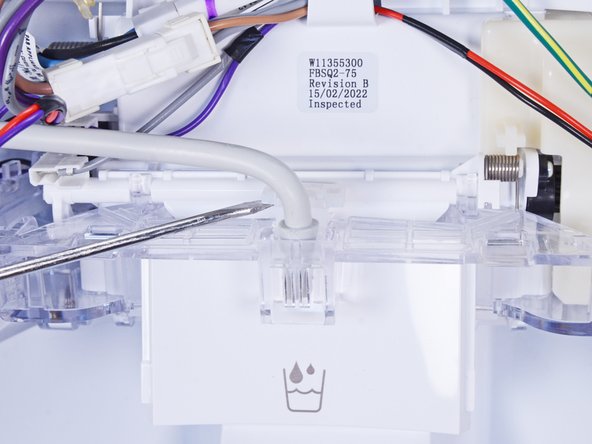
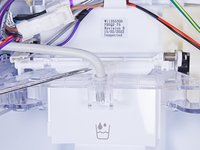
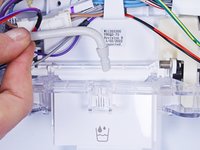
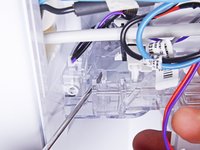
Use a flathead screwdriver, or a similar tool, to pry up the plastic clip securing the water hose.
-
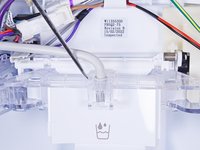
Remove the plastic clip.
-
-
-
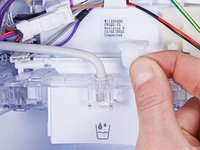
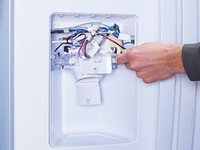
Use a flathead screwdriver, or a similar tool, to pry up the water hose enough to grip it with your fingers.
-
Pull the water hose straight up to disconnect it.
-
-
-
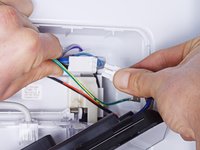
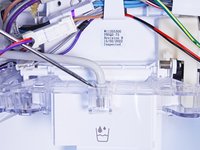
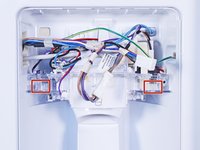
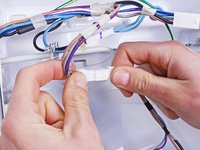
Reposition the cables so they lay in front of the top plastic clip.
-
-
-
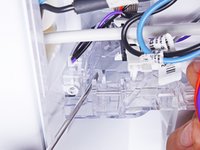
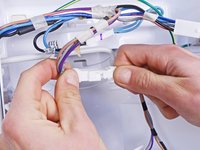
Use a flathead screwdriver, or a similar tool, to press the plastic clip toward the dispenser assembly.
-
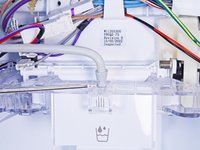
Repeat for the other plastic clip to completely separate the dispenser assembly from the chassis.
-
-
-
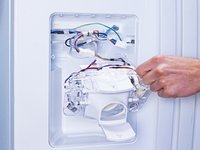
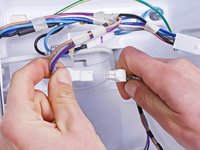
Pull the dispenser assembly away from the chassis enough to access its connectors.
-
-
-
Disconnect the connector attached to the dispenser assembly.
-


To reassemble your device, follow these instructions in reverse order.
Take your e-waste to an R2 or e-Stewards certified recycler.
Repair didn’t go as planned? Ask our Answers community for help.
Cancelar: não concluí este guia.
Uma outra pessoa concluiu este guia.
