Ir para o conteúdo principal

Voluas VL001 Motor Assembly Gears Replacement

O que você precisa

  1. Voluas VL001 Motor Assembly Gears Replacement, Storage Tank: passo 1, imagem 1 %32 Voluas VL001 Motor Assembly Gears Replacement, Storage Tank: passo 1, imagem 2 %32 Voluas VL001 Motor Assembly Gears Replacement, Storage Tank: passo 1, imagem 3 %32
    • Remove the lid to the storage tank by using the latch and lifting off.

    • Grab the food storage tank on both sides. Depress the tabs that say "Push" on them and lift the tank off.

  2. Voluas VL001 Motor Assembly Gears Replacement, Battery: passo 2, imagem 1 %32 Voluas VL001 Motor Assembly Gears Replacement, Battery: passo 2, imagem 2 %32 Voluas VL001 Motor Assembly Gears Replacement, Battery: passo 2, imagem 3 %32
    • Place your pet feeder upside down.

    • Squeeze the lock and remove the battery cover.

    • Remove the three 1.5V D alkaline batteries.

  3. Voluas VL001 Motor Assembly Gears Replacement, Housing: passo 3, imagem 1 %32 Voluas VL001 Motor Assembly Gears Replacement, Housing: passo 3, imagem 2 %32 Voluas VL001 Motor Assembly Gears Replacement, Housing: passo 3, imagem 3 %32
    • Insert a metal spudger under the adhesive part of each rubber foot.

    • Pry the foot off.

  4. Voluas VL001 Motor Assembly Gears Replacement: passo 4, imagem 1 %32 Voluas VL001 Motor Assembly Gears Replacement: passo 4, imagem 2 %32
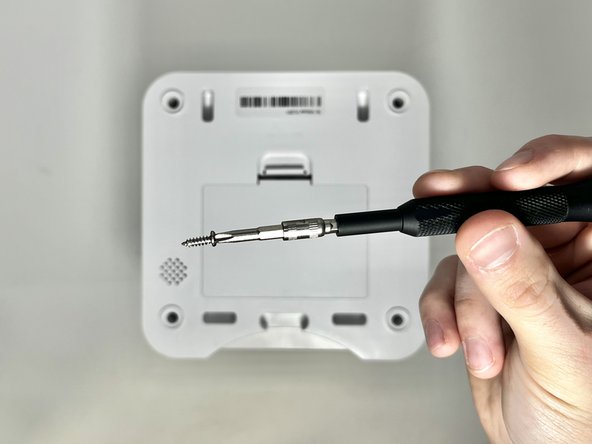
    • Remove four screws from the corners of the device using a Phillips #2 screwdriver.

    • These holes were previously covered by the rubber feet.

    • Using the magnetic tip of the screwdriver, carefully lift the screw out of the hole.

  5. Voluas VL001 Motor Assembly Gears Replacement: passo 5, imagem 1 %32
    • Turn the device over so it is oriented right-side up.

    • Lift the top part of the feeder off, exposing the mechanisms that run the feeder.

  6. Voluas VL001 Motor Assembly Gears Replacement, Motor Assembly Gears: passo 6, imagem 1 %32 Voluas VL001 Motor Assembly Gears Replacement, Motor Assembly Gears: passo 6, imagem 2 %32 Voluas VL001 Motor Assembly Gears Replacement, Motor Assembly Gears: passo 6, imagem 3 %32
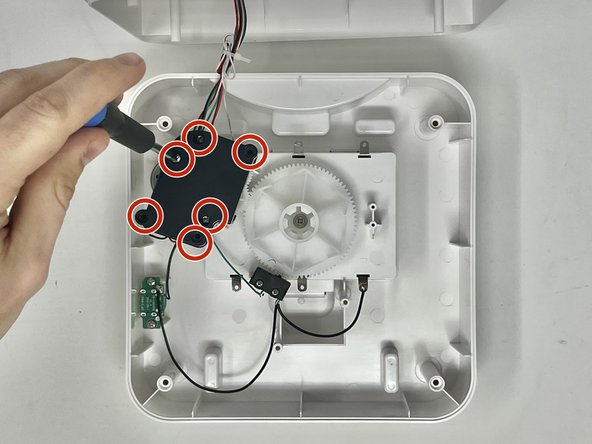
    • Using a Phillips #2 screwdriver, remove the six screws that hold the motor housing on to the device.

  7. Voluas VL001 Motor Assembly Gears Replacement: passo 7, imagem 1 %32
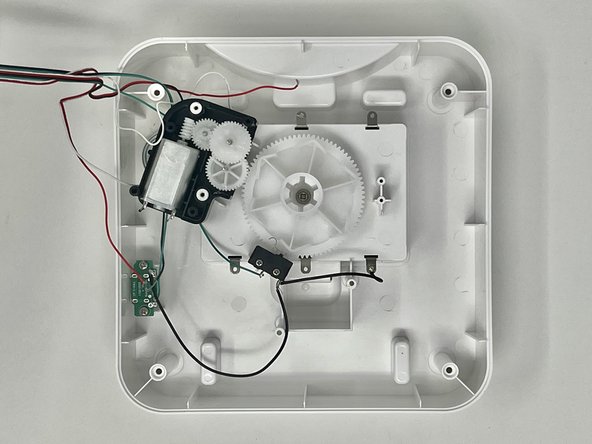
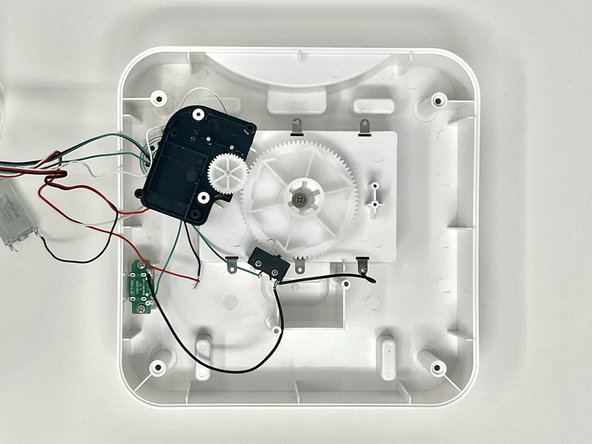
    • Lift the electric motor from its housing and move it aside.

  8. Voluas VL001 Motor Assembly Gears Replacement: passo 8, imagem 1 %32 Voluas VL001 Motor Assembly Gears Replacement: passo 8, imagem 2 %32
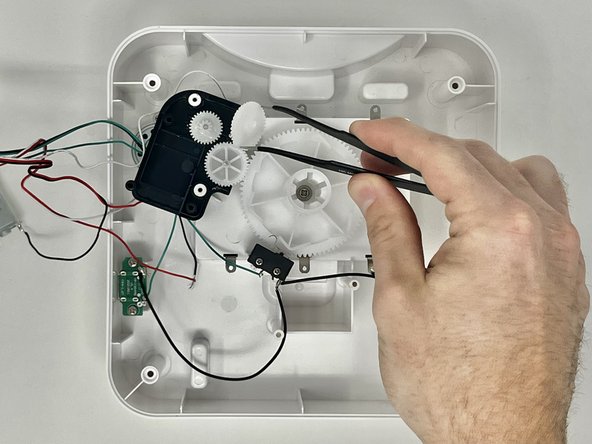
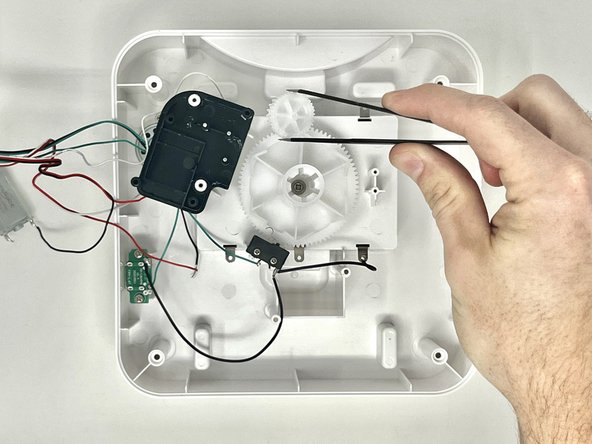
    • Use the tweezers to remove the first gear that is placed on top.

  9. Voluas VL001 Motor Assembly Gears Replacement: passo 9, imagem 1 %32 Voluas VL001 Motor Assembly Gears Replacement: passo 9, imagem 2 %32
    • Use the tweezers to gently remove the second gear.

  10. Voluas VL001 Motor Assembly Gears Replacement: passo 10, imagem 1 %32 Voluas VL001 Motor Assembly Gears Replacement: passo 10, imagem 2 %32
    • Use the tweezers to gently remove the third gear.

Conclusão

To reassemble your device, follow these instructions in reverse order.

Jade Thomson

Membro desde: 01/30/24

699 Reputação

Autoria de 6 guias

Equipe

0 comentários

Adicione um comentário

Exibir estatísticas:

Últimas 24 horas: 0

Últimos 7 dias: 0

Últimos 30 dias: 0

Duração total: 32