Ir para o conteúdo principal

VTech Touch and Swipe Baby Phone Touchscreen Contact Cleaning

O que você precisa

  1. VTech Touch and Swipe Baby Phone Touchscreen Contact Cleaning, Battery: passo 1, imagem 1 %32 VTech Touch and Swipe Baby Phone Touchscreen Contact Cleaning, Battery: passo 1, imagem 2 %32
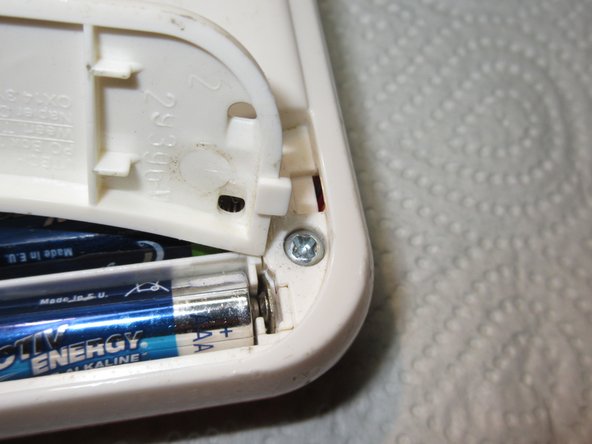
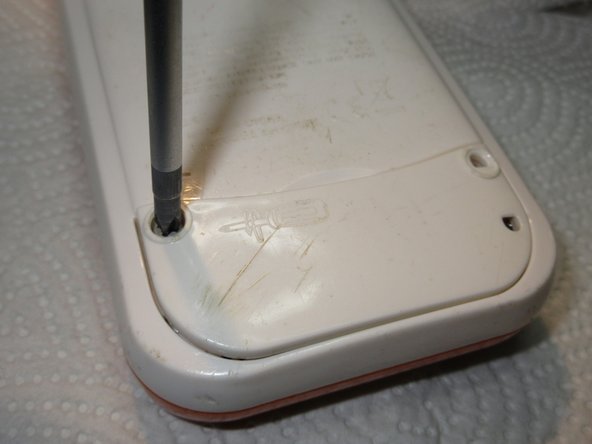
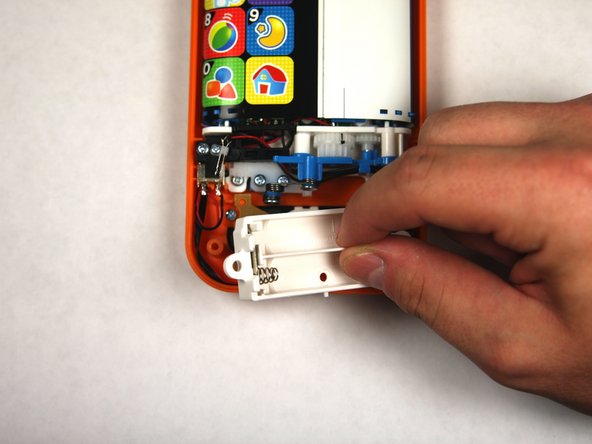
    • Using a Phillips #1 screwdriver, remove the 4.8mm screw on the battery cover by twisting the screwdriver counter-clockwise.

  2. VTech Touch and Swipe Baby Phone Touchscreen Contact Cleaning: passo 2, imagem 1 %32 VTech Touch and Swipe Baby Phone Touchscreen Contact Cleaning: passo 2, imagem 2 %32 VTech Touch and Swipe Baby Phone Touchscreen Contact Cleaning: passo 2, imagem 3 %32
    • Remove the two AAA batteries by pulling on one end of the battery and lifting it straight out.

  3. VTech Touch and Swipe Baby Phone Touchscreen Contact Cleaning: passo 3, imagem 1 %32 VTech Touch and Swipe Baby Phone Touchscreen Contact Cleaning: passo 3, imagem 2 %32 VTech Touch and Swipe Baby Phone Touchscreen Contact Cleaning: passo 3, imagem 3 %32
    • When reassembling, align the notch on the battery panel with the slot on the phone.

  4. VTech Touch and Swipe Baby Phone Touchscreen Contact Cleaning, Repairing VTech Touch and Swipe Baby Phone Screen Alignment: passo 4, imagem 1 %32 VTech Touch and Swipe Baby Phone Touchscreen Contact Cleaning, Repairing VTech Touch and Swipe Baby Phone Screen Alignment: passo 4, imagem 2 %32
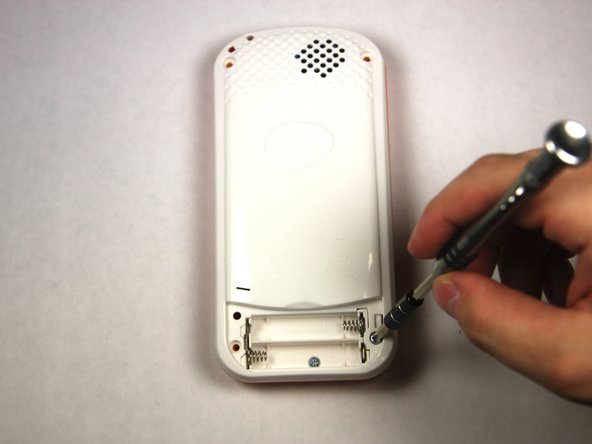
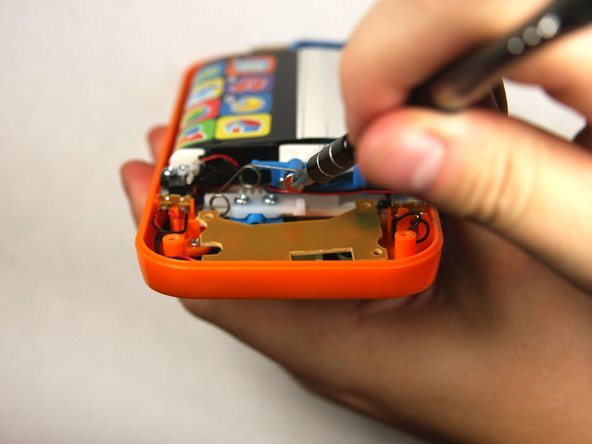
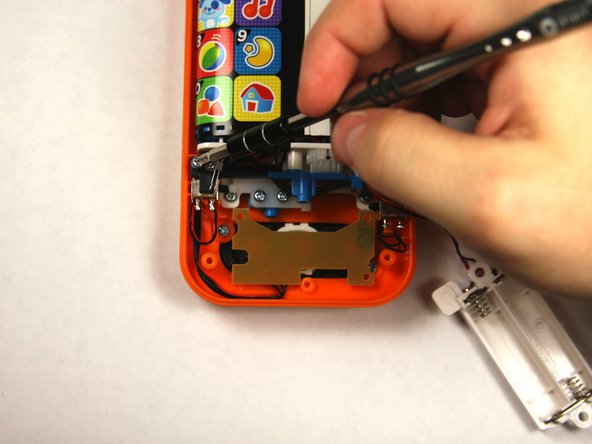
    • Remove four 13.8mm screws from the back of the device using a Phillips #1 screwdriver.

  5. VTech Touch and Swipe Baby Phone Touchscreen Contact Cleaning: passo 5, imagem 1 %32 VTech Touch and Swipe Baby Phone Touchscreen Contact Cleaning: passo 5, imagem 2 %32 VTech Touch and Swipe Baby Phone Touchscreen Contact Cleaning: passo 5, imagem 3 %32
    • Remove a single 4.8 mm screw with a Phillips #0 screwdriver and lift away the battery pack being careful of the wires.

  6. VTech Touch and Swipe Baby Phone Touchscreen Contact Cleaning: passo 6, imagem 1 %32 VTech Touch and Swipe Baby Phone Touchscreen Contact Cleaning: passo 6, imagem 2 %32
    • Remove two 7.2 mm screws with a Phillips #0 screwdriver.

    • Slide off the spring.

  7. VTech Touch and Swipe Baby Phone Touchscreen Contact Cleaning: passo 7, imagem 1 %32 VTech Touch and Swipe Baby Phone Touchscreen Contact Cleaning: passo 7, imagem 2 %32 VTech Touch and Swipe Baby Phone Touchscreen Contact Cleaning: passo 7, imagem 3 %32
    • Remove the single 7.5mm screw with a Phillips #0 screwdriver.

    • Lift up the black plastic piece.

  8. VTech Touch and Swipe Baby Phone Touchscreen Contact Cleaning: passo 8, imagem 1 %32 VTech Touch and Swipe Baby Phone Touchscreen Contact Cleaning: passo 8, imagem 2 %32
    • Remove four 7.5mm screws with a Phillips #0 screwdriver.

  9. VTech Touch and Swipe Baby Phone Touchscreen Contact Cleaning: passo 9, imagem 1 %32 VTech Touch and Swipe Baby Phone Touchscreen Contact Cleaning: passo 9, imagem 2 %32
    • Remove the two buttons, noting how wires are placed for reassembly.

  10. VTech Touch and Swipe Baby Phone Touchscreen Contact Cleaning: passo 10, imagem 1 %32 VTech Touch and Swipe Baby Phone Touchscreen Contact Cleaning: passo 10, imagem 2 %32
    • Lift the button board up and away to clear room for lifting the motherboard.

    • Tilt the assembly up but being wary that it is still attached to the front panel.

  11. VTech Touch and Swipe Baby Phone Touchscreen Contact Cleaning: passo 11, imagem 1 %32
    • Slide the toothed slider towards you to remove.

  12. VTech Touch and Swipe Baby Phone Touchscreen Contact Cleaning: passo 12, imagem 1 %32
    • To reassemble, align the two black lines together by moving the belt back and forth.

    • Once aligned reinsert the toothed slider at the exact point shown.

  13. VTech Touch and Swipe Baby Phone Touchscreen Contact Cleaning, VTech Touch and Swipe Baby Phone Touchscreen Contact Cleaning: passo 13, imagem 1 %32 VTech Touch and Swipe Baby Phone Touchscreen Contact Cleaning, VTech Touch and Swipe Baby Phone Touchscreen Contact Cleaning: passo 13, imagem 2 %32
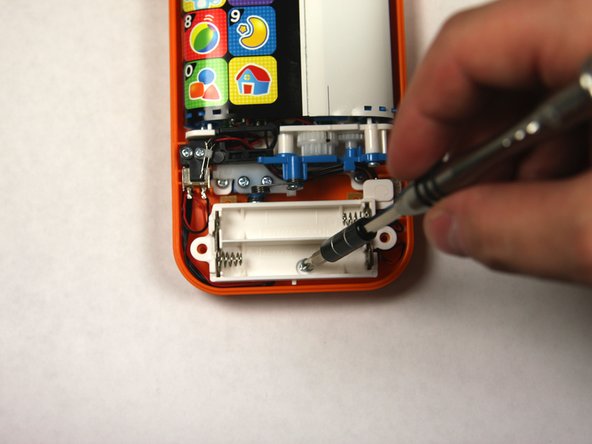
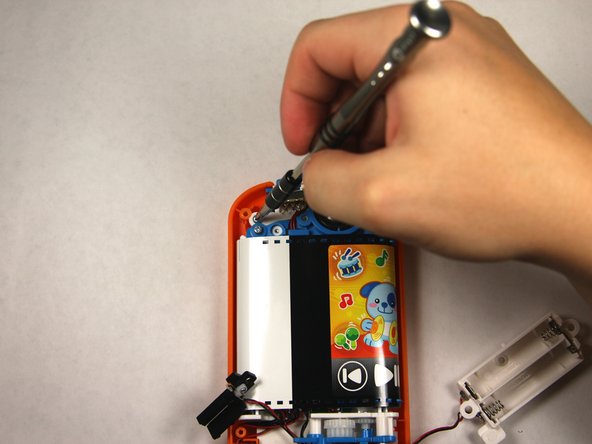
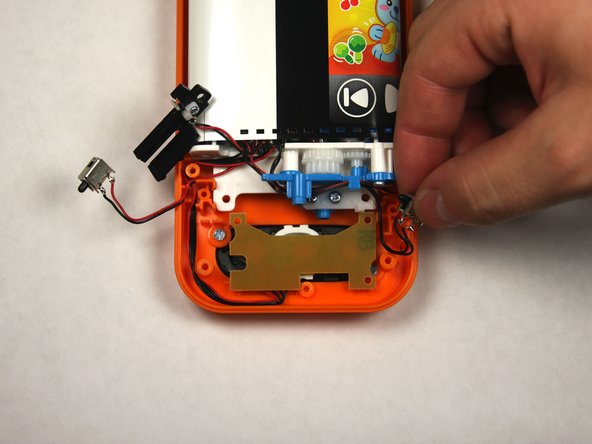
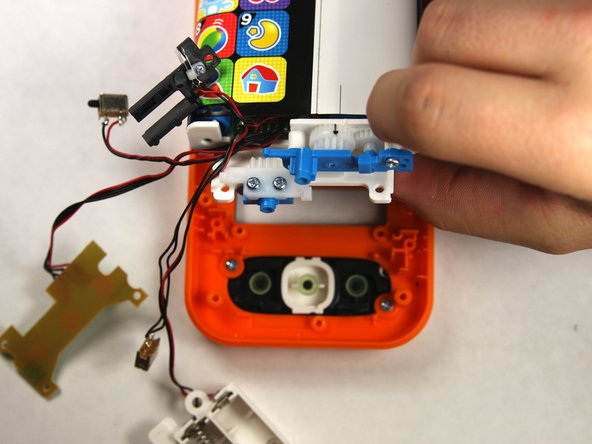
    • Lift the assembly to gain access to the connection point under the assembly.

  14. VTech Touch and Swipe Baby Phone Touchscreen Contact Cleaning: passo 14, imagem 1 %32 VTech Touch and Swipe Baby Phone Touchscreen Contact Cleaning: passo 14, imagem 2 %32
    • Remove the two 7.5 mm screws with a Phillips #0 screwdriver.

  15. VTech Touch and Swipe Baby Phone Touchscreen Contact Cleaning: passo 15, imagem 1 %32
    • With the connector removed, clean both of the boxed sections with rubbing alcohol on a cotton swab. Allow a minute for the alcohol to dry before reassembling.

Conclusão

To reassemble your device, follow these instructions in reverse order.

3 outras pessoas executaram este guia.

Sean Webb

Membro desde: 09/04/15

384 Reputação

Autoria de 2 guias

Equipe

USF Tampa, Team 2-4, Sullivan Fall 2015 Membro de USF Tampa, Team 2-4, Sullivan Fall 2015

USFT-SULLIVAN-F15S2G4

Membros da 3

Autoria de 12 guias

5 comentários

Before I attempt this: Does this address the problem of the touch screen no longer responding and the device playing the same sound repeatedly?

Lars Gilbert - Responder

Well, the answer to my own question is “no”.

Lars Gilbert - Responder

What if the unit is only 1 week old. Unlikely to be contact cleaning issues

Jason Chu - Responder

@larsgilbert did you find a fix to your problem? I have the same problem!

Dany - Responder

Regrettably, no.

Lars Gilbert -

Adicione um comentário

Exibir estatísticas:

Últimas 24 horas: 1

Últimos 7 dias: 2

Últimos 30 dias: 14

Duração total: 5,616