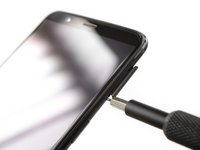
Ir para o conteúdo principal

Upper Main Flex Connector Disconnect Procedure

Pré-requisito somente
Este guia destina-se apenas a ser usado como pré-requisito para outros guias. É incompleto por si só.

O que você precisa

  1. Upper Main Flex Connector Disconnect Procedure, Back Cover: passo 1, imagem 1 %32 Upper Main Flex Connector Disconnect Procedure, Back Cover: passo 1, imagem 2 %32
    • Before you begin, switch off your phone.

    • Remove the SIM card tray.

  2. Upper Main Flex Connector Disconnect Procedure: passo 2, imagem 1 %32
    • Remove the two Torx T2 screws (2.5 mm length).

    • The OnePlus 5T doesn't use a lot of adhesive to secure the backcover, however the clamps are very strong and require some force during the opening procedure.

  3. Upper Main Flex Connector Disconnect Procedure: passo 3, imagem 1 %32 Upper Main Flex Connector Disconnect Procedure: passo 3, imagem 2 %32 Upper Main Flex Connector Disconnect Procedure: passo 3, imagem 3 %32
    • Insert an opening tool between the display and the backcover at the bottom end of the phone.

    • Use the opening tool to create a gap between back cover and display.

    • Insert an opening pick in the gap you created with the opening tool.

  4. Upper Main Flex Connector Disconnect Procedure: passo 4, imagem 1 %32 Upper Main Flex Connector Disconnect Procedure: passo 4, imagem 2 %32 Upper Main Flex Connector Disconnect Procedure: passo 4, imagem 3 %32
    • Slide the opening pick to the bottom right corner of the phone.

    • Insert a second opening pick and slide it to the bottom left corner of the phone.

  5. Upper Main Flex Connector Disconnect Procedure: passo 5, imagem 1 %32 Upper Main Flex Connector Disconnect Procedure: passo 5, imagem 2 %32 Upper Main Flex Connector Disconnect Procedure: passo 5, imagem 3 %32
    • Slide the opening pick around the bottom left corner and then up along the left edge of the phone to open the plastic clamps that secure the backcover.

  6. Upper Main Flex Connector Disconnect Procedure: passo 6, imagem 1 %32 Upper Main Flex Connector Disconnect Procedure: passo 6, imagem 2 %32 Upper Main Flex Connector Disconnect Procedure: passo 6, imagem 3 %32
    • Slide the opening pick around the bottom right corner and then up along the right edge of the phone to open the plastic clamps that secure the backcover.

  7. Upper Main Flex Connector Disconnect Procedure: passo 7, imagem 1 %32 Upper Main Flex Connector Disconnect Procedure: passo 7, imagem 2 %32 Upper Main Flex Connector Disconnect Procedure: passo 7, imagem 3 %32
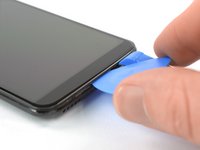
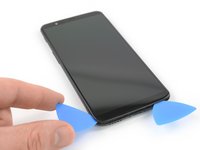
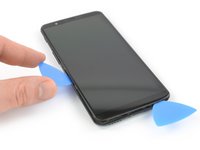
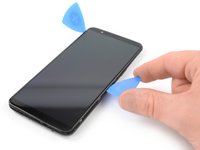
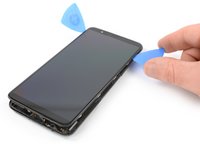
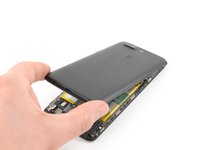
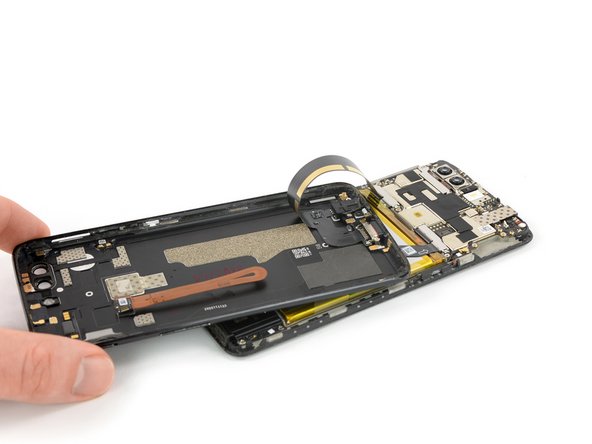
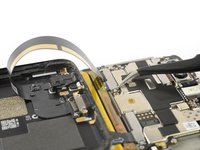
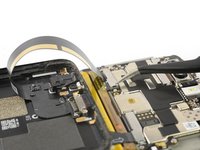
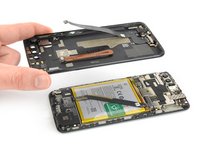
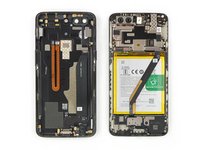
    • Try not to remove the backcover all the way yet. The fingerprint and the charging port and headphone flex cables are still connected to the motherboard.

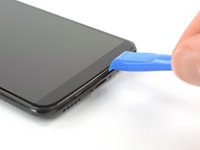
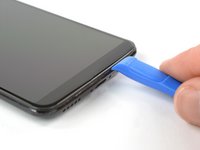
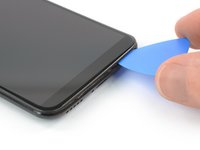
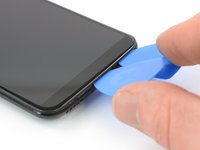
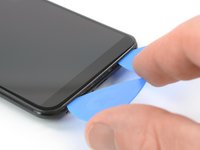
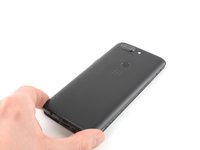
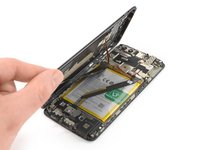
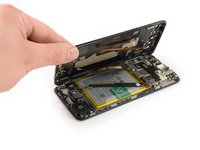
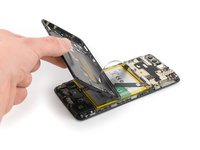
    • Flip your phone and carefully lift the bottom end of the backcover away from the phone assembly. Fold it to left and hold it at an 80° angle.
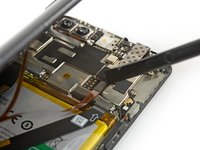
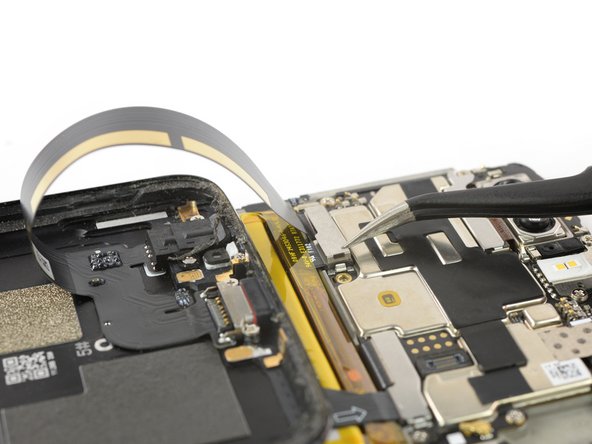
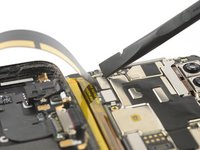
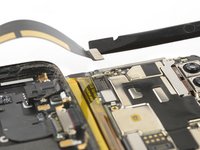
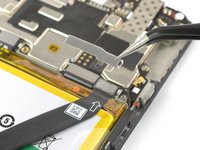
  8. Upper Main Flex Connector Disconnect Procedure: passo 8, imagem 1 %32 Upper Main Flex Connector Disconnect Procedure: passo 8, imagem 2 %32
    • Use a spudger to pry up and disconnect the fingerprint flex cable.

  9. Upper Main Flex Connector Disconnect Procedure: passo 9, imagem 1 %32 Upper Main Flex Connector Disconnect Procedure: passo 9, imagem 2 %32 Upper Main Flex Connector Disconnect Procedure: passo 9, imagem 3 %32
    • Twist the backcover around 180° and lay it down to align the bottom end of the backcover the top edge of the battery.

  10. Upper Main Flex Connector Disconnect Procedure: passo 10, imagem 1 %32 Upper Main Flex Connector Disconnect Procedure: passo 10, imagem 2 %32 Upper Main Flex Connector Disconnect Procedure: passo 10, imagem 3 %32
    Ferramenta utilizada neste passo:
    Tweezers
    $4.99
    • Use a pair of tweezers to remove the small metal shield which covers the battery and the charging port and headphone jack flex cable connectors.

  11. Upper Main Flex Connector Disconnect Procedure: passo 11, imagem 1 %32 Upper Main Flex Connector Disconnect Procedure: passo 11, imagem 2 %32
    • Use a spudger to pry up and disconnect the charging port and headphone jack flex cable.

  12. Upper Main Flex Connector Disconnect Procedure: passo 12, imagem 1 %32 Upper Main Flex Connector Disconnect Procedure: passo 12, imagem 2 %32
    • Remove the backcover.

  13. Upper Main Flex Connector Disconnect Procedure, Battery Disconnect: passo 13, imagem 1 %32 Upper Main Flex Connector Disconnect Procedure, Battery Disconnect: passo 13, imagem 2 %32
    • Use a spudger to pry up and disconnect the battery flex cable.

  14. Upper Main Flex Connector Disconnect Procedure, Upper Main Flex Connector Disconnect: passo 14, imagem 1 %32 Upper Main Flex Connector Disconnect Procedure, Upper Main Flex Connector Disconnect: passo 14, imagem 2 %32 Upper Main Flex Connector Disconnect Procedure, Upper Main Flex Connector Disconnect: passo 14, imagem 3 %32
    Ferramenta utilizada neste passo:
    Tweezers
    $4.99
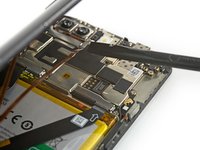
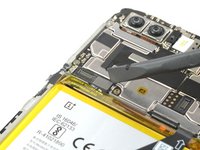
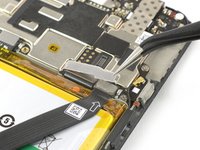
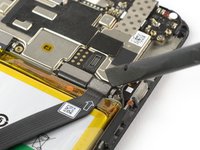
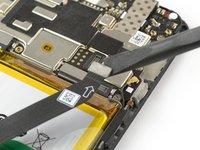
    • Use a pair of tweezers to unhinge and remove the small metal shield that covers the main and interconnect flex cable connectors.

    • The metal shield is held in place by mild adhesive. In case you're having trouble removing it, you can apply a heated iOpener to loosen the adhesive underneath.

  15. Upper Main Flex Connector Disconnect Procedure: passo 15, imagem 1 %32 Upper Main Flex Connector Disconnect Procedure: passo 15, imagem 2 %32
    • Use a spudger to pry up and disconnect the main flex cable.

Conclusão

To reassemble your device, follow these instructions in reverse order.

Dominik Schnabelrauch

Membro desde: 11/23/16

229.684 Reputação

Autoria de 682 guias

Equipe

iFixit Membro de iFixit

Staff

Membros da 119

Autoria de 19.476 guias

0 comentários

Adicione um comentário

Exibir estatísticas:

Últimas 24 horas: 2

Últimos 7 dias: 7

Últimos 30 dias: 19

Duração total: 72