Ir para o conteúdo principal

Trackpad Cable Disconnect

Pré-requisito somente
Este guia destina-se apenas a ser usado como pré-requisito para outros guias. É incompleto por si só.

O que você precisa

  1. Trackpad Cable Disconnect, Prepare your Macbook Air for disassembly: passo 1, imagem 1 %32 Trackpad Cable Disconnect, Prepare your Macbook Air for disassembly: passo 1, imagem 2 %32 Trackpad Cable Disconnect, Prepare your Macbook Air for disassembly: passo 1, imagem 3 %32
    • Before you begin, discharge your battery below 25%, as a charged lithium-ion battery can be dangerous if accidentally punctured.

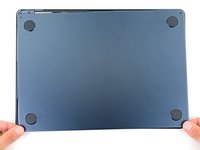
    • Power off your MacBook Air and unplug all cables.

    • Close the display and flip the laptop upside down. Keep the lid closed until you've physically disconnected the battery.

  2. Trackpad Cable Disconnect, Unfasten the lower case: passo 2, imagem 1 %32 Trackpad Cable Disconnect, Unfasten the lower case: passo 2, imagem 2 %32
    Ferramenta utilizada neste passo:
    FixMat
    $36.95
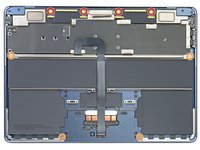
    • Use a P5 Pentalobe driver to remove the four 6.4 mm screws securing the lower case:

    • Two screws with a short threaded portion near the hinges

    • Two screws with a long threaded portion near the front of the MacBook

    • Throughout this repair, keep track of each screw and make sure it goes back exactly where it came from.

  3. Trackpad Cable Disconnect, Insert an opening pick: passo 3, imagem 1 %32 Trackpad Cable Disconnect, Insert an opening pick: passo 3, imagem 2 %32 Trackpad Cable Disconnect, Insert an opening pick: passo 3, imagem 3 %32
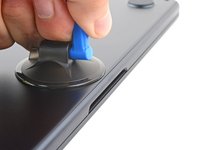
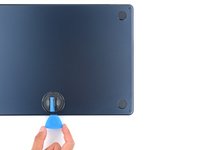
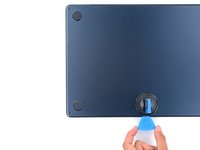
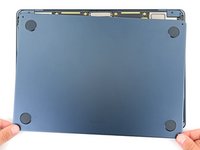
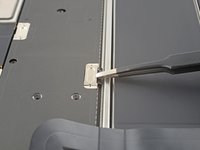
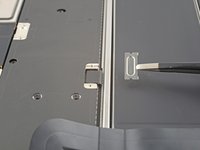
    • Apply a suction handle to the center of the lower case's front edge.

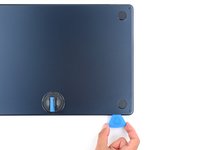
    • Pull up on the suction handle with strong, steady force to create a small gap between the lower case and the frame.

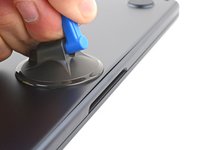
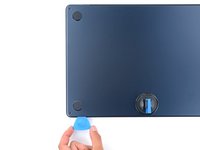
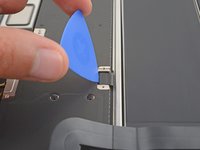
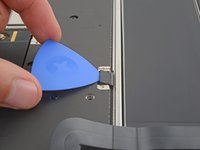
    • Insert an opening pick into the gap.

  4. Trackpad Cable Disconnect, Release the snapping clips: passo 4, imagem 1 %32 Trackpad Cable Disconnect, Release the snapping clips: passo 4, imagem 2 %32 Trackpad Cable Disconnect, Release the snapping clips: passo 4, imagem 3 %32
    • During the next two steps you'll feel and hear four snapping clips release. If a clip doesn't release, insert your opening pick farther and try again.

    • Slide the pick to the bottom right corner to release the first clip.

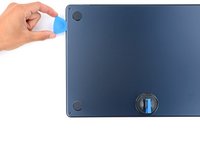
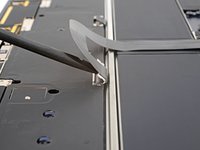
    • Slide the pick around the corner and up the right edge to release the next clip.

  5. Trackpad Cable Disconnect: passo 5, imagem 1 %32 Trackpad Cable Disconnect: passo 5, imagem 2 %32 Trackpad Cable Disconnect: passo 5, imagem 3 %32
    • Insert the opening pick in the original gap created with the suction handle.

    • Slide the opening pick to the bottom left corner and up the left edge to release the two remaining snapping clips.

  6. Trackpad Cable Disconnect, Release the sliding tabs: passo 6, imagem 1 %32 Trackpad Cable Disconnect, Release the sliding tabs: passo 6, imagem 2 %32 Trackpad Cable Disconnect, Release the sliding tabs: passo 6, imagem 3 %32
    • Four sliding tabs along the back edge of the MacBook firmly secure the lower case. Separating these tabs requires a lot of force—consider using gloves to protect your hands from the sharp edges of the lower case.

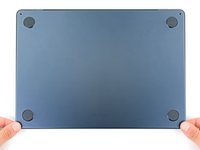
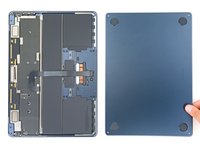
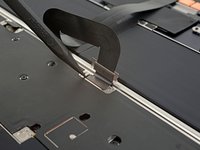
    • Keep the lower case flat and firmly pull it straight away from the back edge, one corner at a time, to disengage the sliding tabs.

    • Don't pull up until the cover is completely separated.

  7. Trackpad Cable Disconnect, Remove the lower case: passo 7, imagem 1 %32 Trackpad Cable Disconnect, Remove the lower case: passo 7, imagem 2 %32 Trackpad Cable Disconnect, Remove the lower case: passo 7, imagem 3 %32
    • Remove the lower case.

    • During reassembly:

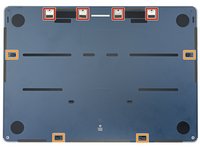
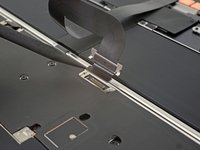
    • Set the lower case in place and align the sliding tabs with the screw heads they slide over. Press down and slide the lower case toward the back edge to engage the tabs—it'll stop sliding as the tabs engage.

    • When one side is engaged, it may push the other out of alignment. Check both sides as you push, there should be no gap along the back edge.

    • Once the lower case is flush with the frame, press down firmly along the perimeter to engage the four snapping clips.

    • You'll hear and feel a distinct click as each clip snaps into place.

  8. Trackpad Cable Disconnect, Remove the battery connector cover: passo 8, imagem 1 %32
    • Use a T3 Torx driver to remove the two 1.5 mm screws securing the battery connector cover.

  9. Trackpad Cable Disconnect: passo 9, imagem 1 %32 Trackpad Cable Disconnect: passo 9, imagem 2 %32
    • Remove the battery connector cover.

  10. Trackpad Cable Disconnect, Disconnect the battery: passo 10, imagem 1 %32 Trackpad Cable Disconnect, Disconnect the battery: passo 10, imagem 2 %32
    • Use an opening pick to pry up and disconnect the battery press connector.

    • To reconnect a press connector, align it over the socket and gently press down on one side until it clicks into place, then press down on the other side. It might take a few tries to align the connector.

  11. Trackpad Cable Disconnect, Unfasten the trackpad cable cover: passo 11, imagem 1 %32
    • Use a T3 Torx driver to remove the two 1.5 mm screws securing the trackpad cable cover.

  12. Trackpad Cable Disconnect, Access the trackpad press connector: passo 12, imagem 1 %32 Trackpad Cable Disconnect, Access the trackpad press connector: passo 12, imagem 2 %32
    • Use a spudger or your fingers to move the trackpad cable cover out of the way so you can access the press connector underneath.

  13. Trackpad Cable Disconnect, Disconnect the trackpad cable: passo 13, imagem 1 %32 Trackpad Cable Disconnect, Disconnect the trackpad cable: passo 13, imagem 2 %32
    • Use the pointed end of a spudger to pry up and disconnect the trackpad cable press connector.

    • To re-attach press connectors like this one, carefully align and press down on one side until it clicks into place, then repeat on the other side. Do not press down in the middle. If the connector is misaligned, the pins can bend and cause permanent damage.

Conclusão

To reassemble your device, follow these instructions in reverse order.

Spencer Day

Membro desde: 09/14/22

94.557 Reputação

Autoria de 662 guias

Equipe

iFixit Membro de iFixit

Staff

Membros da 118

Autoria de 19.416 guias

0 comentários

Adicione um comentário

Exibir estatísticas:

Últimas 24 horas: 1

Últimos 7 dias: 2

Últimos 30 dias: 2

Duração total: 35