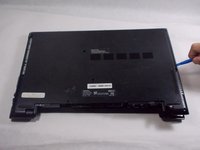
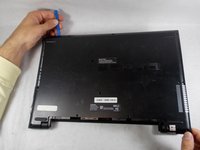
Ir para o conteúdo principal

Toshiba Satellite S55t-C5225 Optical Disk Drive Replacement

O que você precisa

  1. Toshiba Satellite S55t-C5225 Optical Disk Drive Replacement, Battery: passo 1, imagem 1 %32
    • Shut down the computer and disconnect all cables

    • Flip the computer over so the bottom is facing up.

  2. Toshiba Satellite S55t-C5225 Optical Disk Drive Replacement: passo 2, imagem 1 %32 Toshiba Satellite S55t-C5225 Optical Disk Drive Replacement: passo 2, imagem 2 %32
    • Remove the two 7.0 mm Phillips #0 screws that hold the battery in place.

  3. Toshiba Satellite S55t-C5225 Optical Disk Drive Replacement: passo 3, imagem 1 %32 Toshiba Satellite S55t-C5225 Optical Disk Drive Replacement: passo 3, imagem 2 %32
    • Carefully remove the battery by wedging a plastic opening tool in-between the battery and back cover.

  4. Toshiba Satellite S55t-C5225 Optical Disk Drive Replacement, Back Panel: passo 4, imagem 1 %32 Toshiba Satellite S55t-C5225 Optical Disk Drive Replacement, Back Panel: passo 4, imagem 2 %32
    • Remove the eleven 7.0 mm Phillips #0 screws that secure the back cover.

  5. Toshiba Satellite S55t-C5225 Optical Disk Drive Replacement: passo 5, imagem 1 %32 Toshiba Satellite S55t-C5225 Optical Disk Drive Replacement: passo 5, imagem 2 %32
    • Wedge the tip of a plastic opening tool between the back cover and metal frame.

    • Twist the plastic tool, while wedged, to release the retaining tabs from the frame.

    • Repeat these steps around the laptop to release all retaining tabs.

  6. Toshiba Satellite S55t-C5225 Optical Disk Drive Replacement: passo 6, imagem 1 %32 Toshiba Satellite S55t-C5225 Optical Disk Drive Replacement: passo 6, imagem 2 %32
    • Once all retaining tabs are released, pull up on the cover to remove.

  7. Toshiba Satellite S55t-C5225 Optical Disk Drive Replacement, Optical Disk Drive: passo 7, imagem 1 %32 Toshiba Satellite S55t-C5225 Optical Disk Drive Replacement, Optical Disk Drive: passo 7, imagem 2 %32
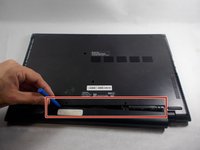
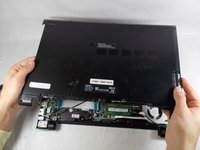
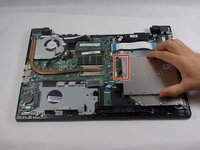
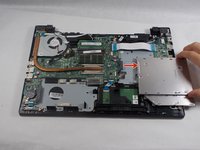
    • Carefully slide the optical disk drive to the right to remove from the motherboard.

Conclusão

To reassemble your device, follow these instructions in reverse order.

Uma outra pessoa concluiu este guia.

Nicholas Costa

Membro desde: 10/21/19

339 Reputação

Autoria de 1 guia

Equipe

UMass Dartmouth, Team S1-G5, Botvin Fall 2019 Membro de UMass Dartmouth, Team S1-G5, Botvin Fall 2019

UMASSD-BOTVIN-F19S1G5

Membros da 3

Autoria de 15 guias

0 comentários

Adicione um comentário

Exibir estatísticas:

Últimas 24 horas: 0

Últimos 7 dias: 1

Últimos 30 dias: 14

Duração total: 338