Ir para o conteúdo principal

Toshiba Satellite P855-S5102 Optical Disk Drive Replacement

O que você precisa

  1. Toshiba Satellite P855-S5102 Optical Disk Drive Replacement, Battery: passo 1, imagem 1 %32 Toshiba Satellite P855-S5102 Optical Disk Drive Replacement, Battery: passo 1, imagem 2 %32
    • Push the locking tabs away from each other.

  2. Toshiba Satellite P855-S5102 Optical Disk Drive Replacement: passo 2, imagem 1 %32 Toshiba Satellite P855-S5102 Optical Disk Drive Replacement: passo 2, imagem 2 %32
    • Pull up on the battery to remove.

  3. Toshiba Satellite P855-S5102 Optical Disk Drive Replacement, RAM: passo 3, imagem 1 %32 Toshiba Satellite P855-S5102 Optical Disk Drive Replacement, RAM: passo 3, imagem 2 %32
    • Remove the 3mm Phillips #0 screw from the cover.

  4. Toshiba Satellite P855-S5102 Optical Disk Drive Replacement: passo 4, imagem 1 %32 Toshiba Satellite P855-S5102 Optical Disk Drive Replacement: passo 4, imagem 2 %32 Toshiba Satellite P855-S5102 Optical Disk Drive Replacement: passo 4, imagem 3 %32
    • Use a plastic opening tool to lift up the cover and remove by hand.

  5. Toshiba Satellite P855-S5102 Optical Disk Drive Replacement: passo 5, imagem 1 %32 Toshiba Satellite P855-S5102 Optical Disk Drive Replacement: passo 5, imagem 2 %32 Toshiba Satellite P855-S5102 Optical Disk Drive Replacement: passo 5, imagem 3 %32
    • Two clips secure the RAM module in place, one on each side. Using your fingers, spread the clips away from the RAM module.


    • When released, the RAM module will pop up at a slight angle.

    • 
Lift the RAM module to an angle of about 30 degrees and slide it out.

  6. Toshiba Satellite P855-S5102 Optical Disk Drive Replacement, Keyboard: passo 6, imagem 1 %32 Toshiba Satellite P855-S5102 Optical Disk Drive Replacement, Keyboard: passo 6, imagem 2 %32
    • Use a plastic opening tool to pry up the keyboard cover.

  7. Toshiba Satellite P855-S5102 Optical Disk Drive Replacement: passo 7, imagem 1 %32 Toshiba Satellite P855-S5102 Optical Disk Drive Replacement: passo 7, imagem 2 %32
    • Use a plastic opening tool to pry up the keyboard.

  8. Toshiba Satellite P855-S5102 Optical Disk Drive Replacement: passo 8, imagem 1 %32 Toshiba Satellite P855-S5102 Optical Disk Drive Replacement: passo 8, imagem 2 %32 Toshiba Satellite P855-S5102 Optical Disk Drive Replacement: passo 8, imagem 3 %32
    • Lay the keyboard upright against the screen.

    • Use a spudger to flip up the retaining flap on the keyboard ribbon cable ZIF socket.

    • Remove the ribbon cable from the socket.

  9. Toshiba Satellite P855-S5102 Optical Disk Drive Replacement, CPU Cooling Fan: passo 9, imagem 1 %32 Toshiba Satellite P855-S5102 Optical Disk Drive Replacement, CPU Cooling Fan: passo 9, imagem 2 %32
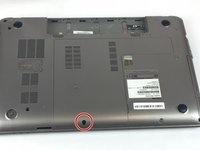
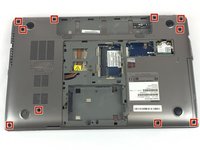
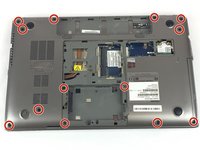
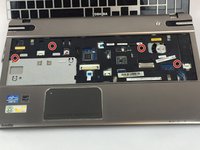
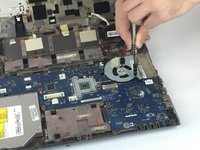
    • Use a set of small tweezers to pull the 10 rubber caps out of the back panel.

    • Each rubber cap will only fit in the holes they came out of so keep track of which caps go where. If you lose track, there are identification letters and numbers on each cap.

  10. Toshiba Satellite P855-S5102 Optical Disk Drive Replacement: passo 10, imagem 1 %32 Toshiba Satellite P855-S5102 Optical Disk Drive Replacement: passo 10, imagem 2 %32 Toshiba Satellite P855-S5102 Optical Disk Drive Replacement: passo 10, imagem 3 %32
    • Remove these thirteen Phillips #0 screws from the bottom case:

    • Ten 3mm screws.

    • Three 2mm screws.

  11. Toshiba Satellite P855-S5102 Optical Disk Drive Replacement: passo 11, imagem 1 %32 Toshiba Satellite P855-S5102 Optical Disk Drive Replacement: passo 11, imagem 2 %32
    • Remove the four 3mm Phillips #0 screws found underneath the keyboard.

  12. Toshiba Satellite P855-S5102 Optical Disk Drive Replacement: passo 12, imagem 1 %32 Toshiba Satellite P855-S5102 Optical Disk Drive Replacement: passo 12, imagem 2 %32
    • Separate the top and bottom panels from each other.

    • Try starting from the corner.

  13. Toshiba Satellite P855-S5102 Optical Disk Drive Replacement: passo 13, imagem 1 %32 Toshiba Satellite P855-S5102 Optical Disk Drive Replacement: passo 13, imagem 2 %32 Toshiba Satellite P855-S5102 Optical Disk Drive Replacement: passo 13, imagem 3 %32
    • Remove the three 3mm Phillips #0 screws from the fan.

  14. Toshiba Satellite P855-S5102 Optical Disk Drive Replacement: passo 14, imagem 1 %32
    • Disconnect the fan's power from the motherboard.

    • Remove the fan from the laptop.

  15. Toshiba Satellite P855-S5102 Optical Disk Drive Replacement, Optical Disk Drive: passo 15, imagem 1 %32 Toshiba Satellite P855-S5102 Optical Disk Drive Replacement, Optical Disk Drive: passo 15, imagem 2 %32
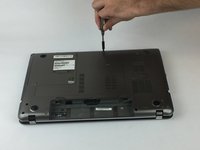
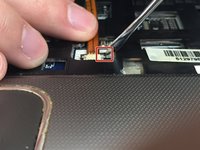
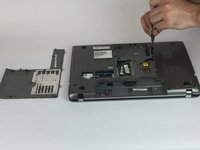
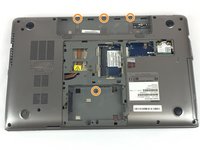
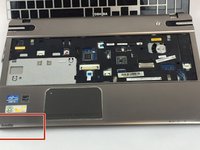
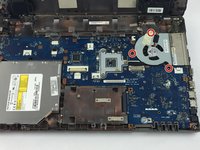
    • Remove the 3mm Phillips #0 screw from the back of the optical disk drive.

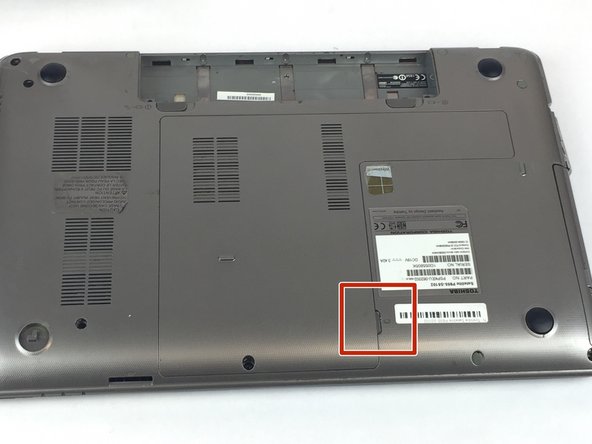
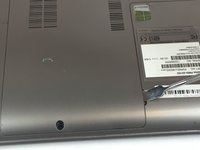
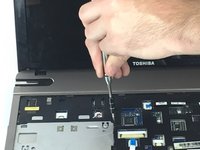
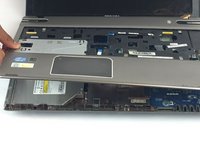
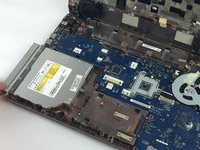
    • Slide the optical drive out of the side of the laptop and remove.

Conclusão

To reassemble your device, follow these instructions in reverse order.

Brandon McGuffey

Membro desde: 01/25/18

339 Reputação

Autoria de 3 guias

Equipe

USF Tampa, Team S20-G3, Passmore Spring 2018 Membro de USF Tampa, Team S20-G3, Passmore Spring 2018

USFT-PASSMORE-S18S20G3

Membros da 4

Autoria de 7 guias

0 comentários

Adicione um comentário

Exibir estatísticas:

Últimas 24 horas: 0

Últimos 7 dias: 0

Últimos 30 dias: 0

Duração total: 356