Esta versão pode conter edições incorretas. Mude para o último instantâneo verificado.
O que você precisa
-
Este passo não foi traduzido. Ajude a traduzi-lo
-
Orient the laptop so that it is closed, faced down, and the battery is facing away from you.
-
Slide the unlock switch in the top left-hand corner to the left/unlock position.
-
-
Este passo não foi traduzido. Ajude a traduzi-lo
-
Hold the switch in upper right-hand corner to the right.
-
With the switch held open, pull the battery straight away from the laptop.
-
-
Este passo não foi traduzido. Ajude a traduzi-lo
-
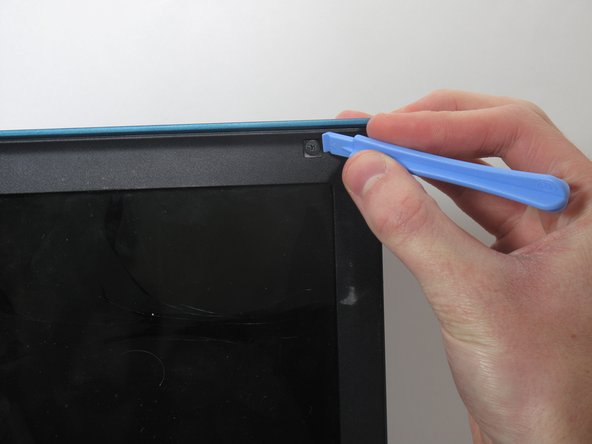
Use the plastic opening tool to remove the four small rubber pop-out squares from the corners of your screen.
-
-
Este passo não foi traduzido. Ajude a traduzi-lo
-
Use the Phillips 00 screwdriver to unscrew the four 6.72mm screws from the corners of the screen.
-
-
-
Este passo não foi traduzido. Ajude a traduzi-lo
-
Use the plastic opening tool to pop off the black plastic casing that surrounds the screen.
-
-
Este passo não foi traduzido. Ajude a traduzi-lo
-
Use the Phillips 00 screwdriver to remove the two 6.72mm screws at the bottom left and right of the screen.
-
-
Este passo não foi traduzido. Ajude a traduzi-lo
-
Turn the laptop 90 degrees clockwise.
-
Use the Phillips 00 screwdriver to remove the six 3.78mm screws from both sides of the screen.
-
-
Este passo não foi traduzido. Ajude a traduzi-lo
-
Fold the screen down so that the back of the screen is visible.
-
Remove the yellow wiring connected to the top of the back of the screen by pulling it out and then up.
-
-
Este passo não foi traduzido. Ajude a traduzi-lo
-
Use the Phillips 00 screwdriver to remove the 5.54mm screw connecting the green panel to the laptop frame.
-
-
Este passo não foi traduzido. Ajude a traduzi-lo
-
Pull out the green panel and disconnect the black cable from the belly of the green panel.
-


Cancelar: não concluí este guia.
Uma outra pessoa concluiu este guia.
Equipe

Cal Poly, Team 7-11, Maness Winter 2013 Membro de Cal Poly, Team 7-11, Maness Winter 2013
CPSU-MANESS-W13S7G11
Membros da 4
Autoria de 5 guias