Esta versão pode conter edições incorretas. Mude para o último instantâneo verificado.
O que você precisa
-
Este passo não foi traduzido. Ajude a traduzi-lo
-
Close the laptop lid and flip the laptop over.
-
Switch the lock button on the left to the unlock position. (The unlock position is to the left side.)
-
-
Este passo não foi traduzido. Ajude a traduzi-lo
-
Push the release button to the right.
-
Hold the release button to the right and lift the battery out of its housing.
-
-
Este passo não foi traduzido. Ajude a traduzi-lo
-
Open the laptop so the keyboard is facing you.
-
Using your fingers, remove the thin plastic cover above the keyboard.
-
-
Este passo não foi traduzido. Ajude a traduzi-lo
-
Remove the two 4.8 mm screws from underneath the plastic cover piece using a Phillips #00 screwdriver.
-
-
Este passo não foi traduzido. Ajude a traduzi-lo
-
Starting at the top, gently raise the keyboard enough to remove it from the socket.
-
-
Este passo não foi traduzido. Ajude a traduzi-lo
-
Locate the data cable that is connected to the motherboard.
-
Pull the white ZIF connector towards the screen to remove it.
-
Pull the black ribbon cable away from the screen.
-
-
Este passo não foi traduzido. Ajude a traduzi-lo
-
With the black ribbon cable now disconnected, remove the keyboard from its housing.
-
-
Este passo não foi traduzido. Ajude a traduzi-lo
-
Close the laptop and flip it over onto its back.
-
Remove the eleven 6.6 mm type-00 Phillips head screws along the perimeter and in the center of the laptop, per image 1.
-
-
Este passo não foi traduzido. Ajude a traduzi-lo
-
Remove the three 3.7 mm type-00 Phillips head screws located in the battery compartment, per image 1.
-
-
Este passo não foi traduzido. Ajude a traduzi-lo
-
Flip the laptop back over again, and open the screen as far back as it can go.
-
-
Este passo não foi traduzido. Ajude a traduzi-lo
-
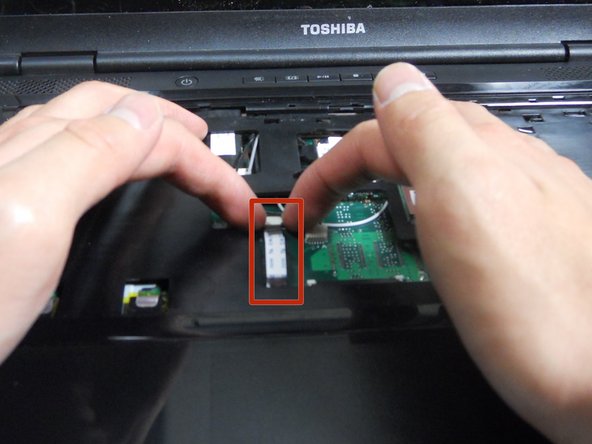
Using your fingers, slide the black ZIF connector out, per image 1.
-
Once the ZIF connector has been moved, the white ribbon cable can be removed, per image 2.
-
-
Este passo não foi traduzido. Ajude a traduzi-lo
-
Using your fingers, remove the white plastic connector located to the right of the ribbon connector, per image 1.
-
-
Este passo não foi traduzido. Ajude a traduzi-lo
-
Use the iFixit opening tool to begin removing the cover.
-
After creating enough space, you can use your hands to completely open the cover.
-
-
Este passo não foi traduzido. Ajude a traduzi-lo
-
Put the laptop aside and locate the speakers attached to the cover, per image 1.
-
Remove the two 3.6 mm type-00 Phillips head screws from each speaker.
-
Remove the old speakers and replace with the new ones.
-
Congratulations, the repair is now complete!
-


