Ir para o conteúdo principal

Toshiba Satellite E45t-B4300 USB HDMI Audio Circuit Board Replacement

O que você precisa

  1. Toshiba Satellite E45t-B4300 USB HDMI Audio Circuit Board Replacement, Battery: passo 1, imagem 1 %32 Toshiba Satellite E45t-B4300 USB HDMI Audio Circuit Board Replacement, Battery: passo 1, imagem 2 %32
    • Power off your laptop before continuing.

    • Remove the following two 4mm screws with a Phillips #0 screwdriver.

  2. Toshiba Satellite E45t-B4300 USB HDMI Audio Circuit Board Replacement: passo 2, imagem 1 %32
    • Slide the battery out towards you.

  3. Toshiba Satellite E45t-B4300 USB HDMI Audio Circuit Board Replacement, Bottom Case: passo 3, imagem 1 %32
    • Remove the following twelve 4mm screws with a Phillips #0 screwdriver.

  4. Toshiba Satellite E45t-B4300 USB HDMI Audio Circuit Board Replacement: passo 4, imagem 1 %32
    • Use a spudger to depress the six white clips connecting the plastic cover

  5. Toshiba Satellite E45t-B4300 USB HDMI Audio Circuit Board Replacement: passo 5, imagem 1 %32
    Ferramenta utilizada nesse passo:
    Plastic Cards
    $2.99
    Comprar
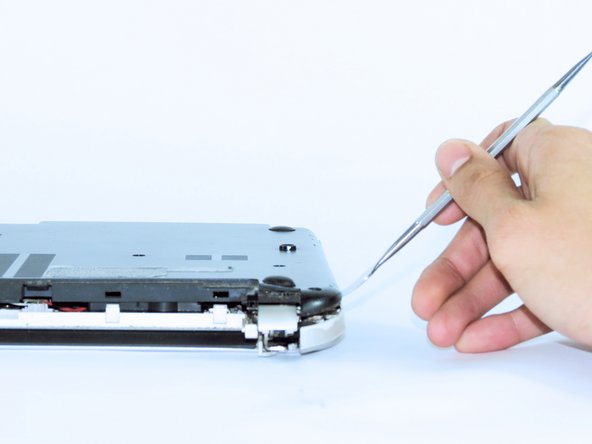
    • Run the spudger or a plastic card around the entire laptop to release the rest of the clips.

  6. Toshiba Satellite E45t-B4300 USB HDMI Audio Circuit Board Replacement: passo 6, imagem 1 %32
    • Remove the cover and set to the side.

  7. Toshiba Satellite E45t-B4300 USB HDMI Audio Circuit Board Replacement, USB HDMI Audio Circuit Board: passo 7, imagem 1 %32 Toshiba Satellite E45t-B4300 USB HDMI Audio Circuit Board Replacement, USB HDMI Audio Circuit Board: passo 7, imagem 2 %32 Toshiba Satellite E45t-B4300 USB HDMI Audio Circuit Board Replacement, USB HDMI Audio Circuit Board: passo 7, imagem 3 %32
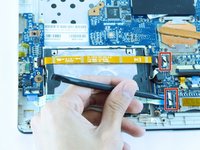
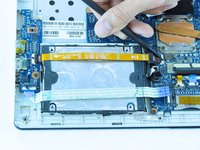
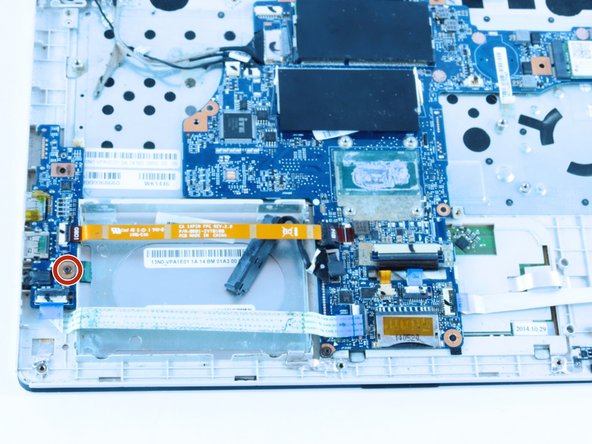
    • Use the point end of the spudger to lift the clips that attach the two ribbons to the motherboard.

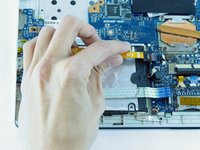
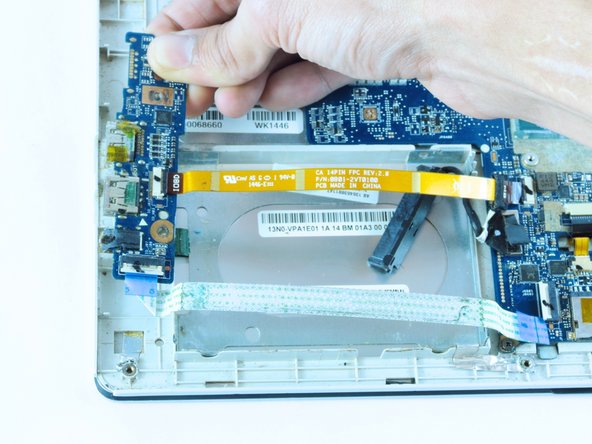
    • Pull out the ribbons from the motherboard.

  8. Toshiba Satellite E45t-B4300 USB HDMI Audio Circuit Board Replacement: passo 8, imagem 1 %32 Toshiba Satellite E45t-B4300 USB HDMI Audio Circuit Board Replacement: passo 8, imagem 2 %32
    • Unscrew the 2mm screw with a Phillips #0 screwdriver.

    • Remove the circuit board.

Conclusão

To reassemble your device, follow these instructions in reverse order.

Joshua Swanson

Membro desde: 02/20/17

701 Reputação

Autoria de 6 guias

Equipe

USF Tampa, Team S2-G2, Sullivan Spring 2017 Membro de USF Tampa, Team S2-G2, Sullivan Spring 2017

USFT-SULLIVAN-S17S2G2

Membros da 3

Autoria de 12 guias

0 comentários

Adicione um comentário

Exibir estatísticas:

Últimas 24 horas: 2

Últimos 7 dias: 4

Últimos 30 dias: 4

Duração total: 299