Ir para o conteúdo principal

Toshiba Satellite C855-S5115 DVD Tray Replacement

O que você precisa

  1. Toshiba Satellite C855-S5115 DVD Tray Replacement, Hard Drive: passo 1, imagem 1 %32
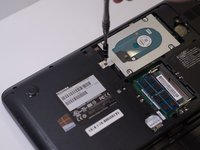
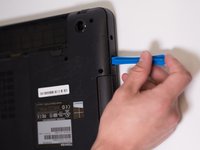
    • Remove the 7mm Phillips screw located on the back panel of the device using the J1S Phillips head screwdriver.

  2. Toshiba Satellite C855-S5115 DVD Tray Replacement: passo 2, imagem 1 %32 Toshiba Satellite C855-S5115 DVD Tray Replacement: passo 2, imagem 2 %32 Toshiba Satellite C855-S5115 DVD Tray Replacement: passo 2, imagem 3 %32
    • Pry the back panel out of the laptop using the spudger tool

  3. Toshiba Satellite C855-S5115 DVD Tray Replacement: passo 3, imagem 1 %32 Toshiba Satellite C855-S5115 DVD Tray Replacement: passo 3, imagem 2 %32
    • Locate and unscrew the five 3.5mm screws holding the hard drive in place using the J1S Phillips head screwdriver

  4. Toshiba Satellite C855-S5115 DVD Tray Replacement: passo 4, imagem 1 %32 Toshiba Satellite C855-S5115 DVD Tray Replacement: passo 4, imagem 2 %32
    • Slide the HDD towards the sticker on the left.

  5. Toshiba Satellite C855-S5115 DVD Tray Replacement: passo 5, imagem 1 %32 Toshiba Satellite C855-S5115 DVD Tray Replacement: passo 5, imagem 2 %32
    • Remove the four 2mm Phillips screws from the HDD tray securing the disk using the J1S Phillips head screwdriver.

    • Remove the hard drive from the tray.

  6. Toshiba Satellite C855-S5115 DVD Tray Replacement, DVD Tray: passo 6, imagem 1 %32
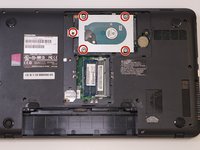
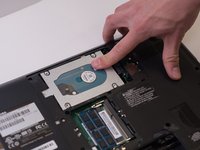
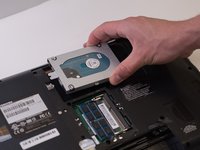
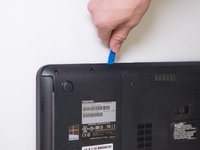
    • Remove the ten 7mm screws located on the bottom of the laptop using the J1S screwdriver.
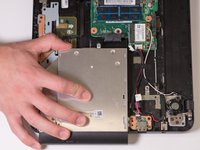
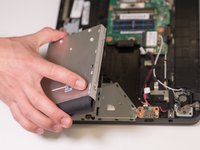
  7. Toshiba Satellite C855-S5115 DVD Tray Replacement: passo 7, imagem 1 %32 Toshiba Satellite C855-S5115 DVD Tray Replacement: passo 7, imagem 2 %32
    • Insert a plastic opening tool and follow the edges to open the panel.

  8. Toshiba Satellite C855-S5115 DVD Tray Replacement: passo 8, imagem 1 %32
    • Once open, locate the CD tray indicated in this picture.

  9. Toshiba Satellite C855-S5115 DVD Tray Replacement: passo 9, imagem 1 %32 Toshiba Satellite C855-S5115 DVD Tray Replacement: passo 9, imagem 2 %32
    • Lift the tray up and out.

Conclusão

To reassemble your device, follow these instructions in reverse order.

0 comentários

Adicione um comentário

Exibir estatísticas:

Últimas 24 horas: 0

Últimos 7 dias: 0

Últimos 30 dias: 1

Duração total: 245