Ir para o conteúdo principal

Toshiba Satellite C55Dt-A5306 Keyboard Replacement

O que você precisa

  1. Toshiba Satellite C55Dt-A5306 Keyboard Replacement, Battery: passo 1, imagem 1 %32
    • Place fingers on the latches and slide outwards to unlock.

  2. Toshiba Satellite C55Dt-A5306 Keyboard Replacement: passo 2, imagem 1 %32
    • Remove battery.

  3. Toshiba Satellite C55Dt-A5306 Keyboard Replacement, Keyboard: passo 3, imagem 1 %32 Toshiba Satellite C55Dt-A5306 Keyboard Replacement, Keyboard: passo 3, imagem 2 %32
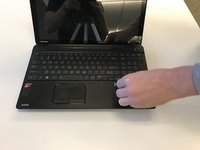
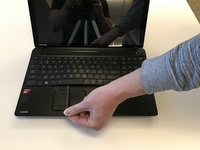
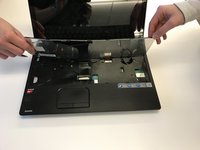
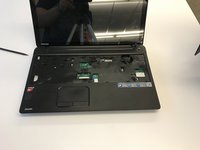
    • After removing the battery, open up your device so that the keyboard is facing you.

  4. Toshiba Satellite C55Dt-A5306 Keyboard Replacement: passo 4, imagem 1 %32 Toshiba Satellite C55Dt-A5306 Keyboard Replacement: passo 4, imagem 2 %32
    • Using the spudger, go around the periphery of the keyboard while gently lifting out the keyboard little by little.

  5. Toshiba Satellite C55Dt-A5306 Keyboard Replacement: passo 5, imagem 1 %32
    • Lift the old keyboard out of the way.

  6. Toshiba Satellite C55Dt-A5306 Keyboard Replacement: passo 6, imagem 1 %32 Toshiba Satellite C55Dt-A5306 Keyboard Replacement: passo 6, imagem 2 %32
    • Before pulling out the keyboard, notice that it is connected to the motherboard via a ribbon cable. Gently press out the ribbon cable from its connection site and put the old keyboard aside.

  7. Toshiba Satellite C55Dt-A5306 Keyboard Replacement: passo 7, imagem 1 %32
    • Locate the keyboard ribbon cable, and the cable retainer keeping it attached to the motherboard.

  8. Toshiba Satellite C55Dt-A5306 Keyboard Replacement: passo 8, imagem 1 %32
    • Use your nylon spudger to release the retainer by gently lifting the retaining clips on either side.

  9. Toshiba Satellite C55Dt-A5306 Keyboard Replacement: passo 9, imagem 1 %32 Toshiba Satellite C55Dt-A5306 Keyboard Replacement: passo 9, imagem 2 %32
    • Once both retaining clips have been lifted up, the ribbon cable should release with a gentle pull.

    • You can now remove the keyboard.

Conclusão

To reassemble your device, follow these instructions in reverse order.

zeena qiryaqoz

Membro desde: 01/17/17

301 Reputação

Autoria de 3 guias

Equipe

Um comentário

mein keyboard war leider noch mit 2 schraubenähnlichen Arretierungen befestigt, und die Laschen an den Seiten ließen sich nur mit Gewalt aufbiegen, so daß das alte Keyboard jetzt im Unterblech ziemlich verbogen ist. C55Dt-A5306

immerich - Responder

Adicione um comentário

Exibir estatísticas:

Últimas 24 horas: 1

Últimos 7 dias: 7

Últimos 30 dias: 8

Duração total: 708