Introdução
This guide will walk you through the process of replacing the CPU cooling fan. Cooling fans can deteriorate into a state where it loses efficiency. This state can cause loud noises and cause the computer to shut down if not properly maintained.
To do so, one must remove the back cover. The back cover is attached by not only screws, but also plastic clips.
O que você precisa
-
-
Place the laptop with the bottom facing up.
-
Remove the single 6mm Phillips #1 screw keeping the laptop panels in place.
-
-
-
-
Unscrew all 15 of the screws in the back cover of the laptop.
-
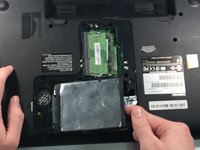
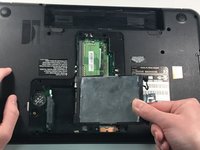
Carefully pry the back cover off the laptop using the prying tools, starting from the hard drive side.
-


To reassemble your device, follow these instructions in reverse order.
To reassemble your device, follow these instructions in reverse order.
Cancelar: não concluí este guia.
3 outras pessoas executaram este guia.
Equipe

IUPUI, Team S8-G8, Wilson Fall 2018 Membro de IUPUI, Team S8-G8, Wilson Fall 2018
IUPUI-WILSON-F18S8G8
4 Membros
Autoria de 6 guias
1Comentário do guia
The one I disassembled didn’t have a screw under the battery bay, but did have one under the HDD bay, just as described by a comment in the charge port replacement guide.