Ir para o conteúdo principal

Toshiba Satellite 1415-S105 CPU Fan and Heatsink Replacement

O que você precisa

  1. Toshiba Satellite 1415-S105 CPU Fan and Heatsink Replacement, Battery: passo 1, imagem 1 %32
    • The battery is located on the front right corner of the laptop.

  2. Toshiba Satellite 1415-S105 CPU Fan and Heatsink Replacement: passo 2, imagem 1 %32
    • With one finger on the raised grip, slide the latch towards the front of the laptop.

  3. Toshiba Satellite 1415-S105 CPU Fan and Heatsink Replacement: passo 3, imagem 1 %32 Toshiba Satellite 1415-S105 CPU Fan and Heatsink Replacement: passo 3, imagem 2 %32
    • Pull the battery out towards the side.

  4. Toshiba Satellite 1415-S105 CPU Fan and Heatsink Replacement: passo 4, imagem 1 %32 Toshiba Satellite 1415-S105 CPU Fan and Heatsink Replacement: passo 4, imagem 2 %32
    • Lift the battery straight up, out of the computer.

  5. Toshiba Satellite 1415-S105 CPU Fan and Heatsink Replacement, Lower Case: passo 5, imagem 1 %32
    • Unscrew all of the visible screws on the bottom of the laptop.

    • The screws circled are not necessary to remove.

    • Keeping track of which hole each screw goes in will speed up reassembly.

  6. Toshiba Satellite 1415-S105 CPU Fan and Heatsink Replacement: passo 6, imagem 1 %32
    • Unscrew the screws located beneath the battery.

  7. Toshiba Satellite 1415-S105 CPU Fan and Heatsink Replacement, Keyboard: passo 7, imagem 1 %32 Toshiba Satellite 1415-S105 CPU Fan and Heatsink Replacement, Keyboard: passo 7, imagem 2 %32 Toshiba Satellite 1415-S105 CPU Fan and Heatsink Replacement, Keyboard: passo 7, imagem 3 %32
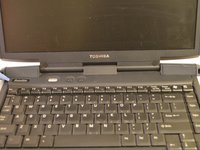
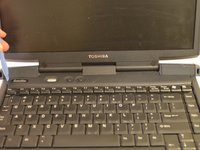
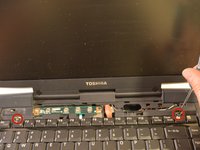
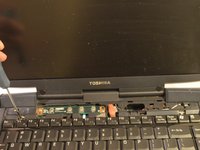
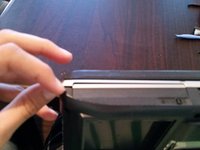
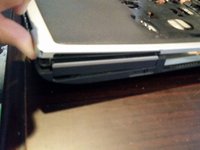
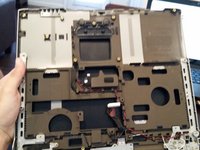
    • Using a set of case opening tools, pry open the left and right sides of the black plastic strip above the keyboard.

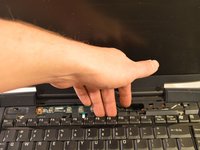
    • Fully detach the strip.

  8. Toshiba Satellite 1415-S105 CPU Fan and Heatsink Replacement: passo 8, imagem 1 %32 Toshiba Satellite 1415-S105 CPU Fan and Heatsink Replacement: passo 8, imagem 2 %32
    • Unscrew the two screws near the top of the keyboard.

  9. Toshiba Satellite 1415-S105 CPU Fan and Heatsink Replacement: passo 9, imagem 1 %32 Toshiba Satellite 1415-S105 CPU Fan and Heatsink Replacement: passo 9, imagem 2 %32
    • Lift the keyboard by holding the middle top of the keyboard.

    • The keyboard is still connected by a ribbon cable to the motherboard.

  10. Toshiba Satellite 1415-S105 CPU Fan and Heatsink Replacement: passo 10, imagem 1 %32 Toshiba Satellite 1415-S105 CPU Fan and Heatsink Replacement: passo 10, imagem 2 %32 Toshiba Satellite 1415-S105 CPU Fan and Heatsink Replacement: passo 10, imagem 3 %32
    • Carefully pull upwards on the ribbon cable to detach.

    • Remove keyboard.

  11. Toshiba Satellite 1415-S105 CPU Fan and Heatsink Replacement, Power Button Circuit Board: passo 11, imagem 1 %32 Toshiba Satellite 1415-S105 CPU Fan and Heatsink Replacement, Power Button Circuit Board: passo 11, imagem 2 %32
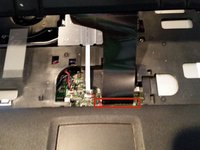
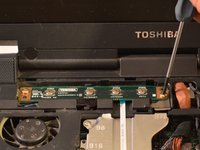
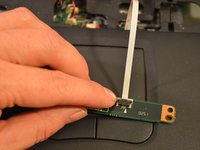
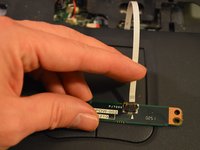
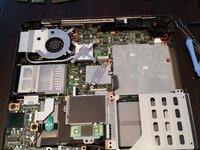
    • Unscrew the screws on either side of the power button circuit board.

  12. Toshiba Satellite 1415-S105 CPU Fan and Heatsink Replacement: passo 12, imagem 1 %32 Toshiba Satellite 1415-S105 CPU Fan and Heatsink Replacement: passo 12, imagem 2 %32
    • Pull upward on the small white ribbon cable to detach from circuit board.

  13. Toshiba Satellite 1415-S105 CPU Fan and Heatsink Replacement, Optical Drive: passo 13, imagem 1 %32
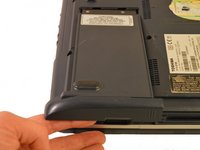
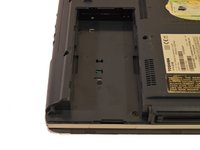
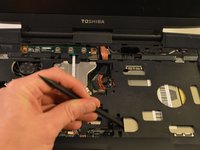
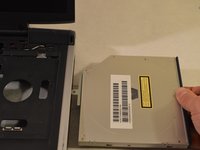
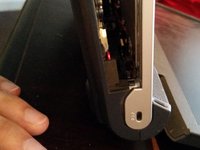
    • Unscrew the screw located on the left side of the optical drive near the heat sink cover in the middle of the laptop.

  14. Toshiba Satellite 1415-S105 CPU Fan and Heatsink Replacement: passo 14, imagem 1 %32 Toshiba Satellite 1415-S105 CPU Fan and Heatsink Replacement: passo 14, imagem 2 %32 Toshiba Satellite 1415-S105 CPU Fan and Heatsink Replacement: passo 14, imagem 3 %32
    • Using spudger, push the optical drive out to the right.

  15. Toshiba Satellite 1415-S105 CPU Fan and Heatsink Replacement, Upper Case: passo 15, imagem 1 %32 Toshiba Satellite 1415-S105 CPU Fan and Heatsink Replacement, Upper Case: passo 15, imagem 2 %32
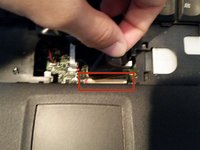
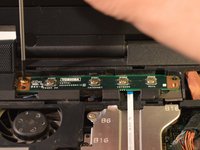
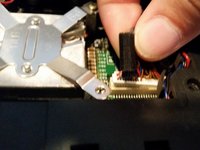
    • Disconnect both speaker connectors located near the center of the laptop.

  16. Toshiba Satellite 1415-S105 CPU Fan and Heatsink Replacement: passo 16, imagem 1 %32 Toshiba Satellite 1415-S105 CPU Fan and Heatsink Replacement: passo 16, imagem 2 %32
    • Unscrew all visible screws on the heat sink shield.

  17. Toshiba Satellite 1415-S105 CPU Fan and Heatsink Replacement: passo 17, imagem 1 %32 Toshiba Satellite 1415-S105 CPU Fan and Heatsink Replacement: passo 17, imagem 2 %32
    • Disconnect the monitor connector.

  18. Toshiba Satellite 1415-S105 CPU Fan and Heatsink Replacement: passo 18, imagem 1 %32 Toshiba Satellite 1415-S105 CPU Fan and Heatsink Replacement: passo 18, imagem 2 %32 Toshiba Satellite 1415-S105 CPU Fan and Heatsink Replacement: passo 18, imagem 3 %32
    • Starting from the front right corner pry apart the black bottom from the gray top.

  19. Toshiba Satellite 1415-S105 CPU Fan and Heatsink Replacement: passo 19, imagem 1 %32 Toshiba Satellite 1415-S105 CPU Fan and Heatsink Replacement: passo 19, imagem 2 %32
    • Set aside the top half.

  20. Toshiba Satellite 1415-S105 CPU Fan and Heatsink Replacement, CPU Fan and Heatsink: passo 20, imagem 1 %32 Toshiba Satellite 1415-S105 CPU Fan and Heatsink Replacement, CPU Fan and Heatsink: passo 20, imagem 2 %32
    • Unscrew the remaining screws on the heatsink and fan brackets.

  21. Toshiba Satellite 1415-S105 CPU Fan and Heatsink Replacement: passo 21, imagem 1 %32 Toshiba Satellite 1415-S105 CPU Fan and Heatsink Replacement: passo 21, imagem 2 %32 Toshiba Satellite 1415-S105 CPU Fan and Heatsink Replacement: passo 21, imagem 3 %32
    • Disconnect the fan power connector.

    • Remove the heatsink and fan.

    • Check the heatsink fins and fan for any dust build-up. If any is found use compressed air to clean.

  22. Toshiba Satellite 1415-S105 CPU Fan and Heatsink Replacement: passo 22, imagem 1 %32
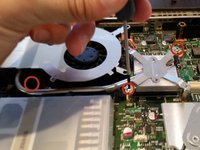
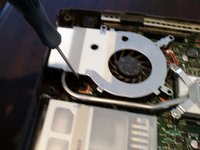
    • Clean the old thermal paste off the CPU and heatsink.

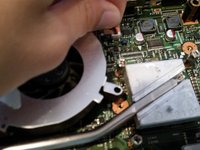
    • Use a q tip to remove the majority of the thermal paste.

    • Use an isopropyl alcohol soaked q tip to further clean remaining thermal paste.

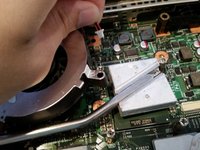
    • Dry and clean both surfaces with another q-tip.

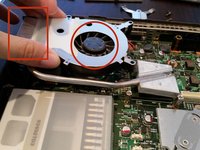
    • Once completely clean, apply a rice grain sized amount of new thermal paste to the CPU and reattach the heatsink and fan.

Conclusão

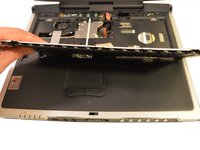
To reassemble your device, follow these instructions in reverse order.

Uma outra pessoa concluiu este guia.

Kiril Lange

Membro desde: 09/22/14

943 Reputação

Autoria de 9 guias

Equipe

USF Tampa, Team 3-2, Brown Fall 2014 Membro de USF Tampa, Team 3-2, Brown Fall 2014

USFT-BROWN-F14S3G2

Membros da 3

Autoria de 27 guias

0 comentários

Adicione um comentário

Exibir estatísticas:

Últimas 24 horas: 0

Últimos 7 dias: 4

Últimos 30 dias: 14

Duração total: 879