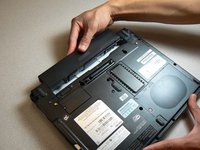
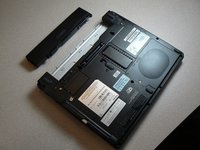
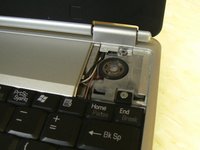
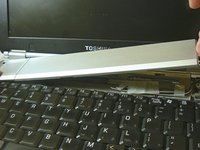
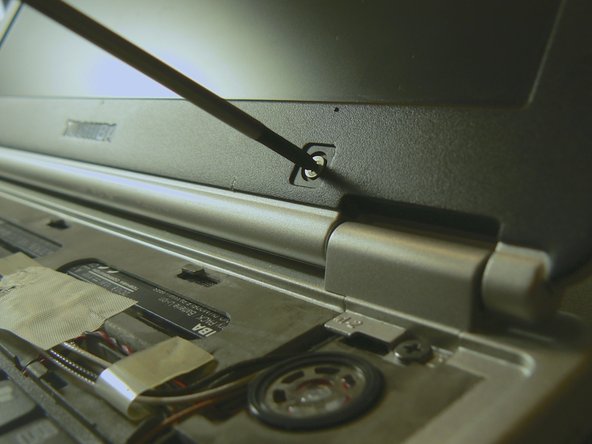
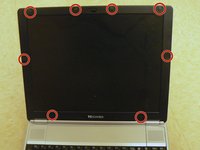
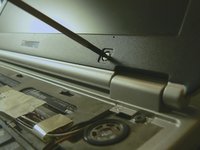
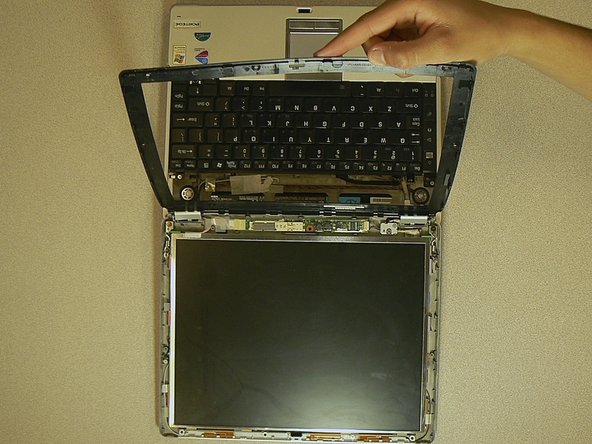
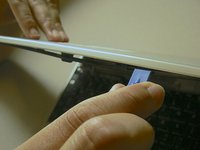
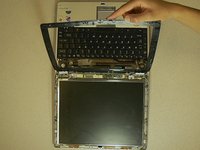
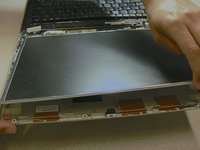
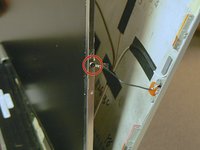
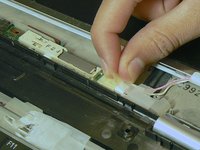
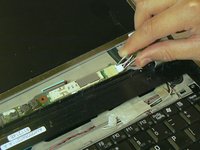
Ir para o conteúdo principal

Toshiba Portege M300 LCD Replacement

O que você precisa

  1. Toshiba Portege M300 LCD Replacement, Battery: passo 1, imagem 1 %32
    • Turn the computer over onto its back.

  2. Toshiba Portege M300 LCD Replacement: passo 2, imagem 1 %32 Toshiba Portege M300 LCD Replacement: passo 2, imagem 2 %32
    • Slide the lock on the left side to the unlock position.

    • Slide the lock on the right side to the unlock position until there is a clicking sound.

  3. Toshiba Portege M300 LCD Replacement: passo 3, imagem 1 %32 Toshiba Portege M300 LCD Replacement: passo 3, imagem 2 %32
    • Remove the battery by sliding it away from the laptop.

    • Make sure the two locks from the previous step are in the unlocked position while sliding the battery away.

  4. Toshiba Portege M300 LCD Replacement, LCD: passo 4, imagem 1 %32 Toshiba Portege M300 LCD Replacement, LCD: passo 4, imagem 2 %32
    • Use a plastic opening tool to unsnap the right hand side speaker cover.

  5. Toshiba Portege M300 LCD Replacement: passo 5, imagem 1 %32 Toshiba Portege M300 LCD Replacement: passo 5, imagem 2 %32
    • Remove the rest of the cover by sliding it to the right and lifting the right edge.

  6. Toshiba Portege M300 LCD Replacement: passo 6, imagem 1 %32 Toshiba Portege M300 LCD Replacement: passo 6, imagem 2 %32
    • Remove all eight plastic circular covers on the plastic screen bezel.

    • Only seven of these plastic covers will contain screws underneath.

    • Unscrew all seven screws with a Phillips head #000 screwdriver.

  7. Toshiba Portege M300 LCD Replacement: passo 7, imagem 1 %32 Toshiba Portege M300 LCD Replacement: passo 7, imagem 2 %32
    • Use a plastic opening tool to separate the screen bezel from the rest of the case.

    • Pull at the top edge of the LCD to separate it from the top part of the case.

    • Only separate the casing and the LCD by an inch—there are still wires connecting them.

  8. Toshiba Portege M300 LCD Replacement: passo 8, imagem 1 %32 Toshiba Portege M300 LCD Replacement: passo 8, imagem 2 %32
    • Use a Phillips #000 to unscrew the one 2.8 mm fine thread screw holding the wire connected to the right face of the LCD.

  9. Toshiba Portege M300 LCD Replacement: passo 9, imagem 1 %32
    • Flip the LCD over onto the back.

    • Gently pull the connection on the corner of the LCD to disconnect.

  10. Toshiba Portege M300 LCD Replacement: passo 10, imagem 1 %32 Toshiba Portege M300 LCD Replacement: passo 10, imagem 2 %32
    • Remove the tape connecting LCD to the inverter.

    • Use tweezers to remove the LCD cable from the inverter.

Conclusão

To reassemble your device, follow these instructions in reverse order.

Uma outra pessoa concluiu este guia.

Alison Wendt

Membro desde: 04/18/13

135 Reputação

Autoria de 6 guias

Equipe

Cal Poly, Team 21-51, Johann Spring 2013 Membro de Cal Poly, Team 21-51, Johann Spring 2013

CPSU-JOHANN-S13S21G51

Membros da 3

Autoria de 18 guias

0 comentários

Adicione um comentário

Exibir estatísticas:

Últimas 24 horas: 0

Últimos 7 dias: 1

Últimos 30 dias: 3

Duração total: 994