Esta versão pode conter edições incorretas. Mude para o último instantâneo verificado.
O que você precisa
-
Este passo não foi traduzido. Ajude a traduzi-lo
-
Unscrew the seven screws located on the back of the device.
-
-
Este passo não foi traduzido. Ajude a traduzi-lo
-
Slide the plastic the spudger along the edge of the device to separate the keyboard tray.
-
-
Este passo não foi traduzido. Ajude a traduzi-lo
-
Flip the device over and open it to lift the keyboard tray from the body of the device.
-
-
-
Este passo não foi traduzido. Ajude a traduzi-lo
-
Use the Plastic Spudger to gently release the ribbon cable attached to the keyboard.
-
Place device to side.
-
-
Este passo não foi traduzido. Ajude a traduzi-lo
-
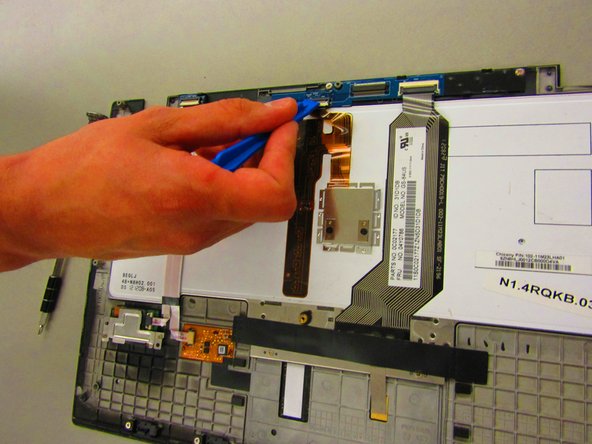
Unlock and remove the 3 ribbon cables along the top of the keyboard tray.
-
-
Este passo não foi traduzido. Ajude a traduzi-lo
-
Gently wiggle and lift the Push Button board from the keyboard tray.
-


Equipe

Western Carolina University, Team S1-G3, Virtue Spring 2018 Membro de Western Carolina University, Team S1-G3, Virtue Spring 2018
WCU-VIRTUE-S18S1G3
Membros da 4
Autoria de 6 guias