Introdução
In this tutorial, you will find the basic method to change the thermal paste.
This component is essential for the proper functioning of a computer and is often forgotten. It is recommended to change the thermal paste every 2 years for optimal processor use.
The symptoms of an aging thermal paste are:
- Device overheating
- Slowness in use
- Device unable to start (safety lock engaged)
O que você precisa
-
-
First step, locate the screws to disassemble the side of the housing.
-
They are often in the back (circled in red in our photo).
-
In some cases, it is a handle that must be operated.
-
As a rule, it is necessary to slide the cover sideways or lift it up.
-
-
-
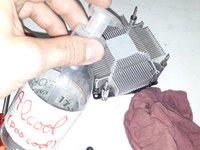
The cooler consists of a heatsink and a fan located above the processor. The heatsink consists of an aluminum or copper part, which transfers heat from the processor and allows it to be evacuated by the fan.
-
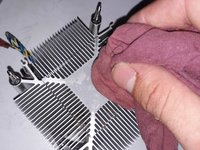
Once located, disconnect the fan (indicated by the orange arrow). Then unscrew each of the mounting screws in turn while maintaining a slight pressure on the metal part of the heat sink.
-
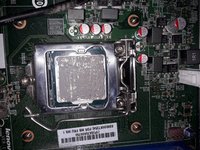
Extract the heatsink by pulling it without over-straining the board. Most of the time, the fixing screws remain on the heatsink. Just like the fan, we will not separate it from the block.
-
If you realize that the cooler resists, do not use force. You would risk extracting the processor from its housing at the same time. This can happen on older computers, up to socket 423.
-
-
-
-
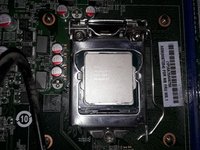
To put back new thermal paste, it is important to clean the remains of the old one
-
For this, alcohol of the ethanol or isopropyl type can be used to remove the old paste. The use of another type of alcohol leaves residues on drying. A plastic cloth or squeegee can be useful for removing residue.
-
Make sure you have cleaned the heat sink side AND the top of the processor.
-
-
-
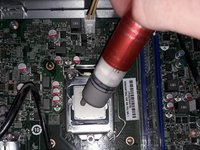
Once the two surfaces are clean, the new paste is applied on the processor side.
-
One drop is sufficient, the important thing is that it covers the entire zone in contact with the heat sink.
-
To be sure that it spreads well, it can be spread out using a plastic spatula. A thin layer of paste is required so that it does not overflow once the ventilator has been repositioned.
-
-
-
We start by reassembling the heat sink, by screwing each piece (don’t over-tighten it all at once!)
-
Don't tighten the screws too much, when the screw locks, it's good to go
-
Reconnect the fan (connector circled in orange)
-
reclose the case
-
-
-
The temperature of a processor at rest depends on each processor. To know its exact specifications and to know if you are in the standard, you just have to consult its technical sheet on the site of Intel or on that of AMD.
-
To know it, it is often marked in the BIOS or via the commands "sensors" or "lm_sensors" if you are on linux :)
-
If the temperature seems too high, the heatsink may have been incorrectly replaced, the fan may not have been correctly reconnected or there may not be enough thermal paste.
-
It is also possible that your environment is too hot, that you have not cleaned your fans or that dust is present in the housing. The more dust there is, the more the PC heats up, and the more dust it attracts, etc.
-
If none of these solutions overcome your problems, consider water cooling, processor undervolting, etc.
-


And that's it, time to give your computer a new start :)
Cancelar: não concluí este guia.
7 outras pessoas executaram este guia.
Um agradecimento especial a esses tradutores:
100%


Estes tradutores estão nos ajudando a consertar o mundo! Quer contribuir?
Comece a traduzir ›
2Comentários do guia
Merci pour ce tuto
Waouh Woah, je l'ai connu cet ordinateur, j'en ai démonté beaucoup de ces types serveur de super qualité de chez IBM, c'était une petite merveille pour l'époque