Esta versão pode conter edições incorretas. Mude para o último instantâneo verificado.
O que você precisa
-
Este passo não foi traduzido. Ajude a traduzi-lo
-
Kids pulled the cable connector off the back of the hello kitty TV
-
-
Este passo não foi traduzido. Ajude a traduzi-lo
-
Remove screws from back, there's 5 in this case circled in red.
-
Notice the parts container highlighted in orange always a good idea for screws.
-
Cookie circled in pink for good measure.
-
-
Este passo não foi traduzido. Ajude a traduzi-lo
-
High voltage areas are outlined in red.
-
Delicate sensitive areas outlined in blue.
-
-
-
Este passo não foi traduzido. Ajude a traduzi-lo
-
remove both covers on video input box, use a small prying tool if necessary, but you should be able to remove them by hand as seen here.
-
-
Este passo não foi traduzido. Ajude a traduzi-lo
-
Use a soldering iron, and solder sucker to remove excess solder from the connector area. You can also use solder-absorbing braided wick.
-
-
Este passo não foi traduzido. Ajude a traduzi-lo
-
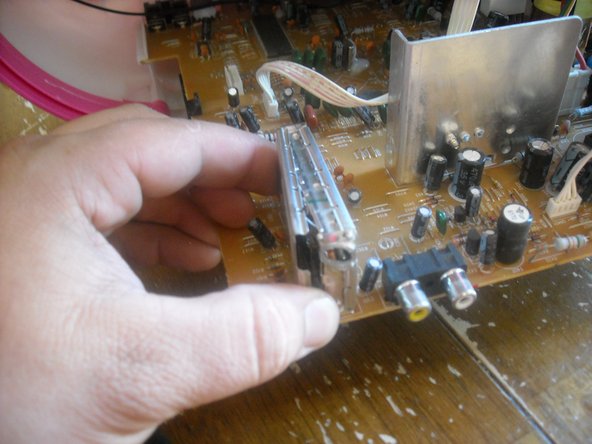
identify, where the centre pin connector was ripped from the board.
-
Use needle-nose pliers to straighten out the tin bracket as much as possible. It does not need to be perfect, but this helps with the alignment of the connector to the back of the tv cover.
-
-
Este passo não foi traduzido. Ajude a traduzi-lo
-
Align the connector, ensuring the center pin can reach the the spot on the board where it needs to be re-connected.
-
Solder the barrel of the connector to the metal bracket first, try not to let it get too hot. You may want to use a solder gun with dual heat of at least 50 watts for this part.
-
When that's done don't forget to solder the center pin to the board using as little solder as possible, to ensure there's no grounding to the metal cover.
-
-
Este passo não foi traduzido. Ajude a traduzi-lo
-
Re-seat both covers using needle nose pliers to ensure they're seated properly.
-
-
Este passo não foi traduzido. Ajude a traduzi-lo
-
Carefully replace the plastic cover. Replace cover screws.
-


Cancelar: não concluí este guia.
8 outras pessoas executaram este guia.
6 comentários
cara memperbaiki warna
where can i get the connectors?
C'est très intéressant, Mais seulement si vous pouvez traduire en français
11.11.16 Francais en anglaise= French to english. It's very interesting. I only wish u'd translate into French!