Ir para o conteúdo principal

TEFAL juicer Gear Replacement

O que você precisa

  1. TEFAL juicer Gear Replacement, Disconnect the upper part of the juicer: passo 1, imagem 1 %32 TEFAL juicer Gear Replacement, Disconnect the upper part of the juicer: passo 1, imagem 2 %32 TEFAL juicer Gear Replacement, Disconnect the upper part of the juicer: passo 1, imagem 3 %32
    • Before dismantling, disconnect the juicer from the grid.

    • Remove the lid of the juicer by lifting it up and away from the juicer.

    • Remove the upper inner part of the juicer.

  2. TEFAL juicer Gear Replacement, Remove the middle casing: passo 2, imagem 1 %32 TEFAL juicer Gear Replacement, Remove the middle casing: passo 2, imagem 2 %32
    • Slide the beige button to the right so that the beige bottom casing of the juicer unlocks.

    • Remove the middle casing.

  3. TEFAL juicer Gear Replacement, Unscrew the bottom of the casing: passo 3, imagem 1 %32 TEFAL juicer Gear Replacement, Unscrew the bottom of the casing: passo 3, imagem 2 %32 TEFAL juicer Gear Replacement, Unscrew the bottom of the casing: passo 3, imagem 3 %32
    • Pull the three black rubber grips from the bottom with your fingers.

    • Use a Torx T15H security bit screwdriver to untwist the three 15.5 mm long socket screws of 5.5 mm head diameter that are hidden behind the black rubber grips.

    • Lift the bottom of the juicer.

  4. TEFAL juicer Gear Replacement, Detach the power cable and motor: passo 4, imagem 1 %32 TEFAL juicer Gear Replacement, Detach the power cable and motor: passo 4, imagem 2 %32
    • Pull on the power cable of the juicer.

    • Remove the power cable with the attached motor.

  5. TEFAL juicer Gear Replacement, Disassemble the shaft by pulling: passo 5, imagem 1 %32
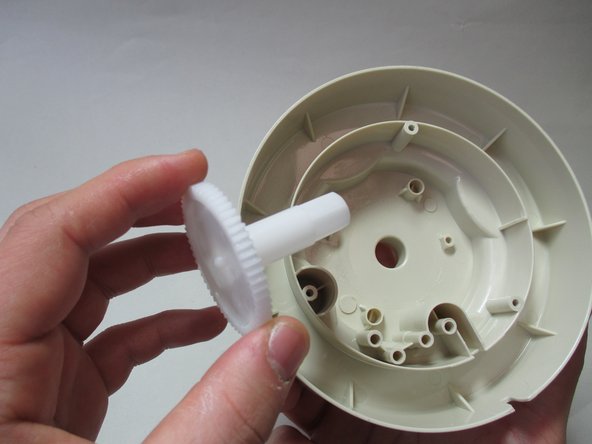
    • Clamp the shaft tight with a needle nose plier.

    • Disassemble the shaft, the bottom of the juicer and the gear by pulling the pressfitted parts from each other.

    • When reassembling make sure to press the components tight again.

  6. TEFAL juicer Gear Replacement, Replace the gear: passo 6, imagem 1 %32
    • Remove the gear from the bottom casing.

Conclusão

To reassemble your device, follow these instructions in reverse order.

[deleted]

Membro desde: 12/05/16

1 Reputação

Autoria de 1 guia

0 comentários

Adicione um comentário

Exibir estatísticas:

Últimas 24 horas: 0

Últimos 7 dias: 0

Últimos 30 dias: 1

Duração total: 393