Introdução
Aumenta tu espacio con un nuevo disco duro.
O que você precisa
-
-
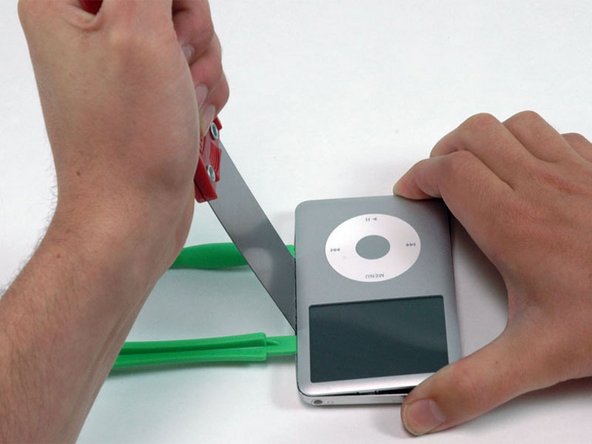
En ángulo, inserta cuidadosamente una espátula de aproximadamente 1/8 de pulgada en la costura entre las dos herramientas de apertura.
-
Una vez que la espátula haya despejado el borde del panel posterior, gira la espátula para que quede vertical y con cuidado (pero con firmeza) muévela directamente hacia el espacio entre las herramientas de apertura.
-
-
-
-
En ángulo, inserta cuidadosamente una espátula de aproximadamente 1/8 de pulgada en la costura entre las dos herramientas de apertura.
-
Una vez que la espátula haya despejado el borde del panel posterior, inclina la espátula para que quede vertical y con cuidado (pero con firmeza) muévela directamente hacia el iPod a través del espacio entre las herramientas de apertura de plástico.
-
Empuja con los dedos el panel posterior detrás de la espátula para minimizar la flexión. Flexiona ligeramente la espátula para asegurarte de que la mayoría de las pestañas metálicas de este lado del iPod estén desenganchadas.
-
-
-
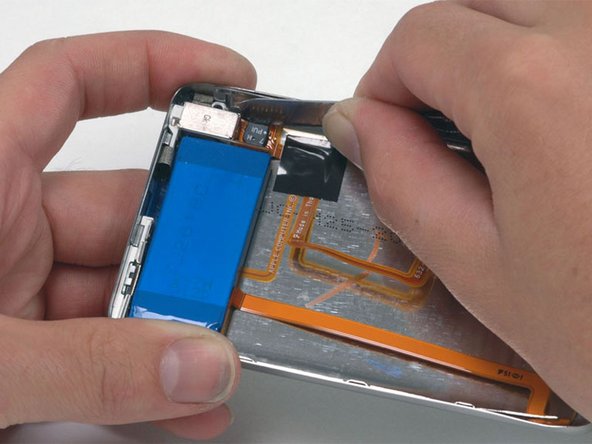
Sujeta el conjunto del panel frontal con una mano y el panel posterior con la otra.
-
Suavemente (SUAVEMENTE) desengancha los clips restantes del panel posterior tirando de la parte superior de los paneles frontal y posterior (piensa en la parte inferior del iPod como una bisagra), teniendo mucho cuidado de no dañar los cables de cinta que sujetan el dos mitades juntas
-
-
-
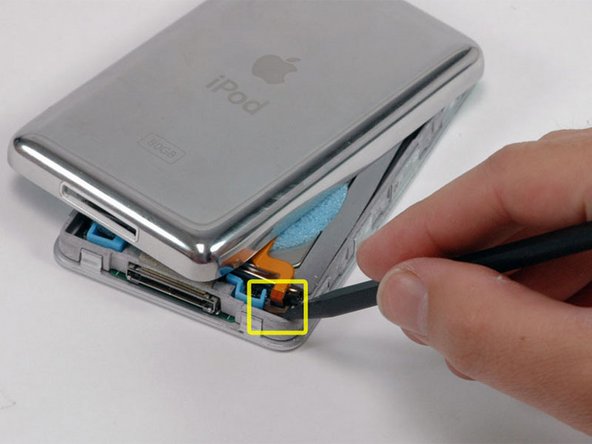
Levanta el disco duro con una mano para poder acceder a la cinta de auriculares debajo.
-
Usa un spudger para voltear la lengüeta de plástico que sujeta la cinta de auriculares en su lugar. La pestaña girará 90 grados hacia arriba, liberando el cable plano.
-
Desliza la cinta naranja del conector para auriculares fuera de su conector.
-
El panel posterior ahora está suelto del iPod.
-
-
-
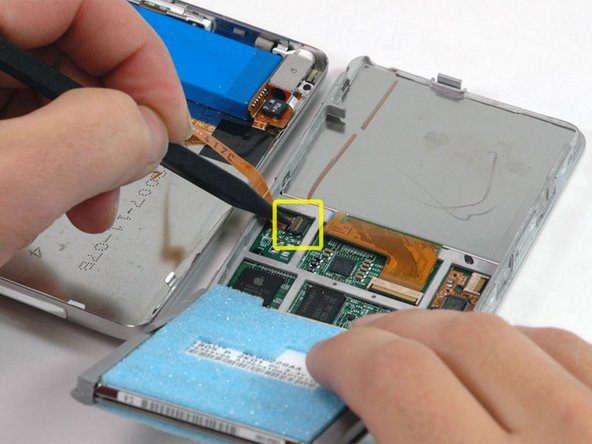
Girar el disco duro hacia fuera del framework y posicionarlo de tal manera que el conector se quede mirando hacia arriba.
-
Utiliza un spudger de plástico para levantar la lengüeta de plástico que sostiene la cinta naranja del disco duro La pestaña girará 90 grados, liberando el cable plano.
-


Antes de cerrar la carcasa, asegúrate de probar el dispositivo para asegurarte de que esté funcionando correctamente.
Para ensamblar tu dispositivo, sigue las instrucciones en orden inverso.
Antes de cerrar la carcasa, asegúrate de probar el dispositivo para asegurarte de que esté funcionando correctamente.
Para ensamblar tu dispositivo, sigue las instrucciones en orden inverso.
Cancelar: não concluí este guia.
324 outras pessoas executaram este guia.
Um agradecimento especial a esses tradutores:
100%


Estes tradutores estão nos ajudando a consertar o mundo! Quer contribuir?
Comece a traduzir ›

48 comentários
The instructions worked like a charm. This is not for the faint of heart and requires some modicum of skill, but I saved a buttload of money by doing it myself. You will definitely need the recommended tools.
It worked like a charm... Just need to follow the instructions carefully and you can avoid to spend 200 something € to buy a new iPod!
Thanks iFixit
i couldn't get the plastic opening tool in between the 2 sections. i ended up using two razor blades instead of the plastic tools and the putty knife, i was able to replace the hard drive with very little struggle and almost no cosmetic damage(not that i care what the thing looks like)
Thanks for a highly useful guide. Slowly and methodically, using a single-bladed, razor blade, I was able to open the case, following this procedure. Patience is, indeed, a virtue, in this case.
I was able to successfully replace the hard drive and battery.
The only snag I encountered was that the headphone jack ribbon was glued to circuit board adjacent to the connector under the hard drive. (I just left this ribbon be, not wanting to risk damaging the ribbon.) It was a bit awkward straightening the case edges, but I managed.
Overall, I'd give this guide a grade of "A"....it was nearly perfect and very clear. Bravo!
Well I managed to get it apart, though it wasn't all that difficult with the right tools, but getting it back together has been a nightmare. Just saying "reverse the process" is reall not quite enough in this case. All the little pieces of shock padding keep falling off, it's almost impossible to get the two wires plugged back in as well as keeping them in place, but I got there in the end. Or so I thought . Now my ipod has no sound (except from dock output) - and on investigating I find I have severed the orange cable near the jack itself- either by bending it or catching it on something. So another part to buy. So it's a warning to be very careful.